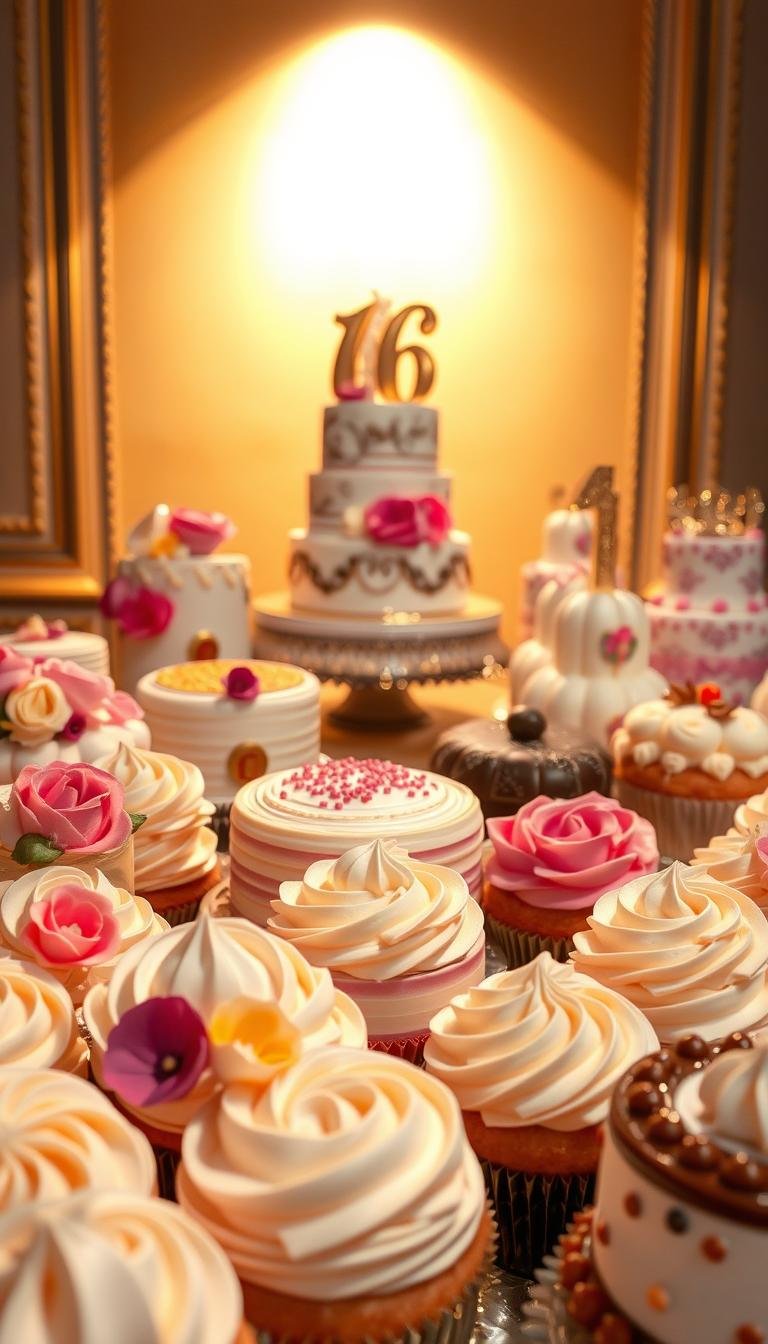
Surprising fact: nearly half of teen parties now feature a themed centerpiece that guests photograph for social feeds, so the right design can shape the whole event.
This Website contains affiliate links. That means I may earn a small commission if you purchase through my links, at no extra cost to you.
This listicle promises bold, photogenic ideas that match real teen interests—from gaming and sports to cars and urban art. Parents and planners will find a short, stylish shortlist that balances flavor, budget, and visual impact for the birthday boy.
We organize the guide by themes, then decorations and DIY basics so you can jump to a specific cake idea or mix and match idea features. Each entry notes practical materials and textures that photograph well, like black fondant and pearls crumbs, plus clean lettering for names and numbers.
Whether you choose to get bespoke from a cake artist or follow simple cake craft tips, the result will feel curated. Quick checklists cover staples such as caster sugar, unsalted butter, and self-raising flour, and every design scales for small gatherings or big bashes.
Key Takeaways
Find themed options that read great in photos and at the party.
Use the guide to mix themes, decorations, and cake idea features.
Choose materials and textures that shoot well, like pearls crumbs.
Follow quick ingredient checklists for easy home baking.
Decide early: bespoke artist or DIY craft world approach.
Why Boys’ 18th Birthday Cakes Matter for Teen Parties Right Now
The right centerpiece sets tone, shapes photos, and tells guests this milestone matters.
Statement desserts now anchor themes and create photo moments that last on social feeds. A clear front face and bold side profile make the design work for Stories and Reels.
Trends shaping 2025 teen party cake styles
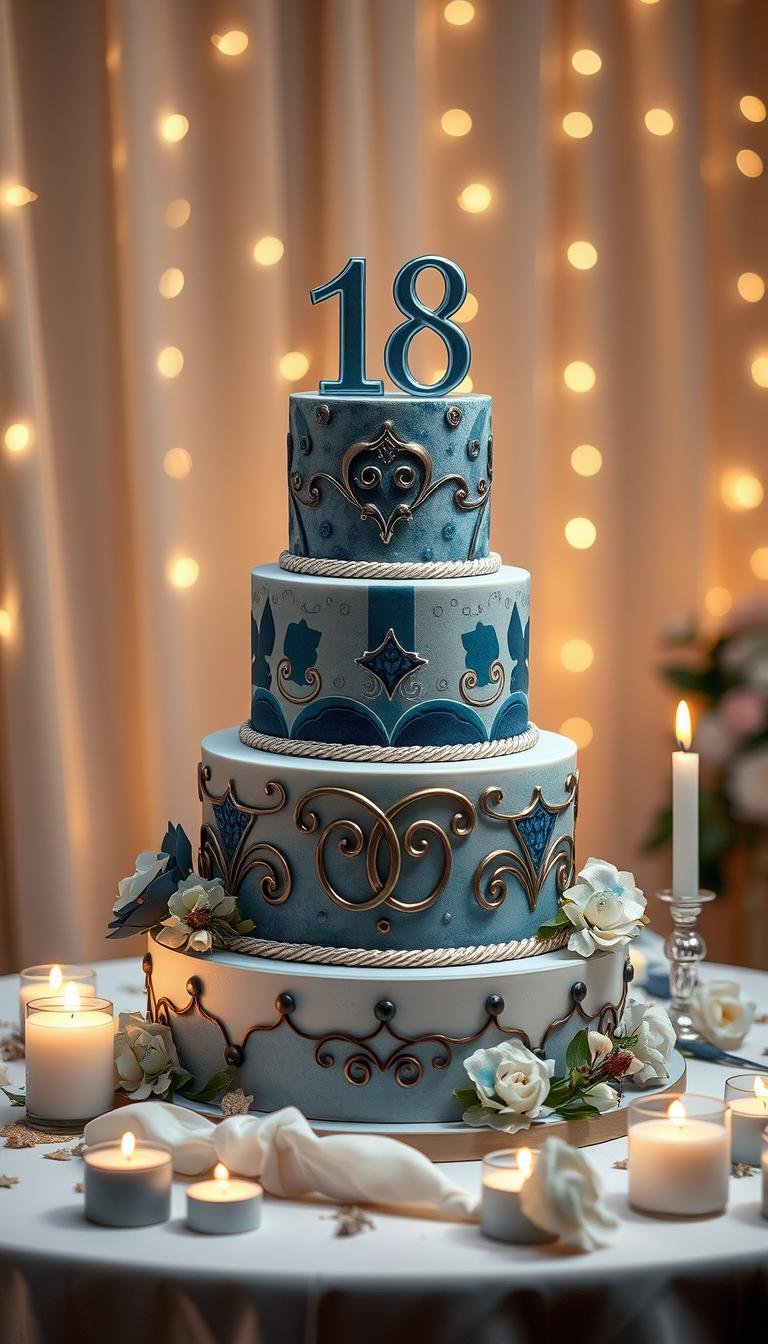
Design drivers this year favor sleek silhouettes and bold color blocking. Mixed textures—like pearls crumbs beside smooth fondant—add depth without clutter.
Minimal-but-luxe finishes are popular. Think sharp edges, micro accents, and one or two focal icons that read adult and stylish.
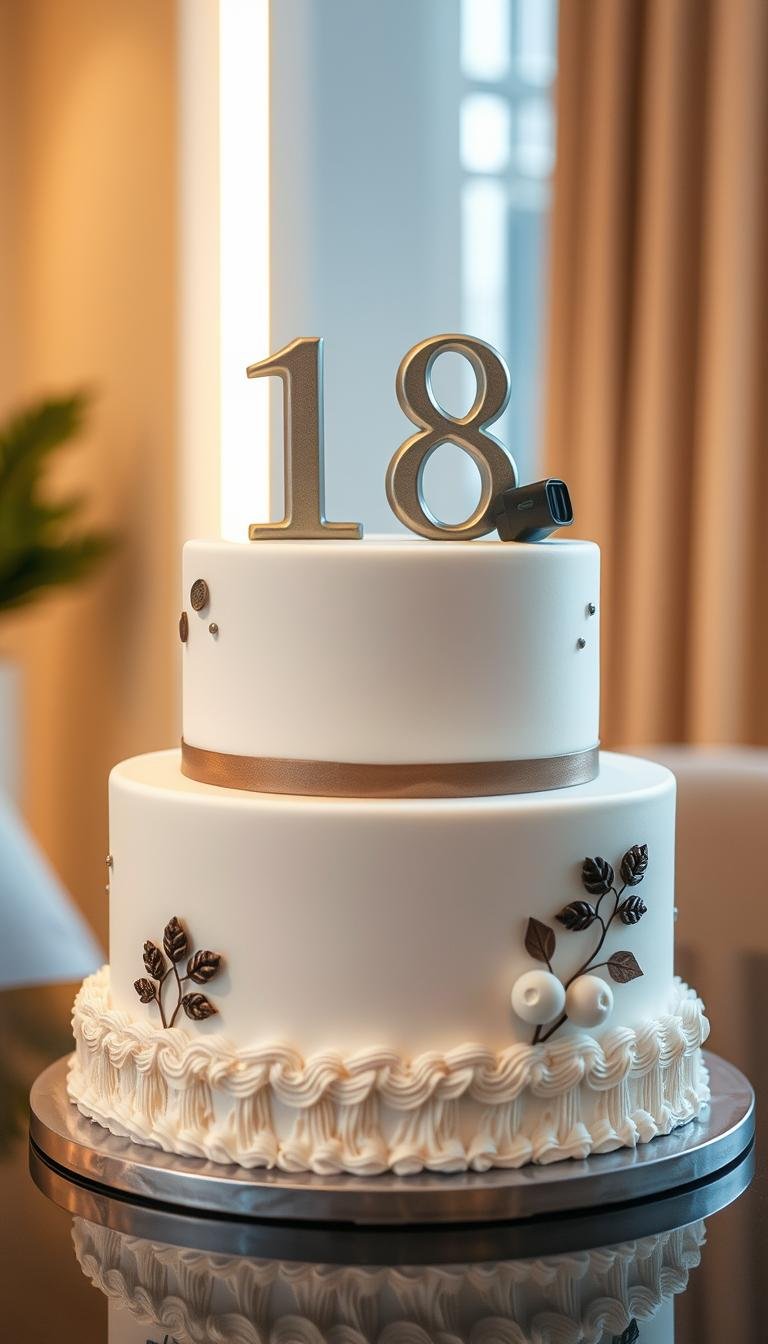
Personalization: name-forward fronts and tasteful “18” accents that feel grown-up.
Material choices: matte black with gloss highlights, metallic touches, and brand palettes tied to the celebrant’s interests.
Access: cake craft world and craft world tools make cleaner home finishes easier than before.
Tip: If the build is complex, get bespoke birthday work from a pro; for casual hangs, a streamlined home bake usually wins.
Plan early for holiday weekends and busy dates so ingredient pre-orders and artisan slots are secure. Balance trends with timeless details so photos stay classic down the line.
18th birthday cake boys: standout themes that always hit
Choose a standout theme that reflects his passions, and the dessert becomes a personal statement at the party.
What makes a design memorable at eighteen
A memorable design aligns with identity—gaming, cars, football, boxing, or urban art. Pick one or two icons so the look stays bold and tidy.
Use a tight color palette and one hero element. That keeps photos crisp and avoids clutter.
Balancing style, flavor, and photo-worthiness
Composition tips: a front-facing name plaque, a strong “18” accent, and a single hero object read well at 3–6 feet.
For texture, add pearls crumbs or micro sprinkles. They give subtle depth without overwhelming the finish.
Flavor pairings: chocolate, cookies-and-cream, or red velvet with stable fillings for clean slices.
Scale guide: single-tier (10–12), two-tier (20–30), sheet cakes for team gatherings.
When to get bespoke: complex sculpted designs like a stadium cake or sports logos—get a pro.
Quick checklist: interest/theme, color palette, number placement, topper choice, and a short cake idea features list to guide the build.
Theme
Hero Element
Good for
Gaming
Controller topper
Photos, small tiers
Football
Mini stadium or field lines
Varsity pride, stadium cake builds
Cars
Mini car or road strip
Drivers, glossy finishes
Urban art
Graffiti name plaque
Bold color blocking, street vibe
Shortlist of evergreen boy cake idea themes: gaming console, football stadium cake, luxury car, boxing glove, and graffiti personalization. These age well after high school and photograph reliably.
Gaming console cake ideas that level up the party
A gaming console cake makes the dessert table feel sleek and modern. It works for a casual hang or a streamed session with friends.
Controller details with black fondant and gel food colouring
Build a controller-shaped sculpt or place a console-on-plinth. Use black fondant for the body and add gel food colouring for button accents.
Keep brand silhouettes true without copying logos. Dry brush subtle highlights and use micro pearls crumbs near the base for texture that stays grown-up.
Edible screen graphics and topper name age placement
Print wafer-sheet screens or edible images for crisp displays. Position the topper name age at the top-right or front edge so it reads in photos.
Tip: For tight shapes, decide early whether to get bespoke or use a simple rectangular base with a fondant controller topper.
Build
Best for
Serves
3D controller sculpt
Photo impact, detailed idea features
20–30
Console-on-plinth (rectangular base)
Faster DIY, sturdy slices
12–18
Topper-only fondant controller
Small hang, simple boy cake idea
6–10
Football stadium cake and sports-win designs
Designing a sports-themed centerpiece means balancing field detail with clean, photo-ready lines.
Start with the top field. Build a rectangular or oval playing surface on the top tier and add crisp white yard lines and end-zone color blocks that match the team palette.
Outline seating tiers using thin black fondant or an edible marker. Add tiny micro dots to mimic a crowd for texture without clutter.
Practical tips and finishing touches
Create goalposts from gum paste or modeling chocolate and anchor them with small hidden supports for stability.
Keep the boys birthday cakes palette to two or three team colors; add selective red fondant accents for contrast.
Lightly dust pearls crumbs along the base to suggest gravel and keep the field surface clean for photos.
When to get bespoke: detailed logos or sculpted stadium architecture are best left to pros; simple sheet-field versions suit a confident DIYer.
Finish with a front plaque that shows the birthday boy name or “18” in team-style lettering. For travel, chill the build, mount on a sturdy board, and shoot a top-down photo to capture the field lines, then a front hero shot for the name plaque.
Boxing glove cake for the athlete birthday boy
For an active teen, a boxing glove centerpiece turns dessert into a power move.
Carve a single oversized glove or a pair overlapped from stacked sponge. Chill the carved crumb, then cover in red fondant for that glossy, gym-worn look.
Add laces, palm vents, and seam lines with modeling tools to build realism without airbrushing. Place the 18 on a wrist-strap plaque and put the birthday boy name on the glove cuff so it reads in photos.
Keep the board minimal — matte black or white — and add a thin pearls crumbs border to frame the glove. For a pro finish, twist a short “ring rope” from fondant along the board edge.
Tip: Use a dense chocolate or red velvet crumb that carves cleanly. Chill after the crumb coat, then temper to room temp before serving for a satin-smooth finish.
Filling idea: half chocolate, half vanilla to suit mixed tastes.
DIY option: print a glove template and cut with sharp knives; hire a pro for quick, complex carving.
Photo angle: shoot low to make the glove look larger-than-life and milestone-worthy.
Luxury car cake for the driver’s-seat milestone
A luxury car centerpiece instantly turns a milestone into a sleek, photo-ready statement.
Design basics: pick an iconic silhouette—supercar front end, steering-wheel top, or key fob—to signal independence at age eighteen.
Edible silver paint highlights and glossy red fondant
Cover body panels in glossy red fondant and add edible silver paint to grills, rims, and trim for reflective accents. Use pearls crumbs sparingly around the base to keep the look refined.
Add realistic details: side mirrors, brake calipers, and a minimalist license plate with “18” or the birthday boy initials. Choose chocolate fudge or cookies-and-cream for a luxe internal flavor that slices well.
Tip: Decide early if you’ll get bespoke for a full 3D sculpt or keep it simple with a single-tier and a topper. For complex builds, consider bespoke birthday cakes.
Build
Best for
Serves
Full 3D car sculpt
High-photo impact, pro finish
20–30
Single-tier + topper
Budget-friendly, clean slices
10–18
Key-fob or steering-wheel top
Small hang, simple boy cake idea
6–12
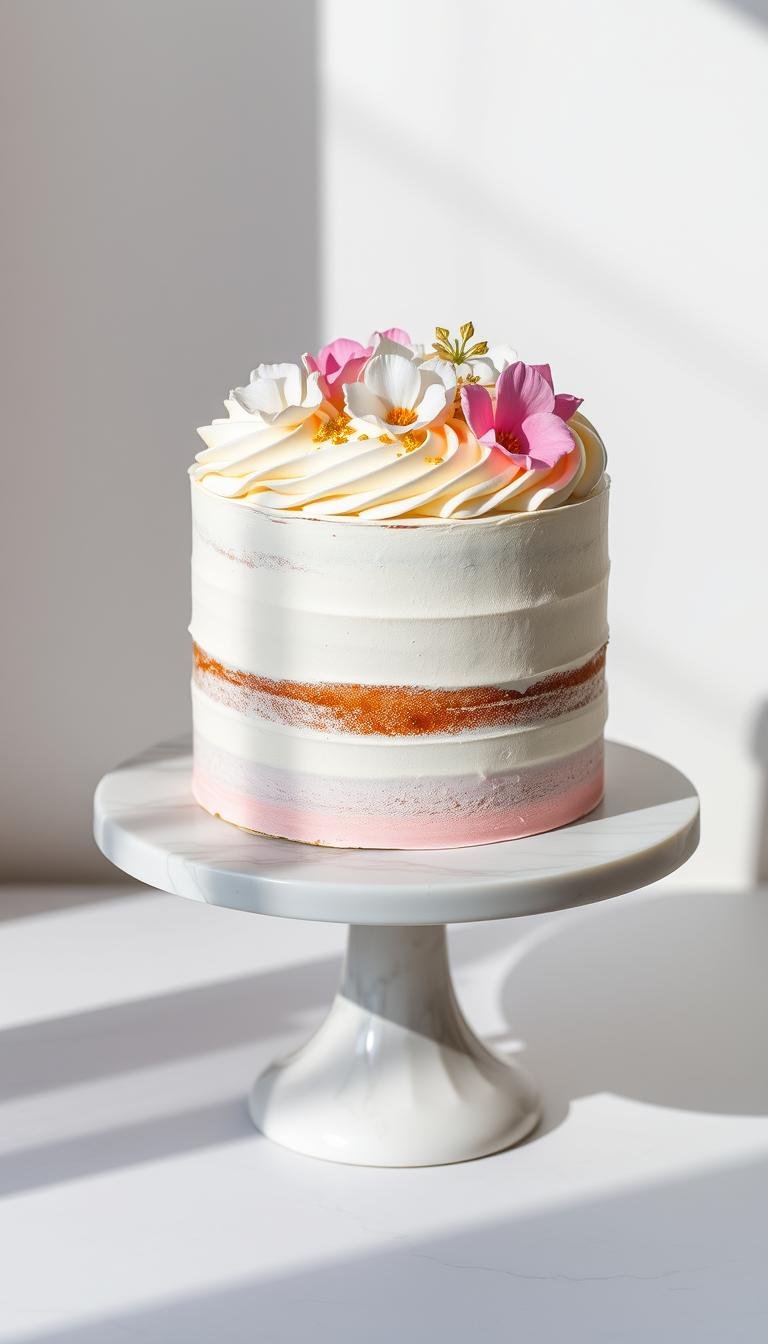
Chill night-in cake for low-key celebrations
Keep it cozy: a low-key dessert can feel special when details are sharp and the vibe is relaxed.
Go minimal with a tall, smooth buttercream in a neutral shade and place a clean “18” with the birthday boy name front and center. Thin-line piping, tiny fondant stars, and a tidy base edge of pearls crumbs add texture that photographs well at home.
Stick to classic flavors so everyone enjoys a slice—vanilla sponge with chocolate buttercream or marbled layers for visual interest. Add a small topper (movie night icon, headphone motif, or controller outline) to signal the hang-at-home theme and keep the look intentional.
Make it flexible: a 6-inch serves a few friends, an 8-inch suits family pizza night. No complex transport or assembly needed.
Tip: Crisp typography and a well-placed number make even a simple dessert feel milestone-worthy.
Short shopping list: unsalted butter, caster sugar, self-raising flour, vanilla extract, cocoa (optional), buttercream tools, a small fondant pack.
Photo guide: natural window light, neutral background, shoot at a 45-degree angle for depth without harsh shadows.
Boys birthday cakes with graffiti personalization
Graffiti-style personalization turns a simple dessert into a bold, street-ready centerpiece.
Use a bold color-blocked background—think black fondant or deep navy buttercream—then layer a clear tag across the front. Keep letterforms thick, readable, and outlined in a contrasting shade so the boy name graffiti reads in photos.
Boy name graffiti styles and bold color blocking
Balance vivid spray fades with clean negative space. Thick block letters, simple caps, and a small drop shadow give depth without clutter.
Topper name age combos for instant customization
Pair a front tag with a tidy topper name age so the milestone reads at a glance and the main face stays free for art.
DIY: cut fondant letters using a paper template or pipe softer buttercream tags.
Add pearls crumbs lightly at the base for texture that won’t steal focus.
For airbrushed fades or complex lettering, get bespoke or hire a pro.
Tip: Choose a reflective board for a gallery finish or a matte slate board for a street vibe.
Bespoke birthday cakes vs DIY: choosing your path
Choosing between a pro-made centerpiece and a home bake comes down to scale, skill, and the look you want on the day.
When to get bespoke designs from cake artists
Get bespoke for sculpted cars, gloves, consoles, multi-tier stadiums, or any build that needs internal supports.
London-based cake artists and other metro pros book fast; if you are in west london or a big city, reserve a slot early for peak weekends.
Budget note: bespoke birthday cakes reflect labor and structural work, so expect higher fees for complex shapes and tight lead times.
When a DIY recipe and simple decor are the smarter pick
Choose DIY when you want a single-tier, clean buttercream finish, or a clear front-facing name plaque. A basic diy recipe and steady hands deliver a tidy result without pro prices.
Tools check: no turntable or leveler? Pick straightforward designs.
Middle path: order a plain frosted base and add your own topper or plaque for a custom look.
For large guest counts, pros help with speed and structure; for small hangs, DIY often wins.
Briefing a pro: supply theme, color palette, serving size, must-have elements, and clear references of what to include or avoid.
Best for
Who should choose
Why
Sculpted builds
Get bespoke
Structural skill and finish
Single-tier names
DIY
Simple tools, low cost
Plain frosted base + topper
Hybrid
Custom look, smaller price
DIY recipe basics: sponge base and chocolate options
Start with a sturdy sponge base and a simple method to get even, tender layers every time. This section gives a clear routine you can follow for both a classic sponge and a chocolate variant.
Crumb coat, chill, then smooth; add minimal pearls crumbs at base
Prep ingredients supplies—parchment, offset spatula, bench scraper, and a turntable—to make the diy recipe easier. Do a test bake a week ahead so the 18th birthday boy’s main day runs smoothly.
Decorations that pop: pearls, crumbs, and white piping gel
Small details lift a simple centerpiece into a photo-ready focal point.
Cake pearls crumbs for texture and edge finishes
Use cake pearls crumbs as a mixed-size combo—micro and standard—to add depth without crowding the surface. A thin band of pearls crumbs around the base edge creates a refined frame that hides minor imperfections.
Keep a light hand: too many pearls crumbs makes a design look juvenile. For a grown-up vibe, scatter micro pearls near seams and reserve larger pearls for intentional accents.
White piping gel for clean lines and number accents
White piping gel traces ultra-clean numerals and fine outlines that photograph crisply under phone cameras. It gives a glossy, flexible finish that sits smoothly on buttercream or fondant.
When to choose piping gel vs royal icing: gel adds sheen and slight give; royal icing creates a matte, raised line that hardens. Trial piping on parchment first so your “18” numerals and name lettering stay steady.
Use a single accent hue with gel food colouring for tiny dots or thin lines—this keeps the look mature.
Tie back to your diy recipe: a smooth sponge base and balanced cocoa powder or vanilla layers make decorative work faster and cleaner.
Chill between steps to lock edges and prevent smudges as you add details.
Quick ingredients supplies: piping bags, small round tips, tweezers for pearls, a steady turntable, and a clean sheet of parchment for test piping.
Fondant and color: black fondant depth, red fondant impact
Choose black fondant when you want instant depth and a grown-up look for gaming, automotive, or luxury themes.
A deep black wrap gives contrast that makes trim, logos, and the hero element read clearly in photos. Keep hands and surfaces lint-free to avoid tiny white specks showing on dark surfaces.
Red fondant delivers high-impact accents—perfect for gloves, stripes, or sports details against neutral tiers. Use red sparingly for energetic pops that never overwhelm.
Knead fondant well and dust lightly with cornstarch for smooth application and razor-sharp corners on tall tiers. Pre-mix gel food colouring and rest coloured fondant to cut stickiness and get a stable tone.
Use edible silver paint sparingly on edges, hardware details, or name plaques to catch light without making the whole surface look metallic.
“Swatch-test your colour under the same lighting you’ll use for photos.”
Bring chilled, fondant-covered tiers to room temp slowly to avoid condensation and tack.
Use cake craft world and craft world tools—fondant smoothers, precision blades, and acrylic guides—for neat, consistent finishes.
Add a thin pearls crumbs ring if you want subtle texture without stealing the color statement.
Name-forward designs: birthday boy name front and center
A front-facing name plaque turns a simple tier into a personal statement that photographs well.
Lettering placement that reads well in photos
Place the birthday boy name on the front third of the cake at eye level. This keeps the name clear in group shots and close-ups.
Choose high-contrast lettering: use white piping gel on black fondant or bold fondant cutouts on pale buttercream. That prevents color bleed and keeps letters crisp on phone screens.
Pair a topper name age with a front plaque so both the name and number appear from multiple angles.
Keep letterforms simple—block caps or clear scripts—to aid legibility on mobile photos.
Add one accent stripe in red fondant or a small emblem for a focused pop without clutter.
Drop in a tiny stadium cake or sports icon on the side when the theme needs context.
Quick checklist: font choice, contrast, placement, spacing, and a short list of idea features to avoid crowding edges.
For DIY: print the name in your chosen font, cut a paper stencil, and trace onto fondant or pipe using light guidelines. Smooth the surface before placing the plaque so the lettering sits flat.
Ingredients and supplies: how to get everything you need
Start your planning with a clear list so the build stays calm and fast. A short run to one shop beats multiple last-minute trips.
Smart shopping list: ingredients supplies for speed
Core ingredients supplies: unsalted butter, caster sugar, self-raising flour, eggs, milk 100 or whole milk 100, cocoa powder, and vanilla. Add simple decorations: fondant, piping gel, and a small pack of cake pearls crumbs.
If you can’t find self-raising flour, mix all-purpose with baking powder and a pinch of salt as a smart substitution.
From cake craft to craft world tools you’ll actually use
Essential tools: two 8-inch pans, parchment, offset spatula, bench scraper, turntable, serrated knife, and a reliable scale for consistent layers.
Cake craft world upgrades that matter: fondant smoothers, acrylic disks, dowels, precision blades, and a small set of piping tips from the craft world aisle.
Tip: Order specialty items a week ahead; to get ingredients london same-day, call your supplier (e.g., 0798 568 9931) to confirm stock.
Plan a three-day workflow: bake day one, fill and crumb coat day two, decorate day three. This keeps the sponge base steady and reduces stress if you decide to get bespoke or add last-minute toppers.
Budget, timing, and storage tips for party-day success
Timing and budget choices often decide whether you order a custom centerpiece or build a polished home version.
Lead times for bespoke orders
Expect about 2–4 weeks lead time for simple custom requests and 4–8 weeks for sculpted builds from london-based cake artists. If you plan to get bespoke birthday work for a peak weekend, reach out early.
Across west london demand runs high; ask bakers about waitlists, cancellations, or flexible pickup windows. Keep a day-of contact such as 0798 568 9931 ready for updates.
Keeping builds fresh and photo-ready
After filling, keep the sponge base chilled. Temper to room temperature 1–2 hours before serving so textures bloom and flavors settle.
For chocolate-heavy fillings with cocoa powder ganache, keep the cake cool to avoid soft edges and slumping. Cover butter-based frostings in the fridge to block odors.
Add delicate accents — like pearls crumbs or fragile toppers — on the party day to preserve finish and avoid breakage.
Pro tip: If lead times are tight, order a plain tier and personalize it yourself with a topper or plaque from craft world or cake craft world supplies.
Pack a transport kit: non-slip mat, extra buttercream, offset spatula, paper towels, and wet wipes.
Confirm delivery address, parking, and timing with the bakery before pickup. Keep 0798 568 9931 handy for last-minute changes.
Do a final photo check at the venue — neutral backdrop, even light, and place the birthday boy so names and numbers face the camera.
Conclusion
Close with intention: choose one clear theme—gaming controller, stadium cake, luxury car, boxing glove, or a chill night-in—and build around that hero element so photos and guests instantly get the idea.
Keep finishes clean: crisp lettering, a readable name, and a confident “18” make birthday cakes look premium without overcomplicating the process. Decide early whether to get bespoke or bake a simple DIY using a reliable sponge base.
Shop tight: unsalted butter, caster sugar, self-raising flour, milk 100 or whole milk 100, and cocoa powder for the chocolate option. Use pearls crumbs sparingly as a frame, not a focal point.
Practical note: transport on a non-slip mat, add fragile details on-site, and let the cake come to room temp before slicing. If you need last-minute items, get ingredients london same-day or check west london suppliers quickly.
Use craft world and cake craft world tools for smooth sides and sharp edges. Snap your hero shot—front-facing name and number—and enjoy the milestone with confidence.
FAQ
How far in advance should I order a bespoke birthday cake from London-based cake artists?
Book as early as possible—aim for 2–4 weeks for straightforward customs and 4–8 weeks for sculpted or multi-tier builds. Peak dates fill fast across West London, so contact your chosen bakery early and confirm timelines and any required deposit.
Can I get a stadium cake or a luxury car cake made without trademarked logos?
Yes. Skilled cake artists use recognizable silhouettes, colors, and finishes—like glossy red fondant or edible silver paint—without reproducing protected logos. That gives a premium look while avoiding copyright issues.
What basic ingredients should I have on hand for a reliable sponge base?
Keep unsalted butter, caster sugar, self-raising flour, eggs, and whole milk (milk 100) ready. These make a classic sponge; add sifted cocoa powder for a chocolate variant. Weighing ingredients helps ensure consistent layers.
When is it smarter to go bespoke versus DIY?
Choose bespoke for complex sculptures—cars, gloves, stadium architecture—or when you need guaranteed finish and fast turnaround. DIY works well for single-tier designs, simple buttercream finishes, and when you want to save on labour.
What tools from craft world are worth investing in for a clean finish?
Prioritize a turntable, bench scraper, offset spatula, fondant smoother, sharp precision blades, and a reliable scale. These give sharp edges and smooth surfaces that photograph well.
How do I make a name-forward design read clearly in photos?
Place the name on the front third of the cake at eye level, use high-contrast lettering (for example, white piping gel on dark fondant), and opt for bold, legible fonts. Keep surrounding details minimal so the name remains the hero.
What are quick decoration options that still look luxe?
Use a thin ring of cake pearls crumbs at the base, selective edible silver paint highlights, and a tidy topper with the name and age. Micro accents and one or two focal icons read as upscale without adding complexity.
How should I store and transport a filled sponge to keep it photo-ready?
Chill the cake after filling and crumb coating, then transport on a sturdy board with a non-slip mat. Keep it refrigerated until 1–2 hours before serving so it can temper to room temperature for best texture and sheen.
Can I combine a pro cake with DIY finishing touches?
Absolutely. Order a plain frosted base from a bakery and add your own topper, plaque, or a few pearls crumbs on the day. It’s a great budget-friendly hybrid that still delivers a custom look.
What flavors photograph and slice well for a teen crowd?
Chocolate, cookies-and-cream, and vanilla sponges are crowd-pleasers and hold structure for sculpted elements. Red velvet makes a strong visual cross-section. Use stable fillings—ganache or firm buttercream—for clean slices.
Where can I buy specialty supplies quickly in London?
Check local cake supply shops and larger craft stores; if you need same-day options, call ahead to confirm stock. Keep a local contact number handy (for example, the shop you use) to check availability before you go.
How many servings do different cake sizes typically provide?
A single 8–9 inch tier suits a small family; a two-tier cake or larger sheet will feed 20–30 guests. For casual group hangs, a sheet or multi-portion sculpted cake works best—ask your baker for a portion guide based on the build.
What color and material choices photograph best for milestone cakes?
Matte black fondant and bold red accents photograph beautifully and add depth. Use a mix of smooth fondant, selective gloss highlights, and minimal pearls crumbs for texture. Test swatches in similar lighting to the event.
Any tips for DIY gamers’ console or controller-style designs?
Use a rectangular base with a fondant or carved controller topper if you want a simpler route. Black fondant, gel food colouring for button accents, and wafer-sheet screens help keep proportions recognisable without complex sculpting.
How can I avoid common DIY pitfalls when working with dark fondant?
Keep surfaces lint-free, dust lightly with cornstarch while rolling, and rest the fondant if it feels sticky. Use clean hands to avoid fingerprints and specks, and smooth with a fondant tool to achieve sharp corners and an even finish.
Creative birthday cakes are all about bringing your wildest cake dreams to life! From fun themes to unique flavors, these delicious masterpieces can truly make your celebration unforgettable. Whether you’re looking for a cake shaped like a favorite character or one bursting with flavors, the possibilities are endless, and they’re sure to be the highlight…
Did you know the average family spends more on a milestone dessert than on party favors? That shows how central a standout centerpiece is to a modern celebration.This Website contains affiliate links. That means I may earn a small commission if you purchase through my links, at no extra cost to you. Choose a design…
One surprising fact: nearly half of U.S. home bakers say a bold drip or bright mirror glaze makes a celebration feel instantly modern.This Website contains affiliate links. That means I may earn a small commission if you purchase through my links, at no extra cost to you. This guide walks you through easy, on-trend ideas…
Nearly 70% of viral party posts today feature desserts in calm neutral tones, proving that restraint now rules the celebration feed.This Website contains affiliate links. That means I may earn a small commission if you purchase through my links, at no extra cost to you. The current trend favors white, beige, and soft accents with…
Almost 70% of families say the milestone dessert drives the party vibe, yet many hosts still struggle to match style with taste.This Website contains affiliate links. That means I may earn a small commission if you purchase through my links, at no extra cost to you. This guide helps a birthday boy pick a concept…
Nearly 60% of hosts say dessert sets the tone for a party, so your centerpiece matters more than you think.This Website contains affiliate links. That means I may earn a small commission if you purchase through my links, at no extra cost to you. This friendly guide walks U.S. hosts through smart baking and decorating…