Surprising fact: Nearly half of milestone parties in the U.S. prioritize a showstopping dessert that guests remember long after the music stops.
This Website contains affiliate links. That means I may earn a small commission if you purchase through my links, at no extra cost to you.
Set the tone with a layered, bakery-quality treat that anyone can master at home. Expect soft, moist layers, balanced sweetness, and frosting that holds crisp edges for photos. This guide covers flavors, portion planning, tools, step-by-step baking, and simple assembly for the U.S. home baker.
Inside, you’ll find a flexible vanilla base, a chocolate variation, and a dairy-free swap so everyone can enjoy a slice. Learn frosting choices—from classic buttercream to glossy ganache and lighter whipped finishes—and pro tricks for leveling, crumb coating, chilling, and smoothing.
We also share make-ahead timelines, stress-reducing tips for common problems, and fresh designs like gradients, metallic accents, drips, and fruit-forward finishes. Prefer to jump ahead? You can skip main steps and go straight to toppers and finishing touches.
Key Takeaways
One reliable recipe with vanilla, chocolate, and dairy-free options.
Frosting choices to match mood and sweetness level.
Easy pro techniques for a clean, photo-ready finish.
Make-ahead and freezing tips to reduce party-day stress.
Design ideas for modern, personalized styles.
Quick fixes for dry layers, sliding tiers, and frosting issues.
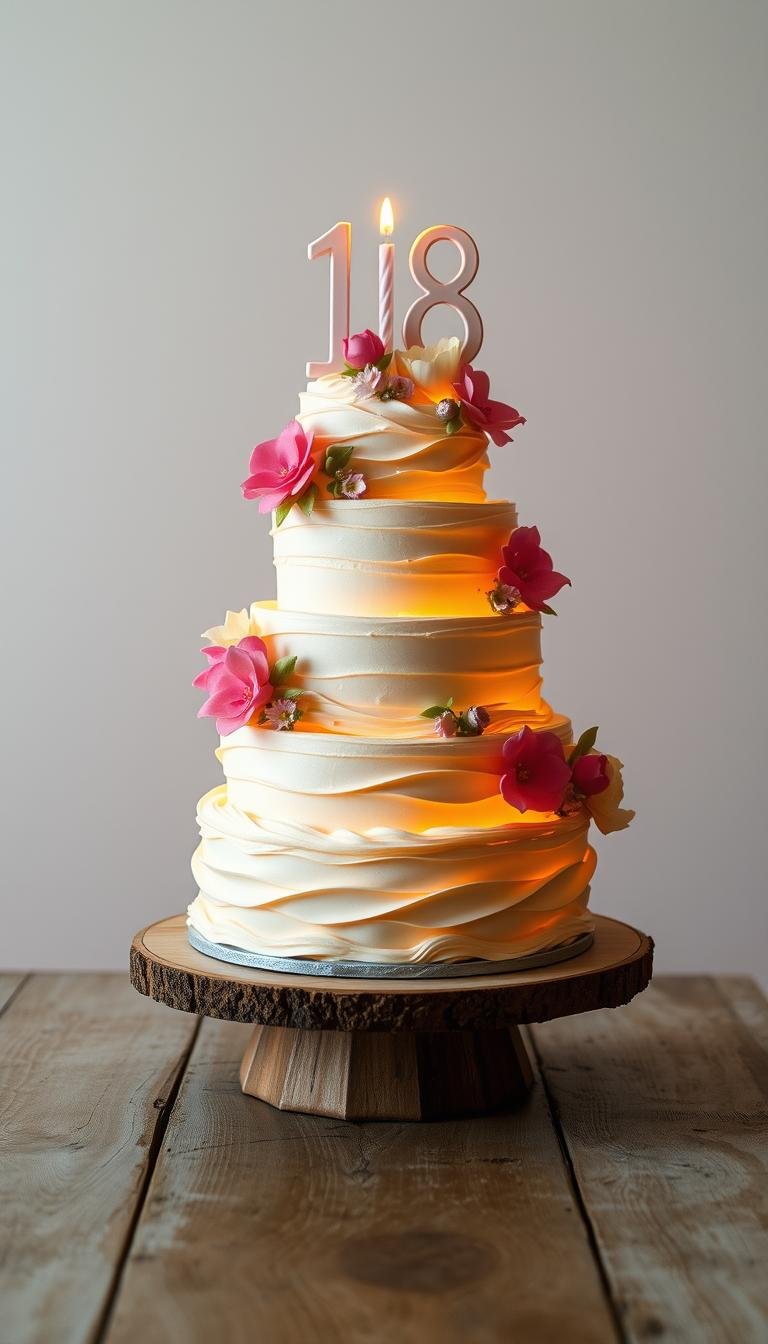
Start Here: What Makes an 18th Birthday Cake Truly Unforgettable
Lay the foundation with flavors and crumb structure built to please a mixed-age crowd.
Choosing flavors and textures guests love right now
Flavor trends lean on familiar comforts with a twist: vanilla bean with a hint of almond, chocolate-on-chocolate, red velvet with cream-cheese style frosting, lemon-raspberry, and cookies-and-cream.
For texture, aim for a tender, fine crumb that still supports stacking. Use buttermilk or sour cream and mix gently to avoid tunneling.
Fillings that travel well include seedless raspberry jam, stabilized whipped cream, chocolate ganache, or a thin salted caramel layer. Keep fillings thin to prevent slipping.
Portion planning and pan sizes for U.S. celebrations
Pan
Yield
Notes
Three 8-inch layers
20–24
Good for tall tiered looks
Two 9-inch layers
18–22
Classic party size
9×13 sheet
24
Easy to slice and transport
Batter volumes: 8-inch ≈ 2–2.5 cups; 9-inch ≈ 3 cups. Fill pans two-thirds full. Bake times at 350°F: cupcakes 18–22 min; 8-inch 24–28 min; 9-inch 26–32 min.
Transport tip: chill the finished cake, use a nonslip mat, and let it rest 20–30 minutes at room temperature before slicing for cleaner cuts.
18th Birthday Cake: Core Recipe, Tools, and Step-by-Step Method
Here’s a practical guide to ingredients, tools, and a stepwise method that delivers consistent, photo-ready results.
Ingredients for three 8-inch layers
Vanilla base: 2 3/4 cups (330 g) cake flour, 1 Tbsp baking powder, 1/2 tsp fine sea salt, 1 cup (226 g) unsalted butter, 1 3/4 cups (350 g) sugar, 4 large eggs, 1 Tbsp vanilla bean paste, 1 cup (240 ml) buttermilk, 1/3 cup (80 ml) neutral oil. This yields a tender, moist crumb with good structure.
Chocolate variation: swap 1/2 cup (60 g) flour for Dutch-process cocoa, add 1 tsp espresso powder, and +2 Tbsp sugar to balance bitterness.
Dairy-free swap: use a high-fat plant butter (80%+ fat), unsweetened oat milk plus 1 Tbsp lemon juice for buttermilk, and the same oil. Check labels to keep everything dairy-free.
Essential tools
Three 8-inch aluminum pans with parchment rounds
Digital scale, stand mixer or hand mixer, and fine-mesh sieve
Bench scraper, serrated leveler or long knife, rotating turntable
Small and large offset spatulas, instant-read thermometer, non-slip mat
Mixing and baking method
Cream butter and sugar 3–4 minutes until pale. Add eggs one at a time. Whisk dry ingredients, then alternate dry and buttermilk, starting and ending with dry. Mix just until combined, then gently fold in oil.
Bake until centers spring back, edges pull from the pan, and a toothpick shows a few moist crumbs. Aim for 205–210°F internally. Cool 10 minutes in pans, then invert onto racks to finish cooling.
Frosting and assembly basics
Frosting
Key ratio
Notes
American buttercream
1 cup butter : 3–3.5 cups powdered sugar
Beat 5–7 minutes for smooth, not-too-sweet finish
Chocolate ganache
6 oz chocolate : 6 oz cream
Heat cream, pour over chocolate, cool to drip consistency
Lighter whipped finish
Fold whipped cream into equal-weight buttercream
Gives stability with a lighter mouthfeel
Level cooled layers. Place the first layer on an 8-inch board with a dab of frosting. Pipe a frosting dam for soft fillings, stack, and press gently. Apply a thin crumb coat and chill 20–30 minutes. Apply the final coat and warm your bench scraper slightly to smooth sharp edges.
Workflow tip: while the crumb coat chills, prep toppers, numbers, and candles so you can skip main interruptions and finish on schedule.
Make-ahead and storage
Bake layers 1–2 days ahead and refrigerate wrapped, or freeze up to 2 months double-wrapped. Thaw at room temp 1–2 hours before frosting. Store a finished cake chilled up to 24 hours and bring to room temperature 30–60 minutes before serving.
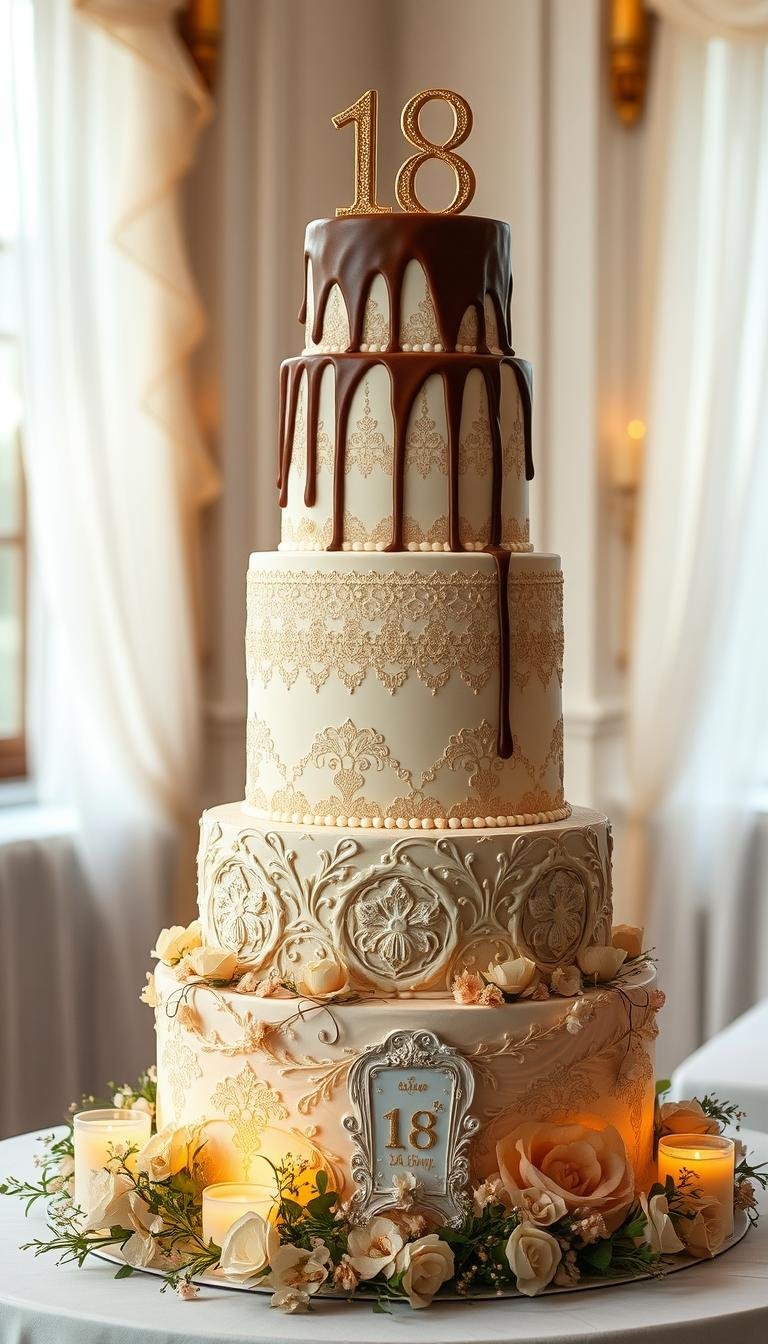
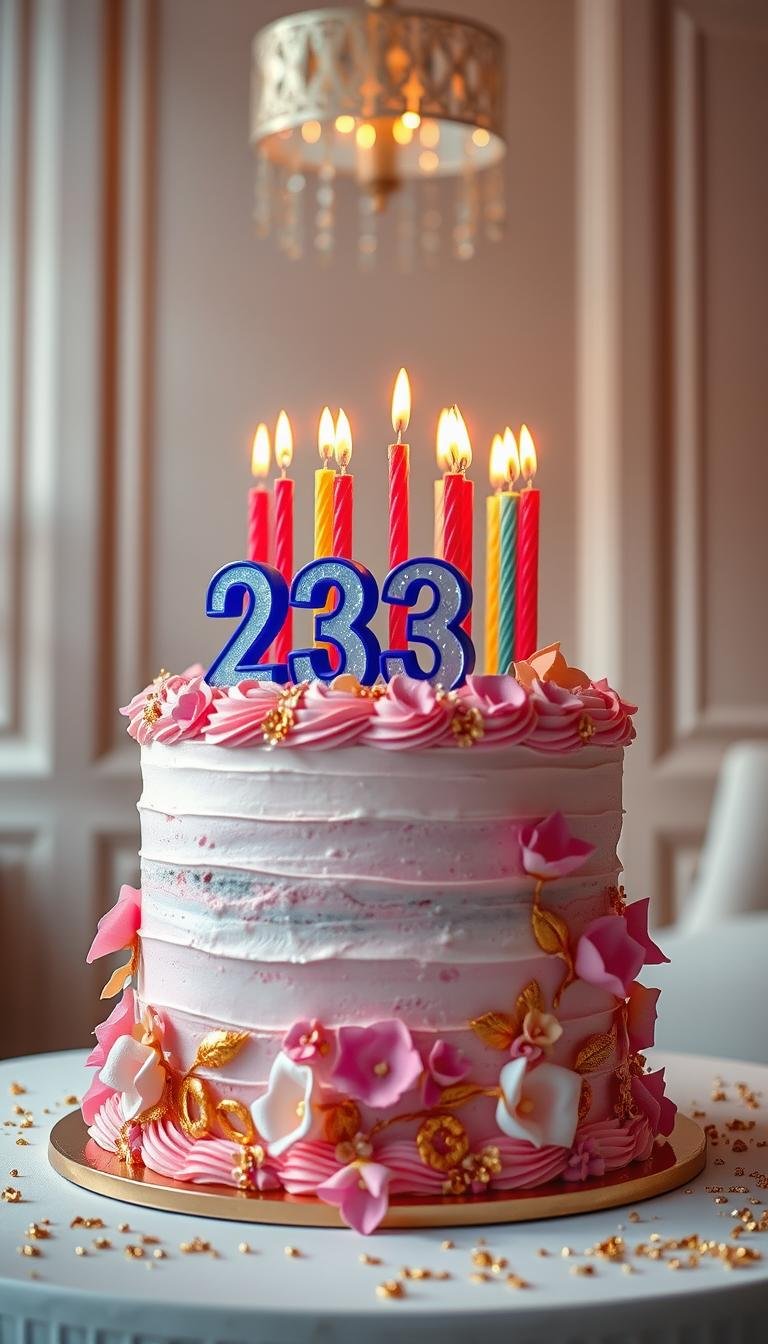
Design Ideas to Personalize Your Cake for Turning Eighteen
Simple finishes—clean lines, a pop of metallic, or fresh fruit—create instant wow.
Modern minimal: tint buttercream with gel colors for a soft ombré. Use a hot bench scraper for razor-sharp sides. Top with a clear acrylic number or a fondant numeral painted with luster dust.
Gold glam
Start with a smooth, chilled buttercream base. Brush on edible gold mixed with clear alcohol for a brushed-metal effect.
Accent with gold leaf applied with tweezers and use stencils for contrast dusting.
Photo moments and playful finishes
Order edible images for a clean, edible panel, or mount printed photos on food-safe picks for Polaroid toppers.
For funfetti layers, fold rainbow jimmies into batter and press sprinkles onto a chilled border with a parchment collar.
Style
Key elements
Quick win
Modern minimal
Ombré buttercream, sharp sides, acrylic topper
Hot bench scraper
Gold glam
Brushed gold, gold leaf, stencil accents
Edible gold mixture
Chocolate overload
Ganache drip, shards, truffles
Pre-made mini bars
Final tips: support heavy toppers with bubble tea straws and keep decorations inside the rim for clean edges. Use pre-made molds, tall spiral candles, or edible glitter spray to finish fast.
Conclusion
A confident finish starts with smart timing, simple tools, and a flavor everyone will remember.
Choose layers sized for your guest list, gather pans, parchment, a turntable, and offset spatulas, and follow the chill–crumb coat–smooth routine for clean results.
Mix gently, bake to the doneness cues described, and use make-ahead and freezing tips to reduce party-day stress. These steps let you focus on fun details like frosting color, toppers, and textures that reflect the guest of honor.
Save this guide for other milestones—the same recipe and techniques scale easily. Now pick your flavor path, set a pan plan, and enjoy a relaxed, photo-ready finish.
FAQ
How do I pick flavors that please a mixed-age crowd?
Choose familiar, balanced combinations like vanilla bean with a touch of almond, chocolate-on-chocolate, lemon-raspberry, or cookies-and-cream. Aim for a tender crumb and moderate sweetness; adding a pinch of fine sea salt or vanilla bean paste helps round flavors without extra sugar.
What pan sizes and portions should I plan for a typical U.S. party?
For layered rounds, three 8-inch layers serve about 20–24, two 9-inch layers serve 18–22, and a 9×13 sheet serves ~24. Party slices are usually 1.5 x 2 inches; wedding-style slices are 1 x 2 inches. Use those guides to match your guest list and appetite.
Can I make a dairy-free version that still holds up for stacking?
Yes. Use a high-fat plant butter (for example, Miyoko’s), unsweetened oat milk mixed with lemon juice as a buttermilk substitute, and keep neutral oil in the recipe. Stick to the same mixing method and chill layers well before stacking to maintain structure.
How do I prevent sliding layers or bulging fillings?
Keep fillings thin and stable—seedless jam, a thin ganache, or a stabilized whipped filling work best. Pipe a frosting dam around each layer to contain soft fillings, chill between stacking steps, and apply a firm crumb coat before the final smooth layer.
What are the best doneness cues so I don’t overbake or underbake?
Look for centers that spring back, edges that pull slightly from the pan, and a toothpick that comes out with a few moist crumbs. Internal temp around 205–210°F is a good target. Cool 10 minutes in the pan, then invert to finish cooling on wire racks.
Which frosting gives clean edges but isn’t too sweet?
A not-too-sweet American buttercream (about 1 cup butter to 3–3.5 cups powdered sugar, 2–3 Tbsp cream, vanilla, pinch of salt) beats briefly for 5–7 minutes for silky texture. For lighter results, fold stabilized whipped cream into equal-weight buttercream for stability and less sweetness.
What tools are essential for a sharp, photo-ready finish?
Keep it simple: aluminum cake pans, parchment rounds, a digital scale, mixer, serrated leveler, rotating turntable, offset spatulas, bench scraper, and a non-slip mat. A warmed bench scraper helps smooth edges for a modern look.
How far ahead can I bake and freeze layers?
Bake layers 1–2 days ahead and refrigerate wrapped, or double-wrap and freeze up to 2 months. Thaw wrapped at room temperature for 1–2 hours before frosting. You can frost day-of or the day before; finished cakes keep chilled up to 24 hours.
Any quick decorating ideas if I want to “skip main” steps and finish fast?
While the cake chills after a crumb coat, prepare toppers, number molds, candles, and simple borders. Use pre-made number molds with melting wafers, edible glitter sprays, or acrylic toppers for instant impact without complex piping.
How can I safely add fresh flowers or heavy chocolate elements?
For flowers, use organic, edible blooms or place stems in floral picks/wrap stems with floral tape to avoid contact with cake. For heavy chocolate clusters, support them with bubble tea straws or dowels inserted into the cake so decorations stay put without collapsing.
What causes air bubbles or rough frosting, and how do I fix them?
Over-whipping frosting, whipping in air, or applying at warm temps causes bubbles. Beat frosting until smooth but not frothy, chill briefly if too soft, and use a spatula to press out air before smoothing. A hot bench scraper wiped between passes gives a glassy finish.
How do I calculate batter volume per pan to avoid domed layers?
Fill pans about two-thirds full. Approximate batter volumes: 8-inch rounds hold ~2–2.5 cups each; 9-inch rounds hold ~3 cups. For three 8-inch layers, aim for 6–7.5 cups total batter; for two 9-inch layers, ~6 cups—adjust ingredients proportionally.
Surprising fact: more than one in three milestone parties name the dessert as the show-stopper, proving the centerpiece sets the whole tone.This Website contains affiliate links. That means I may earn a small commission if you purchase through my links, at no extra cost to you. Turning 50 is a milestone worth celebrating in grand…
Did you know that a single show-stopping dessert can lift a whole party, with 72% of hosts saying the centerpiece makes the event feel official?This Website contains affiliate links. That means I may earn a small commission if you purchase through my links, at no extra cost to you. Turning 18 marks a big step,…
Surprising fact: more than half of party posts that go viral highlight a single dessert moment—usually the first slice captured on video.This Website contains affiliate links. That means I may earn a small commission if you purchase through my links, at no extra cost to you. This guide is an image-first list of creative ideas…
There’s something magical about the combination of rich chocolate cake and sweet, juicy strawberries. This chocolate strawberry cake brings together two beloved flavors in one show-stopping dessert that’s perfect for birthdays, Valentine’s Day, anniversaries, or anytime you want to impress. With moist chocolate cake layers, homemade strawberry filling, and a luscious strawberry buttercream, this cake…
Surprising fact: over 152 ultra‑high definition designs are now available in quick 4K clips, letting you spot styles in five to ten seconds.This Website contains affiliate links. That means I may earn a small commission if you purchase through my links, at no extra cost to you. This collection helps you find a show‑stopping sweet…
Surprising fact: more than half of party hosts say the dessert photo is the most shared image from an event, so your centerpiece really sets the tone.This Website contains affiliate links. That means I may earn a small commission if you purchase through my links, at no extra cost to you. This concise guide serves…