18th Birthday Cake Ideas to Make Your Party Pop
Surprising fact: nearly 60% of hosts change dessert plans the week before a big party due to guest count or weather.
This Website contains affiliate links. That means I may earn a small commission if you purchase through my links, at no extra cost to you.
This short guide helps you pick the right cake style, flavor, and finish based on budget, skill, and how many guests show up. Expect clear choices: statement designs like two-tier or number toppers, or simpler sheet options that still look special.
Quick practical tips cover portions (9×13 ≈ 24 slices; 8-inch two-layer ≈ 20; two-tier ≈ 30–36), basic tools (offset spatula, turntable, piping tips), and the best frostings for parties: American buttercream for stability, Swiss meringue for silk, and stabilized whipped cream for lightness.
We also touch on 2025 trends—metallics, school-color themes, minimalist looks—and budget shortcuts like using a sheet base with ganache drips and a bold number topper. Keep food safety in mind for perishable fillings if your event is outdoors.
Key Takeaways
- Match effort to impact: choose statement or simplified options by skill and time.
- Use portion guides to avoid leftovers or shortages.
- Basic tools and a stable frosting make decorating easier for beginners.
- Try budget upgrades like drips, candy clusters, or a topper for big payoff.
- Plan bake, chill, transport, and final touch-ups to reduce stress on party day.
Quick-start recipe base: a flexible cake you can dress up for any 18th
Begin with a simple, reliable 9×13 sheet that bakes evenly and gives you a clean surface to style however you like. Aim for 350°F for 30–38 minutes; a toothpick should come out with a few moist crumbs and the internal temp near 205°F–210°F.
Simple sheet base and scaling tips
Cream room-temperature butter and sugar 2–3 minutes, add eggs one at a time, and alternate dry ingredients with milk. Stop mixing as soon as flour is incorporated to keep the crumb tender.
- 9×13 pan: standard bake time above.
- Two 8-inch rounds: ~4–5 cups batter each.
- Three 6-inch rounds: ~3–4 cups batter each for a small tiered look.
Go-to frosting options that hold decorations
American buttercream: use a 2:1 powdered sugar to butter ratio by weight, add a pinch of salt and 1–2 tbsp heavy cream for piping and sprinkles that stay put.
Stabilized whipped cream: whip heavy cream to soft peaks, add a cooled gelatin mix (1 tsp gelatin bloomed in 1 tbsp cold water, melted), then whip to medium peaks for a lighter finish.
| Frosting | Best use | Stability at ~75°F |
|---|---|---|
| American buttercream | Bold piping, sprinkles, toppers | High |
| Stabilized whipped cream | Light finish, fresh fruit | Medium |
| Swiss meringue (note) | Silky sides, refined look | Medium-High (needs care) |
Final tips: level layers, apply a thin crumb coat, chill 20–30 minutes, then smooth with a bench scraper. For chocolate flavor, sift in Dutch-process cocoa or bloom with hot coffee. Store unfrosted layers 2–3 days room temp or freeze up to 2 months.
Best 18th birthday cake ideas for every style and budget
Find a show-stopping dessert style that fits your budget, timeline, and party vibe. Below are easy, tested concepts you can adapt for a large crowd or a small gathering.

Number “18” cutout and biscuit-layer options
Bake two 9×13 sheets, chill, and trace bold “1” and “8” templates. Cut with a serrated knife, stack with buttercream, and finish with macarons or berries.
Tip: For extra stability, use cookie-style biscuit layers and pipe rosettes on top.
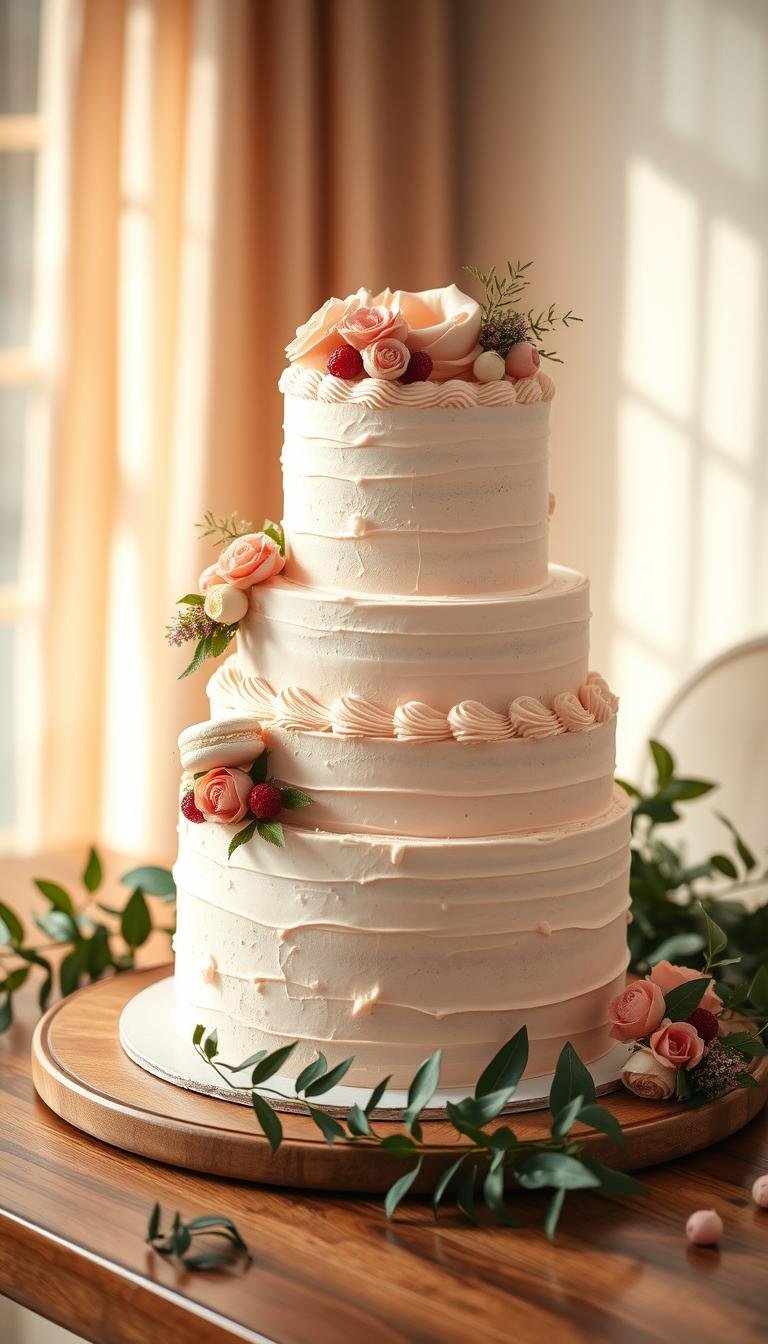
Two-tier celebration with bold piping
Stack 6″ over 8″ rounds, secure with dowels or bubble tea straws. Use Wilton 1M or 4B piping and add confetti sprinkles.
Finish: an acrylic “18” topper in gold or black makes a big impact.
Fresh berry naked and chocolate overload drip
For a naked style, thinly crumb-coat with stabilized whipped cream or mascarpone and add berries day-of. Keep chilled if held over two hours.
For chocolate lovers, cool ganache (1:1 chocolate to cream) to 90–95°F before dripping, then pile on bars and shards for texture.
Minimalist, photo-print, and allergy-friendly ideas
Go gender-neutral with smooth sides, micro-pearls, and one accent color for modern flair.
Order edible photo prints for personalization; apply to freshly smoothed buttercream and avoid condensation by unboxing at room temp.
For allergies, use a 1:1 gluten-free flour blend with xanthan gum, swap in oat milk and vegan butter, and prevent cross-contact with clean tools.
- Budget hack: Elevate a single layer with a dramatic ganache drip and a bold topper.
- Theme picks: school colors, sports, pastel glam, neon, or metallics like gold and rose gold.
- Portions: number cutouts serve ~20–28; two-tier 6″+8″ ~30–36—plan extras for big slices.
| Style | Key elements | Serves (approx.) |
|---|---|---|
| Number cutout | Two 9×13 sheets, chilled cutting, buttercream, macarons | 20–28 |
| Two-tier celebration | 6″ + 8″ rounds, dowels, Wilton piping, acrylic topper | 30–36 |
| Berry naked | Thin frosting, stabilized whip, fresh berries | 18–24 |
| Chocolate drip | 1:1 ganache, cooled drip, chocolate bars & shards | 20–30 |
Decorating, serving, and timing tips to nail your party-day cake
A clear prep schedule and smart display choices make serving effortless and keep flavors at their best.
Color palettes and themes
Choose cohesive palettes: pair school colors with a neutral buttercream and add metallic leaf accents sparingly.
Go bold with neon gel tones, but balance them against white frosting to keep the look crisp.

Make-ahead schedule
Bake layers 1–2 days ahead, wrap tightly, and chill. Crumb-coat the day before to lock crumbs in place.
Finish piping, toppers, and delicate decor the morning of the event. Add fresh fruit only minutes before serving.
Display, cutting, and portioning
Use a sturdy 10–12-inch board for 8-inch rounds and set the dessert away from sun or heat. For outdoor events, keep it shaded and serve within 1–2 hours when fillings are perishable.
- Transport tips: chill until firm, place in a snug box on a flat surface, and bring a repair kit (offset spatula, extra buttercream, paper towels, bench scraper).
- Portioning: slice round tiers into 1×2-inch party portions; score sheet cakes first for even cuts.
- Two-tier advice: remove top tier, pull dowels, then slice the bottom tier for clean servings.
| Task | Timing | Why it helps |
|---|---|---|
| Bake layers | 1–2 days ahead | Reduces day-of stress and improves slice quality |
| Crumb-coat | Night before | Seals crumbs and firms layers for final smoothing |
| Final decorate | Morning of | Keeps fresh elements crisp and prevents melting |
| Serve | 30–60 min after fridge (for whipped frostings) | Frosting texture is optimal and slices cut cleanly |
Quick note: label flavors and allergens on a small tent card so guests choose safely and you can skip main confusion during service.
Conclusion
Wrap up with a clear plan, choose a practical style that balances visual impact with the time you have and the guest count.
Keep stability first: use buttercream or chilled layers for warm settings and long displays. Simple upgrades—ganache drips, sprinkles, fresh berries, or a sleek topper—turn a basic build into a milestone centerpiece.
Label flavors and allergens so guests choose safely. Follow a short checklist: bake ahead, crumb-coat, chill, finish day-of, transport chilled, display in shade, and slice with a warm clean knife.
With this approach, your centerpiece will look polished, taste great, and serve smoothly—letting you enjoy the celebration as much as everyone else.