Pastel de graduación is a delicious cake that celebrates academic achievements with style and flavor. Usually decorated with themes that reflect the graduate’s journey, this cake adds a sweet touch to graduation parties, bringing friends and family together to honor the hard work and dedication that goes into earning a diploma.
This Website contains affiliate links. That means I may earn a small commission if you purchase through my links, at no extra cost to you.
Classic Tres Leches Cake: A Celebration Of Sweetness
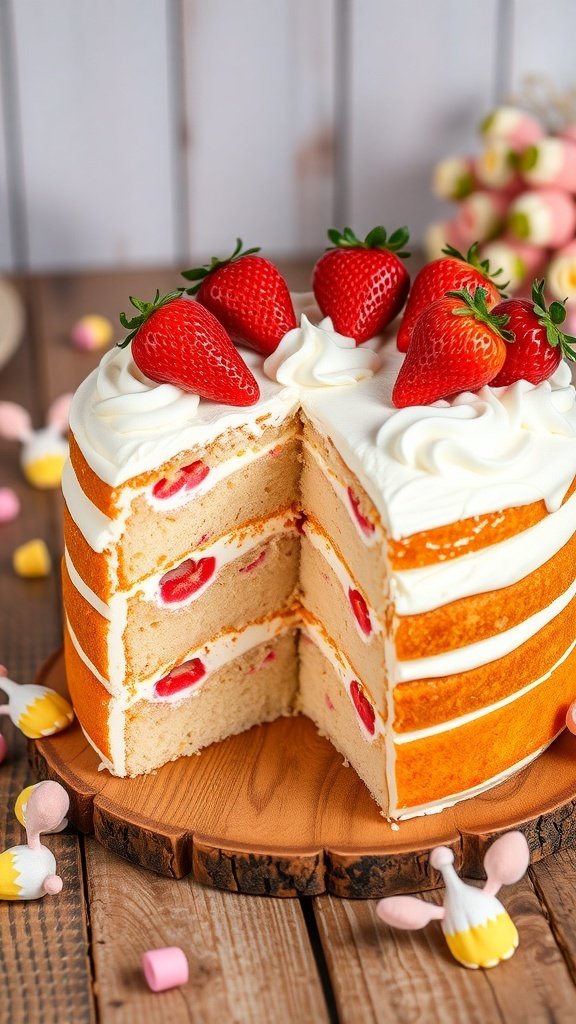
The Tres Leches cake is a delightful treat that brings joy to any celebration, especially graduations. This cake is known for its moist texture and rich flavor, making it a favorite among many. The image shows a beautifully layered cake topped with fresh strawberries, which adds a pop of color and freshness.
Each layer of the cake is soaked in a mixture of three types of milk, giving it a unique sweetness that is hard to resist. The creamy frosting complements the cake perfectly, making each bite a delightful experience. This cake is not just a dessert; it’s a centerpiece that brings people together to celebrate achievements.
Whether you’re celebrating a graduation or any special occasion, a Tres Leches cake is sure to impress. Its soft, spongy layers and sweet milk mixture create a memorable dessert that everyone will love.
Ingredients
1 cup all-purpose flour
1 ½ teaspoons baking powder
1/4 teaspoon salt
5 large eggs
1 cup granulated sugar
1 teaspoon vanilla extract
1 cup whole milk
1 can (14 oz) sweetened condensed milk
1 can (12 oz) evaporated milk
1 cup heavy cream
Fresh strawberries for topping
Instructions
Preheat the oven to 350°F (175°C). Grease and flour a 9×13 inch baking dish.
In a bowl, mix flour, baking powder, and salt. Set aside.
In a separate bowl, beat the eggs and sugar until light and fluffy. Add vanilla extract.
Gradually add the flour mixture to the egg mixture, alternating with the whole milk. Mix until smooth.
Pour the batter into the prepared baking dish and bake for 25-30 minutes, or until a toothpick comes out clean.
Once baked, let the cake cool completely. Poke holes all over the top with a fork.
In a bowl, mix sweetened condensed milk, evaporated milk, and heavy cream. Pour this mixture over the cooled cake, allowing it to soak in.
Refrigerate for at least 4 hours or overnight for best results.
Before serving, top with whipped cream and fresh strawberries.
Delightful Churro Cake: A Twist On A Classic
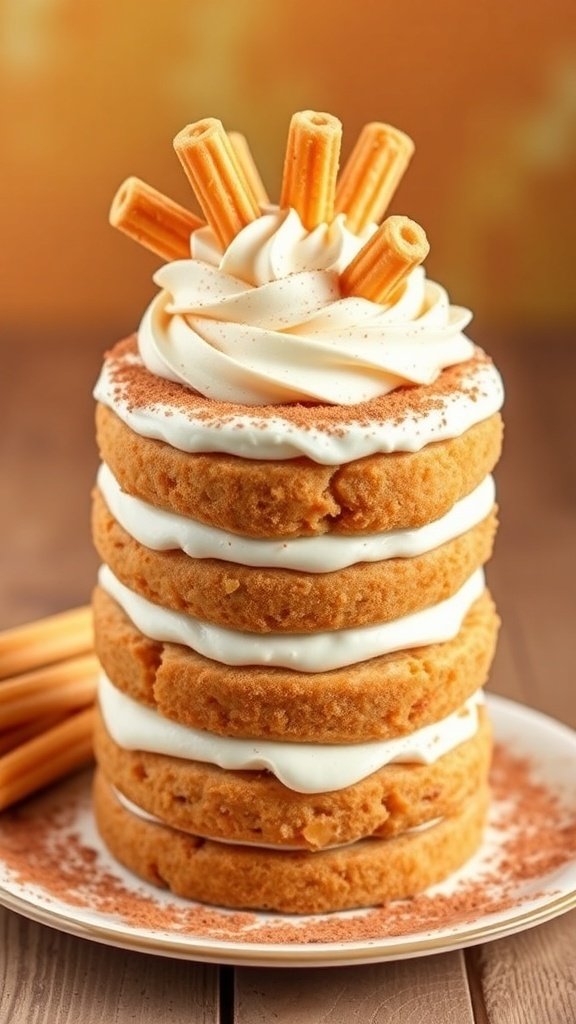
Churros are a beloved treat, often enjoyed at fairs and festivals. Now, imagine combining that crispy, sweet goodness into a cake! This churro cake takes the classic flavors of churros and transforms them into a delightful dessert. The layers of soft, cinnamon-infused cake are complemented by creamy frosting, making it a perfect centerpiece for any celebration.
The cake is stacked high, showcasing its fluffy texture and rich flavor. Topped with a swirl of whipped cream and crunchy churro sticks, it’s both visually appealing and delicious. This cake is not just a treat; it’s a celebration on a plate, perfect for graduations or any special occasion.
Ingredients
2 cups all-purpose flour
1 1/2 cups granulated sugar
1 tablespoon baking powder
1 teaspoon salt
1 teaspoon ground cinnamon
1/2 cup unsalted butter, softened
1 cup milk
3 large eggs
1 teaspoon vanilla extract
2 cups heavy cream
1/2 cup powdered sugar
Extra cinnamon for dusting
Churro sticks for decoration
Instructions
Preheat your oven to 350°F (175°C). Grease and flour two 9-inch round cake pans.
In a large bowl, mix flour, sugar, baking powder, salt, and cinnamon. Add the softened butter, milk, eggs, and vanilla. Beat until smooth.
Divide the batter evenly between the prepared pans. Bake for 25-30 minutes, or until a toothpick comes out clean.
Let the cakes cool in the pans for 10 minutes, then transfer to wire racks to cool completely.
While the cakes cool, whip the heavy cream and powdered sugar until stiff peaks form.
Once the cakes are cool, place one layer on a serving plate. Spread a layer of whipped cream on top, then add the second cake layer.
Frost the top and sides of the cake with the remaining whipped cream. Dust with extra cinnamon and top with churro sticks for decoration.
Slice and serve this delightful churro cake at your next celebration!
Chocolate Flan Cake: A Decadent Duo
Chocolate flan cake is a delightful treat that combines two beloved desserts into one stunning creation. The image shows a beautifully layered cake with a rich chocolate base topped with a smooth, creamy flan layer. The glossy caramel sauce drizzled on top adds a touch of elegance and sweetness, making it perfect for celebrations like graduations.
This cake is not just visually appealing; it’s a delicious blend of flavors and textures. The chocolate layer is dense and fudgy, while the flan is light and silky. Together, they create a harmonious balance that will impress anyone who takes a bite.
To make this cake, you’ll need a few simple ingredients. The process involves baking the chocolate layer first, then preparing the flan and pouring it over the chocolate base. After baking, it’s chilled to set, allowing the flavors to meld beautifully.
Ingredients
1 cup granulated sugar (for caramel)
1 cup all-purpose flour
1/2 cup unsweetened cocoa powder
1 teaspoon baking powder
1/2 teaspoon salt
1/2 cup unsalted butter, softened
1 cup granulated sugar (for cake)
2 large eggs
1 teaspoon vanilla extract
1 cup milk
1 can (14 oz) sweetened condensed milk
1 can (12 oz) evaporated milk
3 large eggs (for flan)
1 teaspoon vanilla extract (for flan)
Instructions
Prepare the Caramel: In a saucepan, melt 1 cup of sugar over medium heat until it turns golden brown. Quickly pour it into a round cake pan, tilting to coat the bottom evenly. Let it cool and harden.
Make the Chocolate Cake: Preheat the oven to 350°F (175°C). In a bowl, mix flour, cocoa powder, baking powder, and salt. In another bowl, cream butter and sugar until fluffy. Add eggs and vanilla, mixing well. Gradually add dry ingredients and milk, stirring until smooth. Pour the batter over the cooled caramel.
Prepare the Flan: In a blender, combine sweetened condensed milk, evaporated milk, 3 eggs, and vanilla. Blend until smooth. Carefully pour this mixture over the chocolate cake batter.
Bake: Place the cake pan in a larger baking dish filled with water (water bath). Bake for about 50-60 minutes, or until a toothpick comes out clean. Remove from the oven and let it cool completely.
Chill: Refrigerate the cake for at least 4 hours or overnight. When ready to serve, run a knife around the edges and invert onto a serving plate. Drizzle with additional caramel if desired.
Lemon Lavender Cake: A Fragrant Delight
The Lemon Lavender Cake is a stunning centerpiece for any graduation celebration. This cake features layers of moist lemon-flavored sponge, perfectly balanced with a hint of lavender. The bright yellow color and delicate floral notes make it not just a treat for the taste buds but also a feast for the eyes.
Decorated with fresh lavender sprigs and lemon slices, this cake captures the essence of spring. The combination of lemon and lavender creates a refreshing flavor that is both uplifting and soothing. It’s a great way to celebrate achievements with a touch of elegance.
For those looking to recreate this delightful cake, here’s a simple recipe that will impress your guests and make your graduation party unforgettable!
Ingredients
2 cups all-purpose flour
1 1/2 cups granulated sugar
1 tablespoon baking powder
1/2 teaspoon salt
1/2 cup unsalted butter, softened
1 cup milk
3 large eggs
1/4 cup freshly squeezed lemon juice
1 tablespoon lemon zest
1 tablespoon dried lavender buds
1 teaspoon vanilla extract
Instructions
Preheat your oven to 350°F (175°C). Grease and flour three 8-inch round cake pans.
In a large bowl, mix flour, sugar, baking powder, and salt. Add softened butter and mix until crumbly.
In another bowl, whisk together milk, eggs, lemon juice, lemon zest, lavender, and vanilla. Gradually add this mixture to the dry ingredients, mixing until just combined.
Divide the batter evenly among the prepared pans. Bake for 25-30 minutes or until a toothpick inserted in the center comes out clean.
Let the cakes cool in the pans for 10 minutes, then transfer to wire racks to cool completely.
Once cooled, frost with your favorite lemon buttercream and decorate with lemon slices and lavender sprigs.
Red Velvet Cake: A Festive Favorite
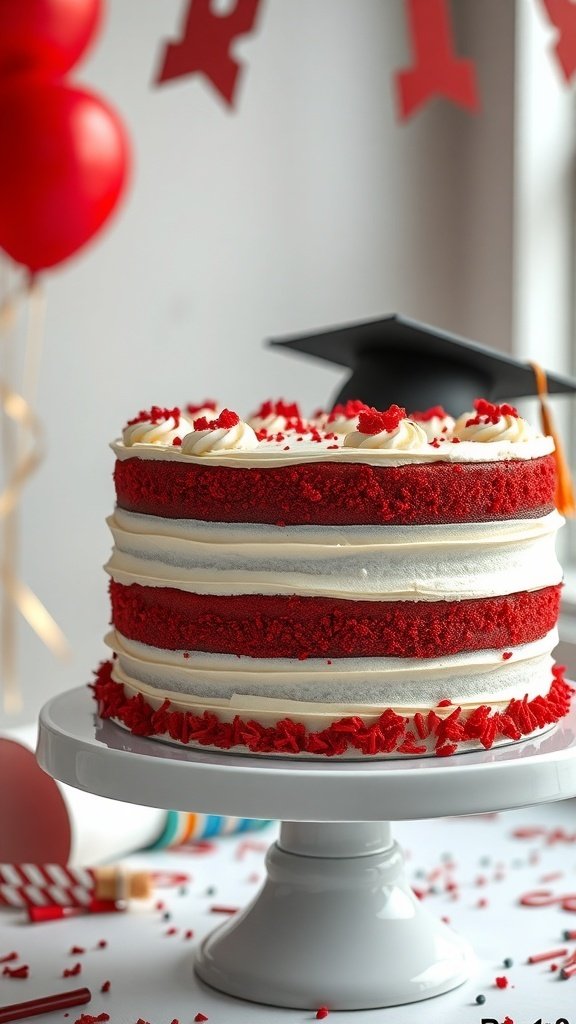
Red velvet cake is a classic choice for celebrations, especially graduations. Its rich, velvety texture and vibrant red color make it a standout dessert. Topped with creamy frosting, this cake brings a festive touch to any gathering.
The cake is often adorned with fun decorations, like graduation caps and colorful balloons, adding to the celebratory vibe. The layers of red velvet and white frosting create a beautiful contrast that is as pleasing to the eye as it is to the palate.
Making red velvet cake is straightforward and rewarding. It’s a great way to celebrate achievements and create lasting memories with friends and family.
Ingredients
2 1/2 cups all-purpose flour
1 1/2 cups granulated sugar
1 teaspoon baking soda
1 teaspoon salt
1 teaspoon cocoa powder
1 1/2 cups vegetable oil
1 cup buttermilk, room temperature
2 large eggs
2 tablespoons red food coloring
1 teaspoon vanilla extract
1 teaspoon white vinegar
8 oz cream cheese, softened
1/2 cup unsalted butter, softened
4 cups powdered sugar
1 teaspoon vanilla extract (for frosting)
Instructions
Preheat the oven to 350°F (175°C). Grease and flour two 9-inch round cake pans.
In a large bowl, mix flour, sugar, baking soda, salt, and cocoa powder.
In another bowl, combine oil, buttermilk, eggs, food coloring, vanilla, and vinegar. Mix well.
Gradually add the wet ingredients to the dry ingredients, mixing until smooth.
Divide the batter evenly between the prepared pans. Bake for 25-30 minutes or until a toothpick comes out clean.
Let the cakes cool in the pans for 10 minutes, then transfer to wire racks to cool completely.
For the frosting, beat cream cheese and butter until smooth. Gradually add powdered sugar and vanilla, mixing until creamy.
Once the cakes are cool, spread frosting between the layers and on top and sides of the cake.
Decorate as desired, and enjoy your festive red velvet cake!
Mango Mousse Cake: A Tropical Escape
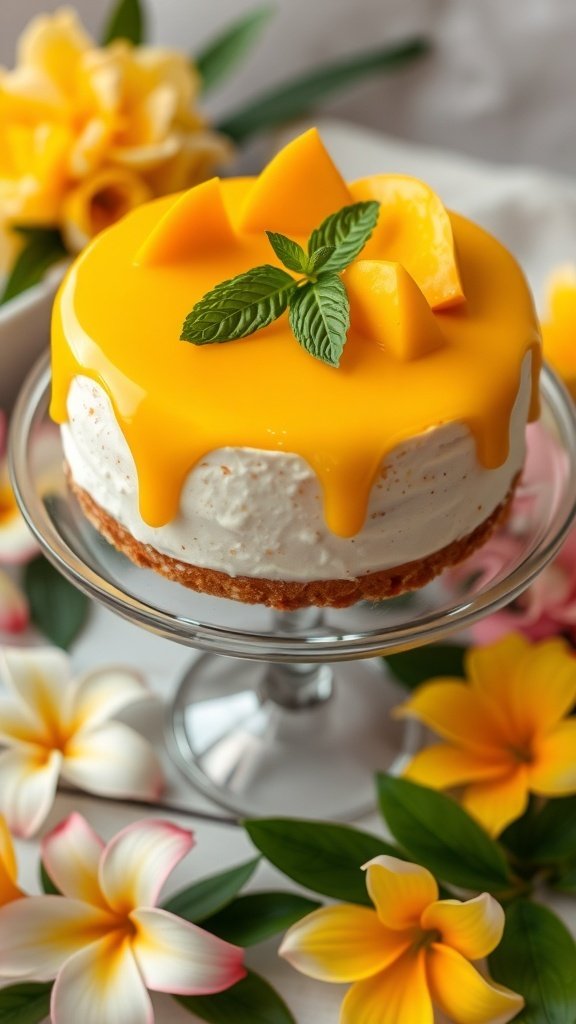
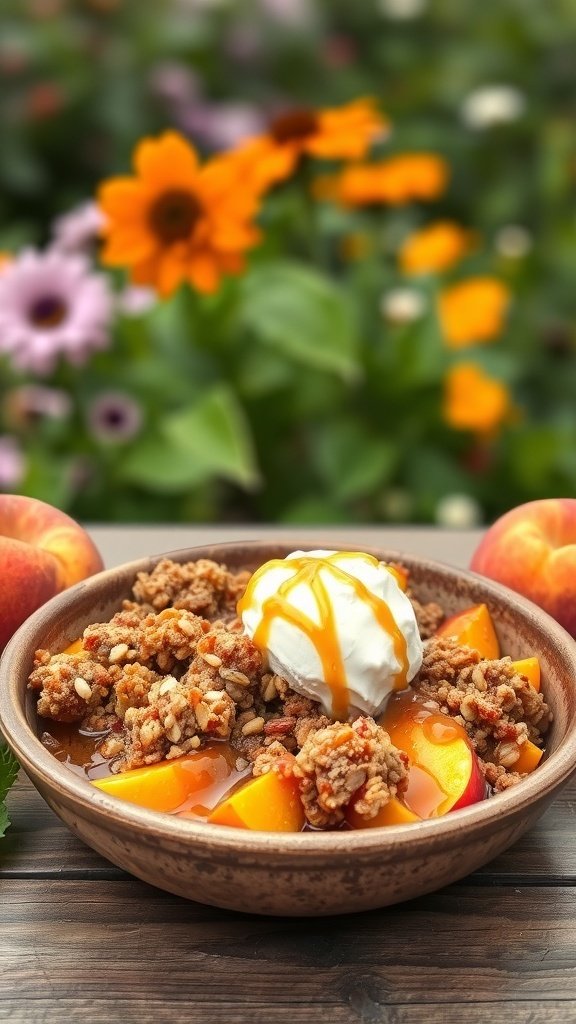
Mango mousse cake is a delightful treat that brings a taste of the tropics to any celebration. This cake features a light and airy mousse made from fresh mangoes, sitting atop a buttery crust. The vibrant yellow color of the mango topping is sure to catch the eye and make any gathering feel special.
The cake is adorned with fresh mango slices and mint leaves, adding a pop of color and freshness. It’s perfect for graduations, birthdays, or just a sunny afternoon. Each slice is a little piece of paradise, making it hard to resist going back for seconds!
Making this cake is simpler than you might think. With just a few ingredients, you can create a dessert that looks and tastes impressive. Let’s get started with the recipe!
Ingredients
1 ½ cups crushed graham crackers
½ cup unsalted butter, melted
2 cups ripe mango puree (about 3-4 mangoes)
1 cup heavy cream
½ cup powdered sugar
2 teaspoons gelatin
3 tablespoons cold water
1 teaspoon vanilla extract
Fresh mango slices and mint leaves for garnish
Instructions
Prepare the Crust: In a bowl, mix crushed graham crackers with melted butter. Press the mixture into the bottom of a springform pan to form an even layer. Chill in the fridge for about 30 minutes.
Make the Mousse: In a small bowl, sprinkle gelatin over cold water and let it sit for about 5 minutes until it blooms. Heat gently until dissolved, then set aside.
Whip the Cream: In a large bowl, whip the heavy cream and powdered sugar until soft peaks form. Gently fold in the mango puree and vanilla extract.
Combine: Add the dissolved gelatin to the mango mixture and fold until fully incorporated. Pour the mousse over the chilled crust and smooth the top.
Chill: Refrigerate for at least 4 hours or until set. Once set, carefully remove the sides of the springform pan.
Garnish: Top with fresh mango slices and mint leaves before serving. Enjoy your tropical escape!
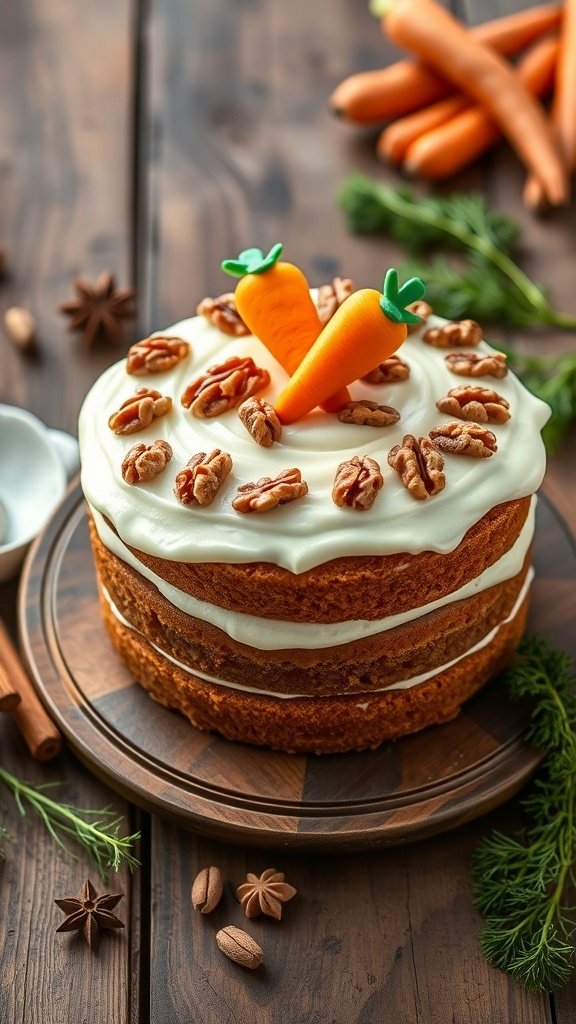
Carrot Cake With Cream Cheese Frosting: A Classic Crowd-Pleaser
Carrot cake is a delightful treat that never fails to impress. This version, topped with creamy frosting, is perfect for celebrations like graduations. The cake is moist, flavorful, and has a lovely texture, thanks to the grated carrots and nuts.
The image shows a beautifully layered carrot cake, adorned with cute little carrot decorations and sprinkled with pecans. The vibrant colors and inviting presentation make it a centerpiece for any dessert table. It’s not just a feast for the eyes; the combination of spices and sweetness makes it a favorite among many.
Making this cake is a straightforward process. Gather your ingredients, and let’s get started!
Ingredients
2 cups all-purpose flour
2 cups granulated sugar
1 teaspoon baking powder
1 teaspoon baking soda
1 teaspoon ground cinnamon
1/2 teaspoon ground nutmeg
1/2 teaspoon salt
1 cup vegetable oil
4 large eggs
3 cups grated carrots
1 cup chopped pecans or walnuts
1 teaspoon vanilla extract
8 oz cream cheese, softened
1/2 cup unsalted butter, softened
4 cups powdered sugar
1 teaspoon vanilla extract (for frosting)
Instructions
Preheat the oven to 350°F (175°C). Grease and flour three 9-inch round cake pans.
In a large bowl, whisk together flour, sugar, baking powder, baking soda, cinnamon, nutmeg, and salt.
In another bowl, mix the oil, eggs, grated carrots, and vanilla extract. Combine the wet and dry ingredients until just mixed. Fold in the nuts.
Divide the batter evenly among the prepared pans. Bake for 25-30 minutes, or until a toothpick comes out clean.
Let the cakes cool in the pans for 10 minutes, then transfer to wire racks to cool completely.
For the frosting, beat together cream cheese and butter until smooth. Gradually add powdered sugar and vanilla extract, mixing until fluffy.
Once the cakes are cool, spread frosting between the layers and on top of the cake. Decorate with additional nuts or carrot decorations as desired.
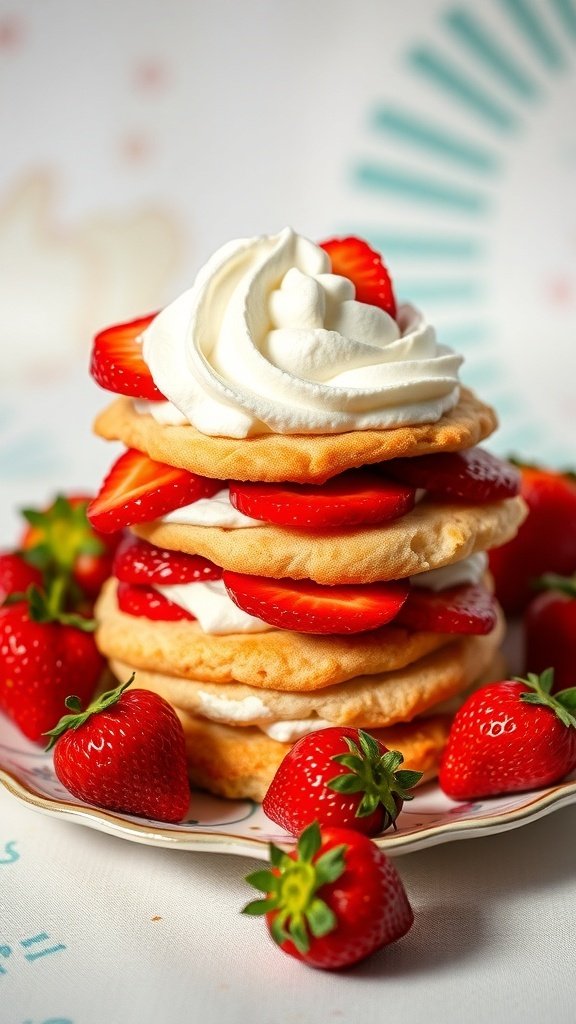
Strawberry Shortcake: A Summertime Treat
Strawberry shortcake is a classic dessert that screams summer. The image shows a delightful stack of fluffy shortcakes layered with fresh strawberries and whipped cream. Each layer is a sweet treat that brings joy to any gathering.
This dessert is perfect for graduations, picnics, or just a sunny day. The bright red strawberries pop against the soft, golden cakes, making it as pleasing to the eye as it is to the taste buds. It’s a simple yet elegant way to celebrate special moments.
Making strawberry shortcake is easy and fun. You can involve friends or family in the process, turning it into a delightful activity. The combination of sweet strawberries, light cream, and tender cake is hard to resist!
Ingredients
2 cups all-purpose flour
1/4 cup granulated sugar
1 tablespoon baking powder
1/2 teaspoon salt
1/2 cup unsalted butter, chilled and cubed
1 cup heavy cream
2 cups fresh strawberries, sliced
1/4 cup powdered sugar
1 teaspoon vanilla extract
Instructions
Preheat the oven to 425°F (220°C). In a bowl, mix flour, granulated sugar, baking powder, and salt.
Add the chilled butter to the flour mixture. Use a pastry cutter or your fingers to blend until it resembles coarse crumbs.
Pour in the heavy cream and stir until just combined. Do not overmix.
Turn the dough onto a floured surface and gently knead it a few times. Roll it out to about 1-inch thick.
Cut out circles using a biscuit cutter and place them on a baking sheet. Bake for 15-20 minutes until golden brown.
While the cakes cool, mix the sliced strawberries with powdered sugar and let them sit for about 10 minutes to release their juices.
Whip the remaining heavy cream with vanilla extract until soft peaks form.
To assemble, slice the shortcakes in half. Layer strawberries and whipped cream between the halves and on top. Enjoy!
Coconut Cream Cake: A Tropical Indulgence
Coconut Cream Cake is a delightful treat that brings a taste of the tropics to any celebration. This cake is not just a dessert; it’s a centerpiece that catches the eye and tantalizes the taste buds. The fluffy layers of cake are generously filled with creamy coconut goodness, making it a perfect choice for graduations or any festive occasion.
The image showcases a beautifully decorated Coconut Cream Cake, sitting elegantly on a white cake stand. The layers are adorned with whipped cream and sprinkled with shredded coconut, giving it a fresh and inviting look. Surrounding the cake are halved coconuts and lush green palm leaves, enhancing its tropical vibe. This cake not only looks stunning but also promises a burst of flavor with every bite.
Making this cake at home is easier than you might think. With simple ingredients and straightforward steps, you can create a dessert that impresses everyone. Whether you’re celebrating a graduation or just want to treat yourself, this Coconut Cream Cake is sure to be a hit!
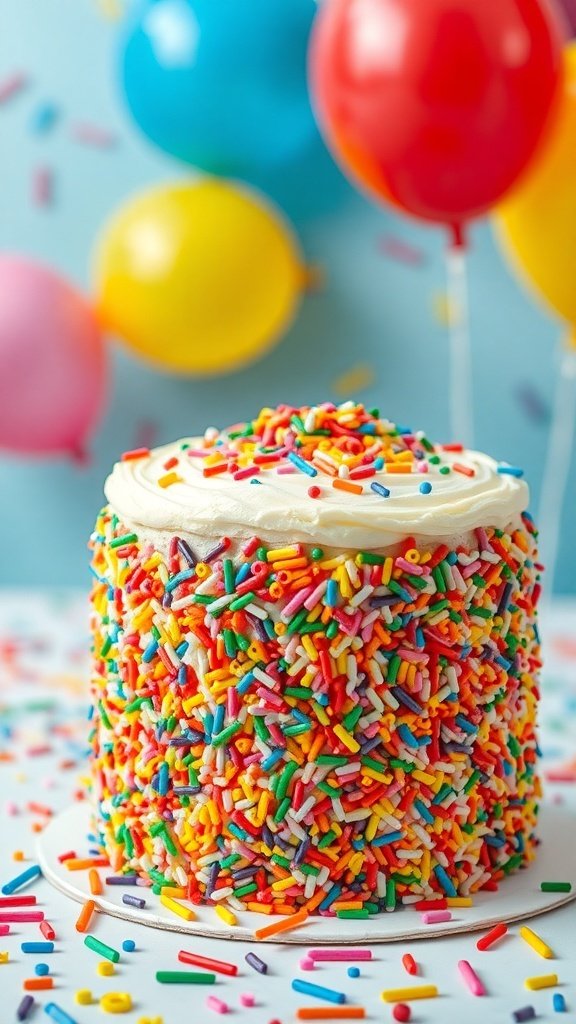
Funfetti Cake: A Colorful Celebration
Funfetti cake is the life of any celebration, especially graduations! This cake is not just a treat; it’s a burst of joy. The colorful sprinkles make it look festive and inviting. Imagine a cake that brings smiles and laughter to your party. That’s what funfetti is all about!
The cake is usually covered in a creamy frosting, which pairs perfectly with the sweet, soft cake. The sprinkles add a delightful crunch, making each bite exciting. It’s a cake that everyone loves, young and old alike!
When you see this cake, you can’t help but feel the excitement of the occasion. It’s perfect for celebrating achievements, birthdays, or just because. The vibrant colors and cheerful decorations create a fun atmosphere that makes any gathering special.
Ingredients
2 1/2 cups all-purpose flour
1 1/2 cups granulated sugar
1 tablespoon baking powder
1/2 teaspoon salt
1 cup unsalted butter, softened
4 large eggs
1 tablespoon vanilla extract
1 cup milk
1 cup rainbow sprinkles
2 cups frosting (store-bought or homemade)
Instructions
Preheat your oven to 350°F (175°C). Grease and flour two 9-inch round cake pans.
In a large bowl, mix flour, sugar, baking powder, and salt. Add the softened butter and mix until crumbly.
Add eggs, vanilla, and milk. Beat on medium speed until smooth and well combined.
Gently fold in the rainbow sprinkles.
Divide the batter evenly between the prepared pans. Bake for 25-30 minutes, or until a toothpick comes out clean.
Let the cakes cool in the pans for 10 minutes, then transfer to wire racks to cool completely.
Once cool, frost the top of one cake layer, place the second layer on top, and frost the top and sides of the cake.
Decorate with extra sprinkles on top and around the sides. Slice and enjoy!
Planning a strawberry shortcake birthday party brings together the charm of sweet berries, delightful decorations, and childhood nostalgia. Whether you’re inspired by the classic character or simply love the fresh, summery theme, a strawberry shortcake celebration creates magical memories for children of all ages. This comprehensive guide will walk you through everything you need to…
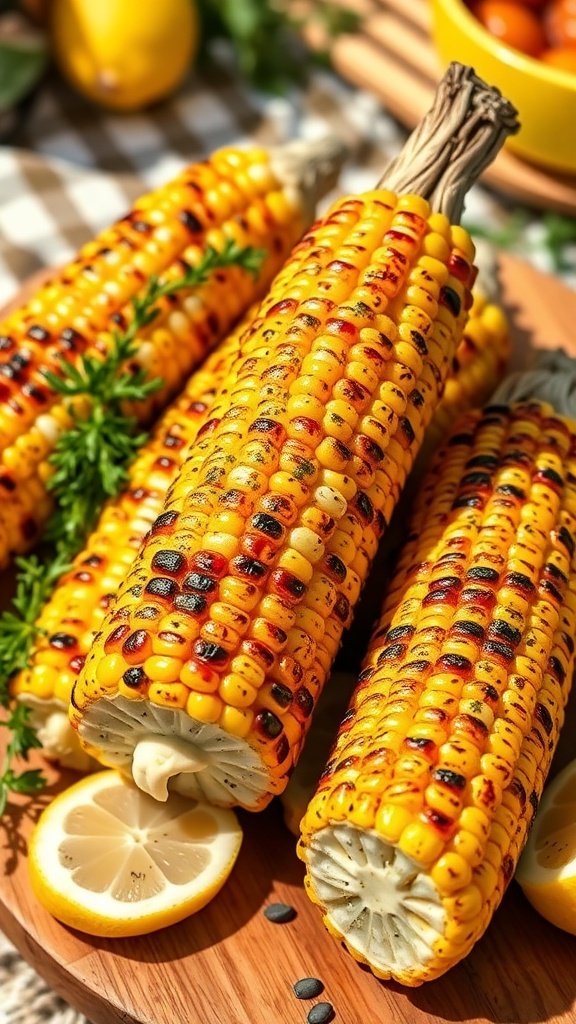
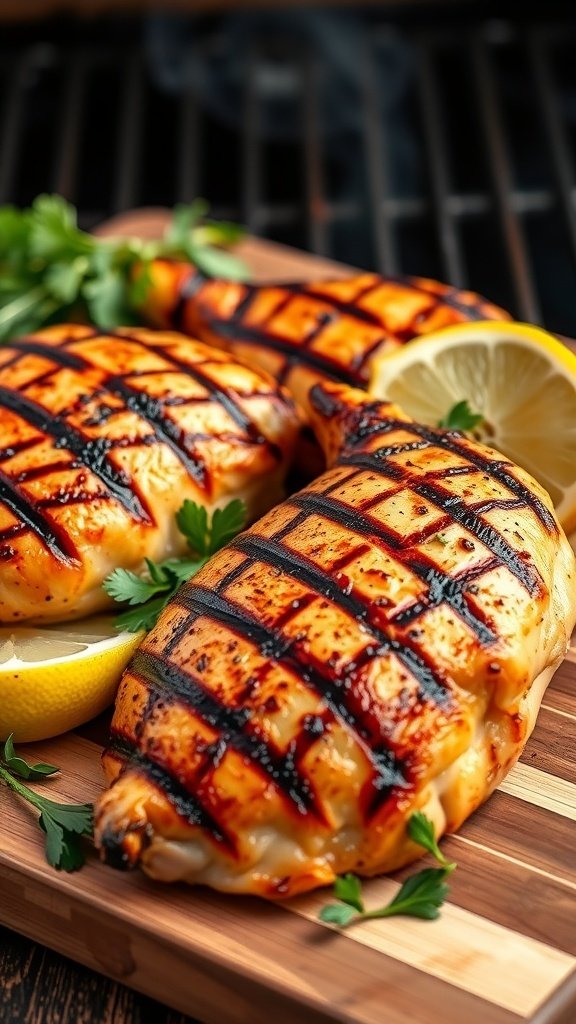
Summer BBQ food is all about great flavors and fun times with friends and family. Think grilled meats, fresh veggies, and tasty sides that make every cookout memorable. From juicy burgers to smoky ribs, there’s something for everyone to enjoy under the sun. Let’s fire up the grill and celebrate those warm, sunny days with…
Summer desserts are the perfect way to beat the heat and satisfy your sweet tooth. With refreshing flavors and fun presentations, they’re ideal for barbecues, picnics, or just a relaxing afternoon. From fruity sorbets to no-bake cheesecakes, these treats are all about keeping it cool and delicious! This Website contains affiliate links. That means I…
Craving something tasty yet light for those hot summer nights? Check out these dinner ideas that keep you cool and satisfied without heating up the kitchen. From fresh salads to quick stir-fries, these options are perfect for a warm evening with friends or family. This Website contains affiliate links. That means I may earn a…
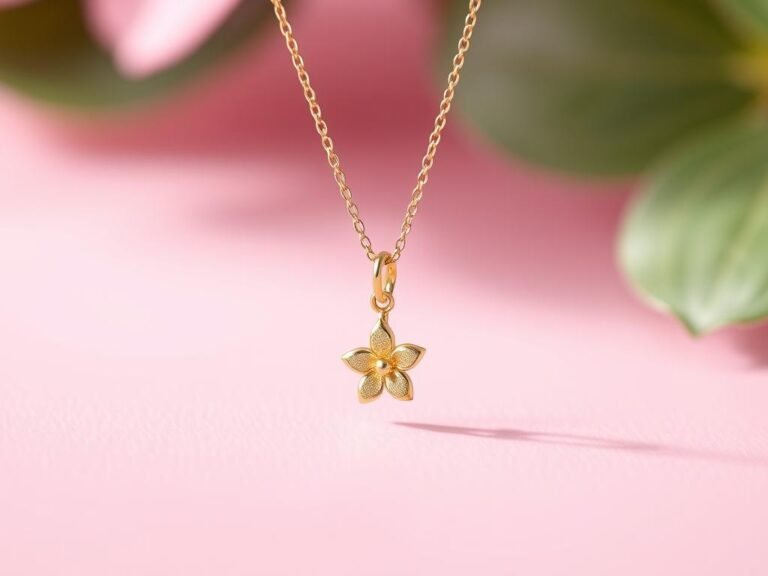
Finding the perfect sweet 16 gift ideas can be challenging when you want to commemorate such a significant milestone. The transition from childhood to young adulthood deserves to be celebrated with a thoughtful present that reflects their growing independence and unique personality. Whether you’re shopping for your daughter, niece, best friend, or another special teen…
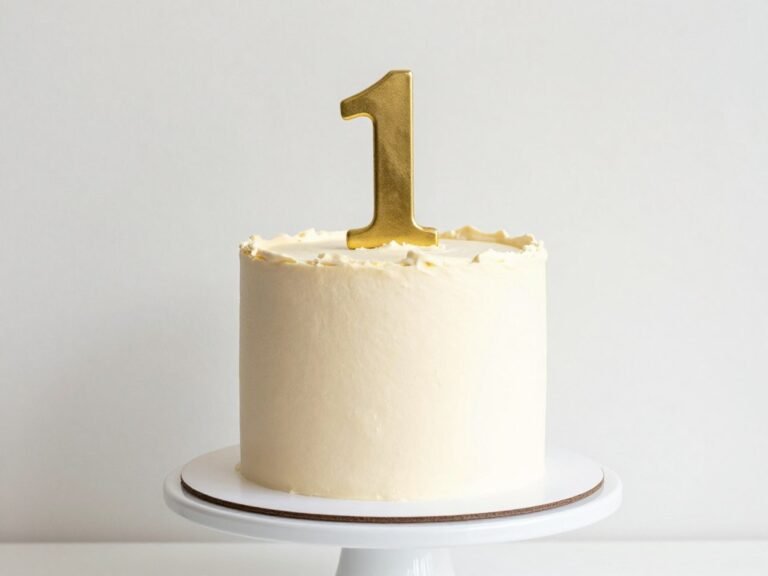
Your baby’s first birthday deserves something special. But you don’t need professional baking skills to create a stunning birthday cake that everyone will remember. This Website contains affiliate links. That means I may earn a small commission if you purchase through my links, at no extra cost to you. Simple cake designs often make the…