Nearly one in three men say a themed milestone dessert made their event feel unforgettable. That makes choosing the right centerpiece more than a nicety—it’s a moment-defining decision.
This Website contains affiliate links. That means I may earn a small commission if you purchase through my links, at no extra cost to you.
This guide helps you pick a show-stopping option fast. From whiskey barrel and beer-ice bucket designs to sneaker and tool toppers, you’ll find ideas that match hobbies and taste.
Expect straight talk on flavors like vanilla, velvet, and rich chocolate, plus tips on handling eggs, dairy, and nuts. We cover fondant details versus buttercream finishes, when a number cake lifts a milestone, and quick swaps for dietary needs.
Whether you bake at home or order from a pro, this short guide gives clear picks by interest, skill level, and timeline—so the party centerpiece hits the mark and celebrates this new chapter in life.
Key Takeaways
Match designs to hobbies: sneakers, beer, music, or tools make memorable cakes.
Choose flavors men love now—chocolate-vanilla blends, red velvet, and salted drip.
Decide between fondant realism and buttercream ease based on skill and time.
Number cakes and printed labels add milestone impact for 21st, 30th, 40th, and 50th ideas.
Plan for eggs, dairy, and nuts up front to avoid last-minute swaps.
Simple staging tips guarantee photo-ready moments at the party.
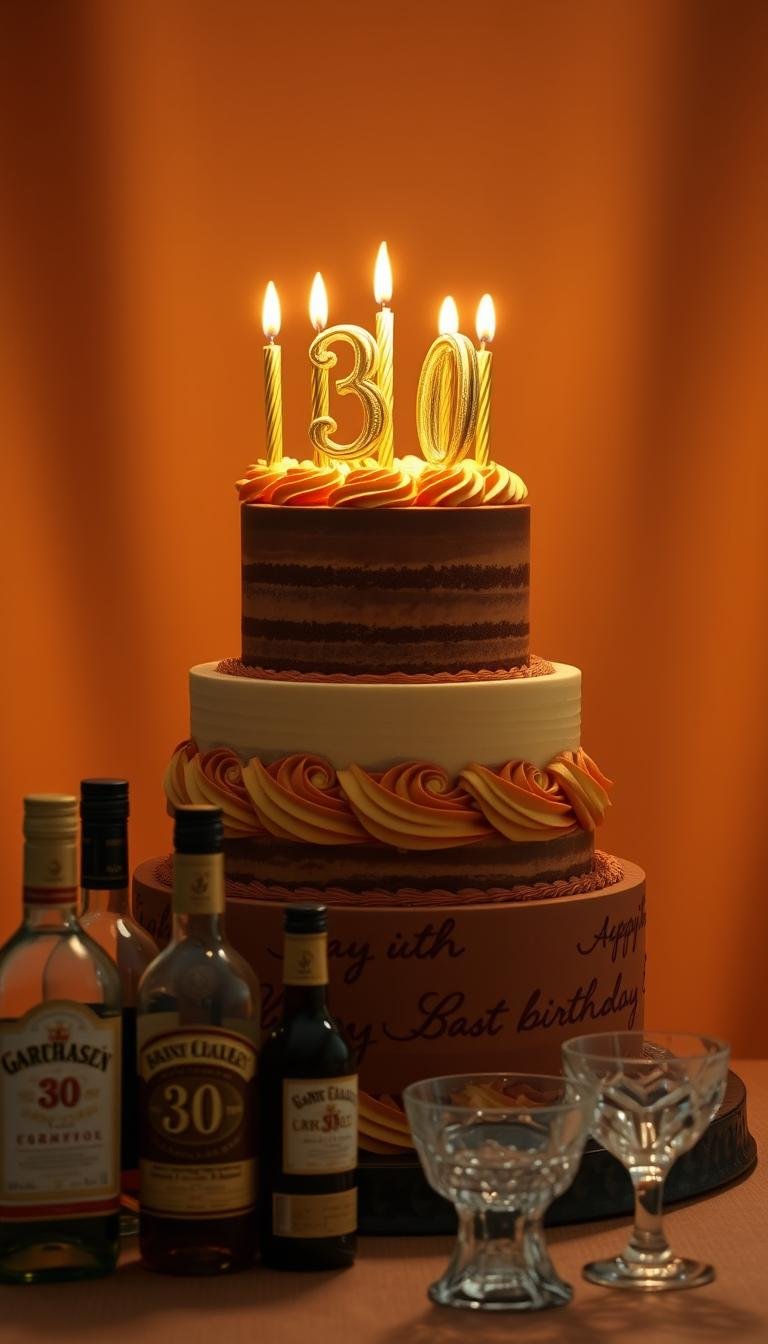
What Makes a Great 30th Birthday Cake for Him Right Now
Pick a centerpiece that reflects his passions—sneakers, sports gear, a favorite brew, music gear, or toolbox all make the dessert feel personal and memorable. Match the theme to his interests first; personal relevance is the fastest route to standout 30th birthday cakes.
Balance wow with reality. If time or tools are tight, choose a simpler cake that still looks polished. If you have time and skill, add fondant textures or edible prints to get pro-level details without endless piping.
Lean into modern style cues: clean edges, bold color blocking, or realistic textures. For casual gatherings, a well-executed frosted finish reads premium and travels easier.
Pick a format that fits the guest count—single tier for small groups, multi-tier or sheet backup for bigger parties.
Match taste to crowd favorites; consider layered sponges with vanilla buttercream or salted caramel accents to please varied palates.
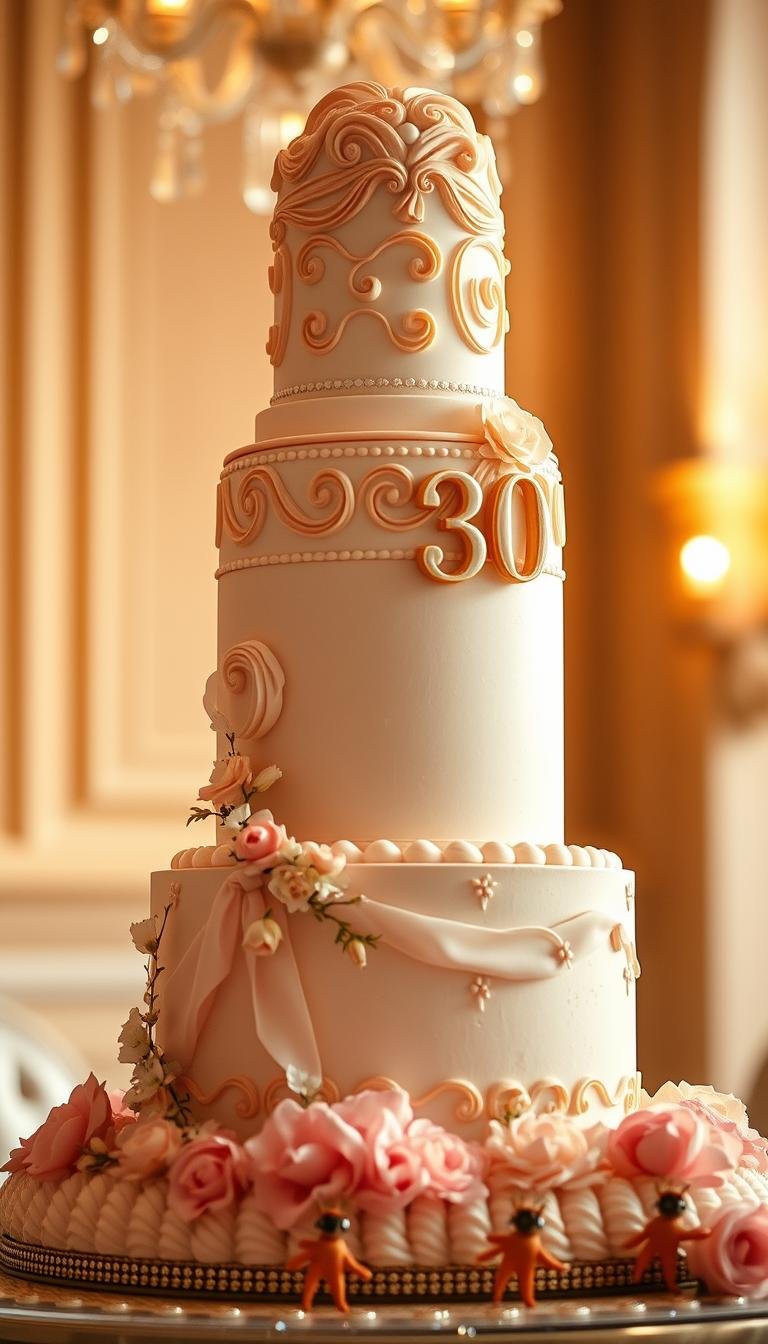
Make the milestone visible but tasteful: a subtle “30” accent, a topper, or a number design keeps the moment front and center.
Plan transport: chill time, a sturdy board, and a protective box save fragile finishes during travel.
If you loved a 21st birthday style, elevate the colors and lines to suit a more mature vibe. These simple idea adjustments make familiar themes feel fresh and right for today.
Best 30th Birthday Cakes for Him
Choose a showpiece that looks luxe and tastes even better—designs that read expensive without fuss. Below are reliable, crowd-pleasing formats and how to build them right.
Money design with luxe gold accents
Commission edible banknote prints on thin fondant for crisp edges. Add metallic gold trim and keep the flavor refined—red velvet or vanilla pairs well with the look.
Jack Daniel’s bottle or whiskey barrel
Use a professionally printed label and infuse sponge or syrup with whiskey. Chocolate or vanilla bases balance the spirit and make the form believable.
Classic Black Forest
Layer dark chocolate sponge with cherries and whipped cream. Finish with chocolate shavings and a touch of cherry liqueur for an adult-friendly twist.
Salted caramel drip showstopper
Build tall, smooth sides and pour warm salted caramel to create a glossy drip. Top with chocolate shards or candied nuts for texture and contrast.
Beer bucket with real bottles
Carve a bucket silhouette, texture “ice” using rock candy or isomalt, and slot chilled bottles on top just before serving for dramatic reveal.
Design tips: Favor masculine palettes—charcoal, matte black, deep green, or metallics.
Finish: Use fondant only for shapes and labels; leave most surfaces buttercream for flavor.
Stability: Dowel taller cakes and chill between steps so the drip and decorations set cleanly.
Milestone touch: Add a bold number topper to link the dessert to the life moment without clutter.
Themed Birthday Cakes He’ll Love
A themed centerpiece instantly ties the party to his passions and simplifies design choices. Focus on one clear idea and keep decorations purposeful so the concept reads well in photos and at a glance.
Air Jordan sneaker-inspired
Sculpt the shoe silhouette in dense sponge and cover panels with fondant to mimic leather grain. Use the classic red, white, and black palette and etch stitching lines for realism.
Sports team tribute
Work team colors into tiers or a single topper. Add a fondant jersey, a fondant ball, and a small name-and-number plaque to personalize without cluttering the design.
Music-themed with instruments or notes
Simple piano keys, note cutouts, or a guitar headstock topper deliver instant recognition. These clean elements keep the style stage-friendly and photo-ready.
Handyman tool design
Model hammers and wrenches from marzipan, dust with edible metallics, and lay them on a textured “workbench” top. If allergies are a concern, switch tool models to fondant to avoid nuts.
Practical tips: use templates for accurate shapes, choose a sturdy cake form for carved work, and keep hero elements at eye level on a tiered base.
Flavor Profiles That Win at Thirty
Pick flavors that balance nostalgia with grown-up depth to make the centerpiece both familiar and refined. Start with two reliable profiles and add one signature twist to keep the dessert memorable.
Chocolate, vanilla, red velvet, and salted caramel pairings
Rich chocolate layers pair beautifully with light vanilla buttercream or a touch of mascarpone to keep the taste satisfying without heaviness. A splash of espresso or whiskey deepens the chocolate note without masking it.
Red velvet brings a smooth cocoa hint and a striking color that pops in photos. Use classic cream cheese to add tang and preserve a soft velvet crumb.
Salted caramel offers a sweet-salty edge. Apply it as a glossy drip or fold it into buttercream for layered flavor that stays balanced on the slice.
Sponge integrity: choose recipes that slice cleanly and hold fillings for neat servings.
Nuts: add chopped nuts sparingly and always confirm allergies first.
Dairy & egg: fully cool layers before frosting to avoid melting or curdling and store safely.
For a classic adult twist, pair cherry and dark chocolate in a Black Forest-inspired option or add whiskey-soaked syrup to a chocolate cake for depth.
Number Cake Ideas for Milestone Birthdays
Build numbers from sheet cakes to get crisp edges and straightforward assembly that still looks custom. This method translates square and round layouts into a bold “3-0” silhouette that reads well on the table and in photos.
Number cake: turning 30 with bold “3-0” designs
Start with templates. Trace clean outlines on baked, chilled sheet layers and use a slightly dense sponge to reduce crumbs when cutting.
Alternate flavors between digits—chocolate for one number and vanilla for the other—so guests can pick a slice they love.
Frost in a crisp palette like black, white, and gold; keep the top flat so the drip-free transport is easy.
Use short dowels in taller sections to prevent sagging and choose a board a few inches larger than the silhouette for room to add decorations and candles.
Top with compact accents—initials or tiny hobby icons—so the numeral stays legible.
Whip a stable frosting (Swiss meringue or American buttercream) to hold up in warm rooms and label flavors at the display to speed service.
Note: if eggs are a concern, mark slices clearly and have cupcakes in matching colors to scale up servings without extra carving.
Drip Cake Styles That Elevate Any Party
A clean drip finish instantly lifts a simple sponge into a party-ready centerpiece.
A few technique rules keep the look glossy and controlled. Aim for tall, smooth sides and a slightly chilled base so the drip sets without pooling at the board.
Pick your medium to match mood and flavor: salted caramel gives a warm amber glow, chocolate ganache makes bold contrast, and white chocolate can be tinted to suit the palette.
“Test the temperature and thickness—too hot and it runs, too cool and it won’t flow.”
Do a spoon test on a chilled glass to nail drip timing.
Balance interiors: caramel with vanilla sponge; ganache with chocolate; fruit compotes to cut richness.
Keep dairy ratios steady in ganache so it firms but stays pourable for transport.
Finish with asymmetrical textures—shards, cookies, or candied nuts—and add a small metallic plaque to mark the milestone. Photograph from a slight angle so the drip, top textures, and height read clearly.
Medium
Look
Best paired sponge
Salted caramel
Warm amber, glossy
Vanilla
Chocolate ganache
Deep, dramatic
Chocolate
White chocolate
Custom color, clean
Fruit or vanilla
Funny Cakes for Men That Bring Laughter
A witty cake concept gets guests laughing before the first slice. Funny themes are great when you want relaxed energy and a memorable photo moment.
Mustache with textured frosting
Carve a round into two mirrored halves to form a moustache silhouette. Frost in deep chocolate and drag a fork through the top to mimic hair texture.
This simple design reads instantly and travels well when chilled. Add a tiny plaque with his name or a cheeky pun to personalize the gag.
Bacon & eggs breakfast pan
Frost a shallow round in matte black to suggest a skillet. Shape streaky bacon and sunny yolks from dyed fondant and place them on top for playful realism.
Pick a sturdy sponge so novelty shapes slice cleanly. Keep the humor light and crowd-friendly so the dessert still feels like the centerpiece of the day.
Golfing green with flags and fondant details
Cover the top in green fondant and press dimples into mini sugar balls. Stand a small flag on a fondant “cup” and add tiny clubs for a fun sports nod.
Consider a plain base tier in team colors if you need extra servings. Refrigerate novelty elements until set so edges hold during transport.
Tips: Use a satin-finish board and matching ribbon to elevate the playful design.
Pairings: Add themed candles—golf tees, mustache picks, or breakfast icons—to pull the look together.
Romantic Birthday Cakes for Boyfriends
Create a romantic centerpiece that tells your story with flavor and gesture. Choose a look that reads intimate at a dinner and tastes special on the plate.
Photo cake with edible image
Order a high-resolution edible photo of a favorite memory. Mount it on a smooth top of fondant or buttercream and frame with a neat piped border.
Confirm the image resolution and avoid dark, low-contrast photos so the print stays sharp on the day.
Model couple topper in marzipan
Sculpt mini figures in marzipan for a sweet, personalized topper. Add tiny outfit details and hair, then place on a clean base tier.
Insert a skewer for stability and consider boxing the topper for travel to the venue.
Heart-shaped red velvet “love” cake
Bake in a heart pan or trim a round into a heart. Finish with silky cream cheese frosting and candy hearts for playful, classic decorations.
Keep colors timeless—cream, deep red, and small metallic accents—and add a slim number behind the figurines so the milestone reads without stealing focus.
Option
Time
Best finish
Edible photo
Low (order)
Fondant or smooth buttercream
Marzipan couple
High (sculpting)
Matte fondant base
Heart red velvet
Medium
Cream cheese frosting
21st Birthday Cakes That Still Inspire at 30
Retro, candy-forward builds stay fun when you refine the form and tone down excess sweetness. These three classics translate well to an adult event with tidy edges, smarter plating, and a small milestone topper.
Rocky road riot
Two chocolate layers sandwich a marshmallow-and-nuts ganache. Sprinkle extra mix on top for texture and nostalgia.
Maltesers-covered sponge
Frost a rich chocolate sponge with ganache, then tile the top with Maltesers for a high-crunch finish guests love. For a quicker option, place a ring of Maltesers around a smooth top.
Cherry Ripe brownie cake
Build a dense brownie base with coconut, dark chocolate, and cherry. Crown with sliced Cherry Ripe bars and serve slightly warmed for gooey slices.
Update the look with tidier edges, minimal piping, and a modern board to make these 21st birthday favorites feel grown-up.
Consider a restrained drip cake accent—salted caramel or thin ganache—for visual interest without extra sweetness.
Allergy note: confirm nuts and offer nut-free cupcakes as an alternative.
Chill between steps, add a central dowel for taller builds, and finish with a small “30” topper to bridge nostalgia with the present milestone.
40th Birthday Cakes He’ll Appreciate
A well-executed beer bucket or number build turns a dessert into a party moment.
The beer-themed ice bucket is a showstopper with a simple reveal. Carve a bucket silhouette from stacked layers, texture the sides, and add clear “ice” made from isomalt or pulled sugar.
Insert chilled bottles at the last minute so labels stay dry. Pair flavors to the pour: citrus sponge suits a light lager, while a chocolate-forward sponge works with stout notes.
Beer-themed ice bucket cake
Use a sturdy board and dowels if the bucket is tall. Cool layers thoroughly between steps to prevent slippage.
Line the rim with chocolate shards for a glass-like edge and add minimal piping. A small plaque with a short message keeps the decorations modern and photogenic.
Number 40 cake with complementary flavors
Build a “40” by cutting a ring from a round for the zero and using strips from a square to form the four. Frost in cohesive team or favorite colors so the number reads cleanly on the table.
Keep decorations bold but simple—clean stripes, a logo plaque, or metallic accents.
Choose candles that complement the palette and place them off-center to protect labels and toppings.
Confirm serving sizes: carved shapes reduce portions, so plan a sheet cake backup if needed.
Design tips: Present the build on a wood-look board to add a pub vibe and great photos on the day. A restrained approach to decorations highlights the silhouette and the flavor inside.
50th Birthday Cakes for Future Milestones
Turning fifty calls for a dessert that reads golden in photos and slices neat on the plate. Choose a clear form and palette so the moment feels timeless and easy to serve.
Number 50 with metallic gold accents
Number builds give a crisp silhouette. Cut clean digits from chilled sheet layers, add dowels, and finish with metallic gold leaf or painted accents so the number pops without clutter.
Pineapple upside-down retro classic
Caramelized rings and cherries make a showy top that needs no extra frosting. This form is perfect when you want a nostalgic look and simple plating on the day.
Funfetti bundt with vanilla buttercream
A quick bundt dotted with sprinkles in the crumb gets a simple vanilla buttercream or glaze. It’s colorful, fast to make, and pleasing to a crowd.
Tres leches: ultra‑moist vanilla sponge
Soak a light vanilla sponge with whole, condensed, and evaporated milk for an indulgent, dairy-rich finish. Chill to set so slices come out clean and satisfy guests who prefer a softer crumb.
Keep the palette classic—gold, ivory, and black—for lasting photos.
Pair a number cake with a pan-bake backup to scale servings without complex design work.
For chocolate fans, choose a dark chocolate base and add gold leaf for contrast.
Stabilize travel with dowels and chill time, and present on a textured board or gold runner.
Add a short, gracious message plaque that complements the metallic accents instead of competing with them.
30th Birthday Cake for Him: Design, Style, and Decoration Tips
Small details—like a textured panel or a metallic edge—change a simple sponge into a showpiece. Use a simple plan so the final look feels intentional and photo-ready.
Fondant vs buttercream: when to choose each
Fondant is best for crisp edges, sculpted shapes, and printed logos. Choose it when you need precise graphics or realistic toppers.
Buttercream wins on taste and ease. Pick buttercream when flavor and soft finishes are the priority, or when time is tight.
Using metallics, textures, and toppers for impact
Combine both: a buttercream base plus fondant plaques gives both flavor and sharp graphics. Add metallics sparingly—gold leaf or luster dust on edges reads luxe without shouting.
Limit colors to two or three plus a neutral so the design stays cohesive.
Keep toppers proportional: compact numbers, initials, or a tiny hobby icon work best.
Box delicate toppers and assemble onsite for safe transport.
Element
When to use
Visual effect
Fondant plaques
Logos, labels, sculpted bits
Sharp, graphic
Buttercream base
Flavor focus, softer look
Textured, appetizing
Metallic accents
Finish touches
Polished, photo-friendly
Dietary and Ingredient Notes
Start by checking guest needs so flavors and toppings don’t become a hazard. Confirm allergens early—ask about nuts, egg, and dairy—so you can plan recipes and decorations that keep everyone safe.
Managing nuts, egg, and dairy considerations
Keep nuts optional. Place chopped nuts on a reserved section or offer a nut-free side cake that matches the main design. That gives guests choice without remaking the whole dessert.
For egg-free bakes, use tested swaps such as flax eggs, applesauce, or commercial replacers. Weigh ingredients and try a mini test bake first to check structure and crumb.
Sponge, drip, and fondant choices for dietary needs
Choose a sturdy sponge that tolerates substitutions. Replace dairy with plant butter or coconut cream in buttercream and sponge. Fondant can be dairy-free—verify labels and skip marzipan if there’s a nut allergy.
Adapt drips by using dairy-free cream or a glossy sugar syrup and test the flow on a chilled cupcake before pouring the main cake. Prevent cross-contact with clean tools, separate storage, and clear display labels so guests know what contains dairy or nuts.
DIY or Pro-Made: How to Choose
Decide early whether you want a hands-on project or a pro-made centerpiece—each path saves different kinds of stress.
Start by checking time, tools, and the final look you want. Simple silhouettes and buttercream finishes are friendly to home bakers. More complex sculpted forms or precise printed labels often need pro skill and equipment.
Time, tools, and skill assessment
Gauge your timeline and kit before committing. Carved shapes and sharp edges need chill time, a serrated knife, a turntable, and scrapers to hold a clean cake form.
If you are short on time, choose a basic form and a strong topper. Tall, heavy builds are safer from a bakery, especially on a hot day.
When edible photos or labels make sense
Edible printing pays off when logos, labels, or a couple photo must look exact. Send high-resolution files to the bakery so prints stay sharp.
Blending approaches works well: order a printed label or photo and apply it to your homemade base to get pro detail without the full cost of a sculpted order.
Budget smart: a simple base with one standout topper saves money and still impresses.
DIY tips: bake ahead, freeze layers, and assemble over two days so the finish is polished on the big day.
Pack a kit: backup frosting and a small spatula for touch-ups after transport or before photos.
Ask pros about portions, delivery windows, and how they protect delicate decorations.
Approach
Best when
What to expect
DIY
Simple silhouettes, buttercream finishes
Lower cost, needs time and chill steps
Pro-made
Sculpted forms, edible prints, complex labels
Higher cost, crisp detail, delivery options
Hybrid
Printed photo or label on homemade base
Pro detail with personal touch and better budget control
“If precision matters, pay for the print. If flavor and speed matter, bake at home.”
Styling the Cake for the Party
Set the scene around the centerpiece so every photo looks intentional and pulled together. A simple, themed display makes the dessert read like part of the room and not an afterthought.
Pairing decorations, plates, and candles
Build a mini vignette that matches the main design. Use a wooden board for beer themes, stadium green for sports, or a monochrome backdrop for sneakers.
Choose candles that suit the palette and scale. Slim metallic tapers or a compact number keep the focus on the design. Arrange plates, napkins, and forks in one color family so photos look cohesive.
Photo-ready presentation and cutting strategy
Elevate the centerpiece on a stand and clear clutter to create a clean photo zone.
Place the display near soft daylight or add warm string lights for flattering shots.
Pre-score slices at the back, cut number edges first, and move inward to keep shapes neat.
Keep a damp towel, serving knife, and extra plates handy. Assign one helper to handle candles and music on the day.
Small staging choices make big visual impact and help service run smoothly. Thoughtful styling keeps cakes looking great and guests smiling.
Conclusion
,
Conclusion
Finish strong. Choose a design that matches your time and skill so the centerpiece feels intentional. Pick flavors that travel well and a look you can finish cleanly. A simple, bold design reads modern and photographs better on the day.
Whether you sketch a luxe money theme, a whiskey-bottle idea, or a classic Black Forest, align form and flavor. Note what worked at his 21st birthday and save ideas for future 50th birthday cakes so traditions grow with his life.
Keep guests in mind: clear allergen labels, neat slices, and a stable board make service smooth. Small touches—a neat number, a heart message, or a metallic edge—add personality without extra stress.
Celebrate with confidence. The right plan and a little care mean the cake looks great, tastes even better, and becomes a memory you’ll return to at future birthdays.
FAQ
What size number cake should I order to feed a party of 20?
For about 20 guests, choose a medium number cake formed from two 8–9 inch sponge tiers or a single large sheet cut into a “3” and “0” shape. That gives roughly 18–24 servings depending on slice thickness. If you expect hungry guests, upgrade to deeper layers or add a small coordinating drip or cupcake tower.
Which flavors work best for milestone designs like a metallic-number or money cake?
Crowd-pleasers include chocolate ganache, vanilla buttercream, red velvet with cream cheese, and salted caramel. Chocolate and salted caramel pair well with richer decorations like fondant metallics or gold leaf, while vanilla and red velvet show off colorful icings and photo-print toppers.
Can I get a number cake with dietary substitutions for nuts, egg, or dairy allergies?
Yes. Many bakeries offer egg-free, dairy-free, and nut-free sponge and frosting options. Choose a dairy-free buttercream or ganache and confirm cross-contamination policies. For sponge alternatives, look for vegan or gluten-aware recipes that still hold up under fondant or drip finishes.
Should I pick fondant or buttercream for a sculpted design like a sneaker or tool cake?
Use fondant when you need sharp edges, smooth surfaces, or delicate sculpted details such as fondant tools or shoe seams. Buttercream works great for textured finishes, drips, and softer, rustic styles. Combine both: a crumb coat and buttercream under a fondant topper gives structure plus flavor.
How far in advance should I order a custom design like a whiskey-barrel or beer bucket cake?
Order custom cakes at least 7–10 days ahead for simpler designs and 2–3 weeks for complex sculpted pieces, edible photo prints, or special toppers. Busy seasons or weekend parties may require earlier booking, so contact your bakery as soon as the date is set.
What are drip cake styles and how do they affect taste and presentation?
Drip cakes feature a glossy ganache or caramel that cascades down the sides. They add visual drama and an extra flavor layer—chocolate, salted caramel, or berry glazes are common. Drips pair best with sturdy sponges like chocolate, red velvet, or dense vanilla that won’t sag under the weight.
Are edible photo cakes durable enough to ship or travel to a venue?
Edible images on frosting sheets are durable for short trips if kept cool and flat. For longer travel, deliver in a refrigerated, level box and avoid direct heat. Consider printing photos on fondant or edible wafer paper, which resist moisture differently—ask your baker which option suits your route and climate.
How can I incorporate a favorite sport team or music theme without using too many colors?
Use the team or band’s primary accent colors sparingly—think fondant logos, piped borders, and a few themed toppers. Neutral bases like dark chocolate, deep navy buttercream, or textured fondant let the small, high-impact details shine without overwhelming the design.
Is it better to DIY a novelty cake like bacon-and-eggs or hire a pro?
DIY works if you have time and basic tools for shaping and fondant work; it’s great for playful, low-stakes cakes. Hire a professional for complex sculpting, multi-flavor layers, or event-ready presentation. Pros save time and reduce stress while ensuring stable structures and polished finishes.
What topping and topper ideas make a romantic red velvet or heart-shaped design feel special?
Edible photo prints, fresh berries, gold leaf accents, and delicate fondant roses elevate romance. For a personal touch, add a small model couple topper in marzipan or an elegant script message in chocolate. Keep portions small so the decoration complements the flavor instead of overpowering it.
How do I match candles, plates, and props to a design cake for a cohesive table display?
Choose one accent color and one texture—metallics, matte black, or natural wood—and repeat them across plates, napkins, candles, and signage. Coordinate heights with cake stands and place a photo-ready backdrop behind the cake to frame the focal point. Simple repetition creates a polished look.
Can I combine two themes, like a whiskey-barrel number cake with a sports-team topper?
Yes. Blend themes by keeping the base design neutral—woodgrain fondant or brown buttercream for a whiskey barrel—and add a compact team topper or edible logo. Maintain consistent colors and limit decorative clutter so both concepts read clearly without competing.
What is a good serving strategy for number cakes to look photo-ready while feeding many guests?
Pre-mark cutting guides on the cake board and slice from top to bottom, keeping slices uniform. Remove any fragile toppers before cutting and have a warm, sharp knife for clean edges. Arrange plated slices on a single platter for easy distribution and a neat presentation for photos.
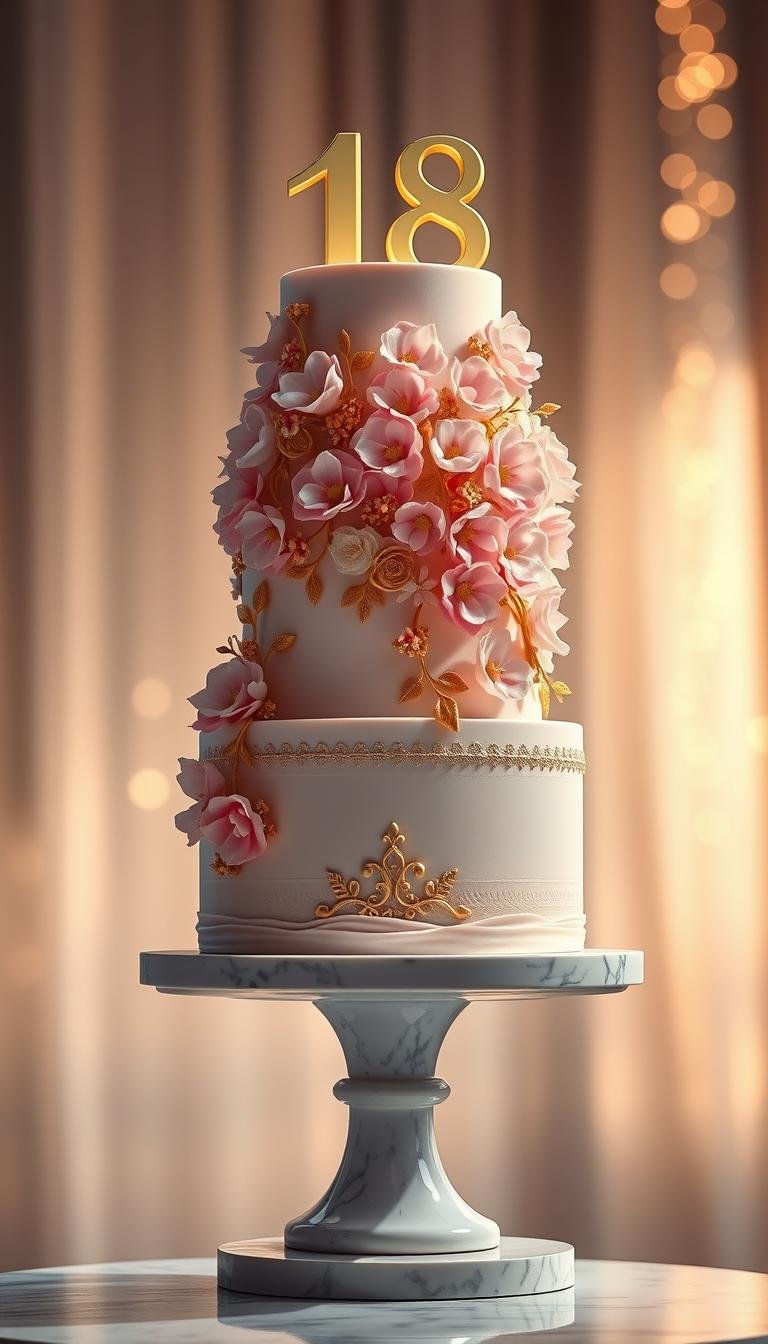
Surprising fact: nearly 70% of hosts say the dessert becomes the party’s most photographed moment, so the right centerpiece matters more than you might think.This Website contains affiliate links. That means I may earn a small commission if you purchase through my links, at no extra cost to you. Turning 18 marks a big step…
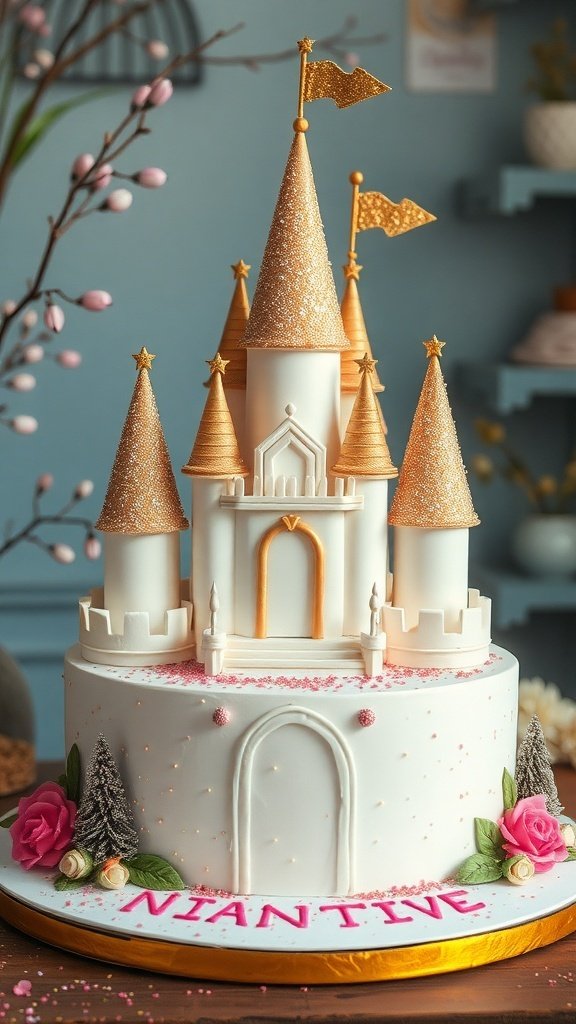
Aesthetic cake designs bring a delightful twist to any celebration, combining creativity with the art of baking. From dreamy pastels to bold patterns, these cakes serve as stunning centerpieces that not only taste great but also tantalize the eyes. Dive into a world where flavors meet visuals, and let your imagination run wild with unique…
Creative birthday cakes are the stars of any celebration, blending flavors and designs that wow guests of all ages. From whimsical animal shapes to intricate themed designs, these cakes transform the traditional treat into a canvas for imagination and fun.This Website contains affiliate links. That means I may earn a small commission if you purchase…
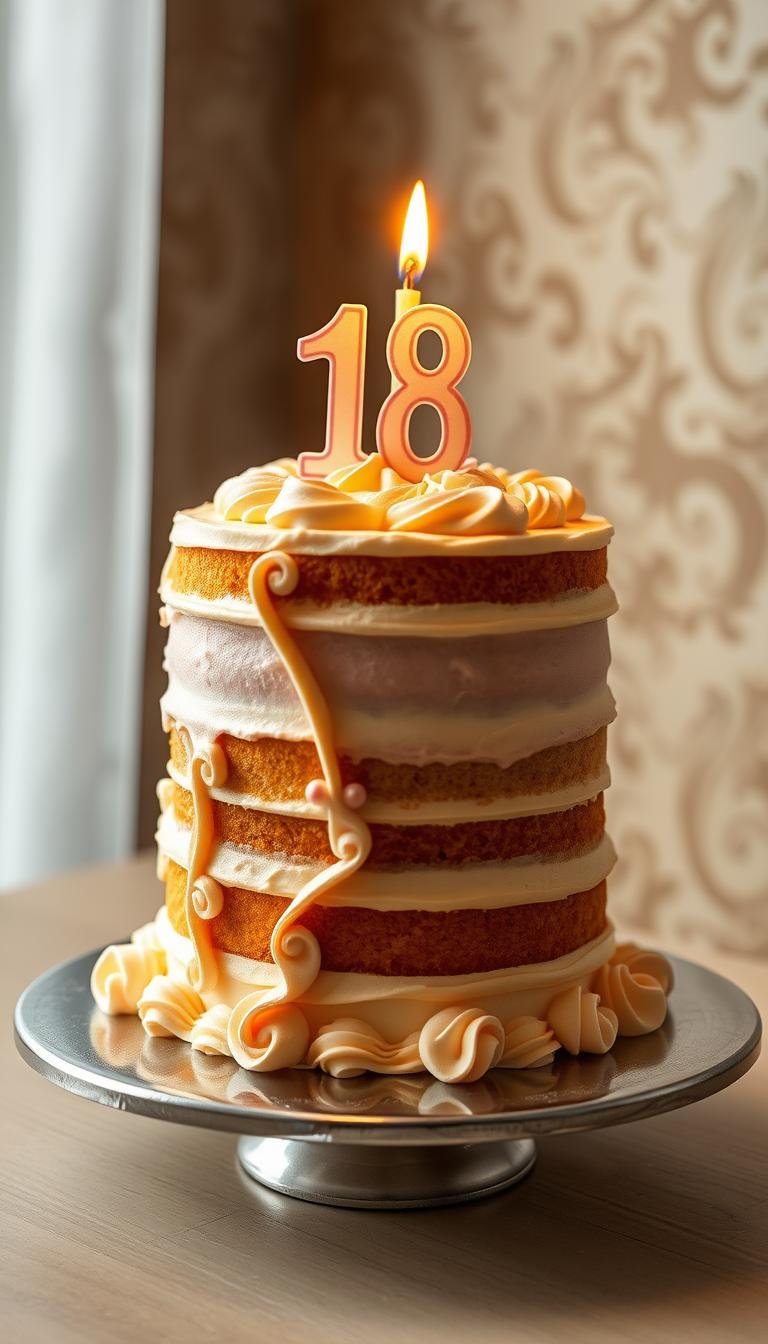
Surprising fact: over 40% of premium milestone orders opt for express or same-day delivery to guarantee freshness and timing.This Website contains affiliate links. That means I may earn a small commission if you purchase through my links, at no extra cost to you. This guide helps you pick a standout dessert for a major celebration….
Surprising fact: 68% of gift buyers say the dessert steals the show at celebrations, making the right choice a memory maker.This Website contains affiliate links. That means I may earn a small commission if you purchase through my links, at no extra cost to you. Make her day unforgettable with a show-stopping centerpiece that pairs…
Surprising fact: nearly half of milestone gatherings center on a single dessert that guests remember most.This Website contains affiliate links. That means I may earn a small commission if you purchase through my links, at no extra cost to you. Your 30th birthday marks a clear shift between youthful years and proper grown-up life. Whether…