Homemade Bread & Rolls: Warm, Fresh-Baked Goodness
Here’s a surprise: the average American eats more than 50 pounds of bread each year, yet the most memorable loaves often come from a home oven. This guide turns that fact into comfort baking you can taste—fresh-baked bread and homemade rolls that rise high, slice clean, and make every meal feel cozy.
This Website contains affiliate links. That means I may earn a small commission if you purchase through my links, at no extra cost to you.
Designed for kitchens across the United States, this friendly roadmap covers beginner bread baking without stress. You’ll find easy bread recipes that work with American bread recipes and common pantry brands like King Arthur Flour and Gold Medal. Expect clear steps, precise temperatures, and timelines that fit busy days.
We start with fundamentals, then move to hands-on skills you can trust. You’ll learn ingredient smarts, yeast science, and tool tips, followed by mixing, kneading, proofing, shaping, scoring, and baking at home. From a soft white loaf to buttery dinner rolls, and from whole wheat to gluten-free options, you’ll gain a method-first approach that delivers results.
Whether you crave chewy crust or pillowy crumb, this series sets you up for success with Homemade Bread & Rolls. By the end, you’ll bake like a pro and serve fresh-baked bread and homemade rolls that feel special, taste amazing, and fit real life.
Key Takeaways
- Approachable steps make beginner bread baking feel simple and repeatable.
- Clear cues—time, temperature, and texture—guide every stage of baking at home.
- Easy bread recipes scale from weekday loaves to party-ready homemade rolls.
- Ingredient and tool insights help you bake consistently with American bread recipes.
- The guide expands to whole wheat, sourdough, gluten-free, and flavored variations.
- Practical storage tips keep loaves fresh and ready for quick reheats.
Introduction to Fresh-Baked Comfort at Home
Pulling a warm loaf from your own oven is more than a task—it’s a small ritual that makes a cozy kitchen feel alive. This is comfort food baking you can taste and hear, from the soft thud of dough on the counter to the crackle of cooling crust. With simple tools, you can create bakery-style at home results that fit busy days and slow weekends alike.
Why baking at home feels special
Hands in dough calm the mind and wake the senses. Kneading links motion to purpose, while quiet proofing teaches patience. The homemade bread aroma turns a room into a cozy kitchen and draws people in, making bakery-style at home bread part of daily life.
The aroma, texture, and comfort factor
That deep homemade bread aroma blooms as the crust browns, building toasty notes that store slices rarely match. Texture seals the deal: a tender crumb for sandwiches, pillowy rolls for dinner, and a crisp shell for rustic rounds. These cues define comfort food baking and bring bakery-style at home joy to the table.
How this guide is structured for all skill levels
This guide moves from beginner to advanced baking so you can start where you are and grow with each bake. We outline ingredient roles, yeast care, and shaping flow, then add steam, timing, and whole-grain options. You’ll find clear steps for a cozy kitchen routine, whether you mix by hand or with a stand mixer.
| Focus | What You’ll Learn | Home Payoff | Best For |
|---|---|---|---|
| Foundations | Flour choices, salt balance, and basic yeast handling | Reliable rise with clean flavor and light crumb | New bakers and those revisiting basics |
| Technique | Kneading, stretch-and-fold, shaping, and scoring | Artisan crust and even structure, bakery-style at home | Home cooks refining workflow |
| Timing & Steam | Proof cues, oven heat, and steam methods | Better oven spring and a crisp crust | Weeknight planners and weekend projects |
| Expansions | Whole grain, gluten-free paths, and sourdough care | Flavor depth with beginner to advanced baking pathways | Curious bakers exploring new styles |
Essential Ingredients for Bread and Rolls
Great dough starts with smart choices. Weigh ingredients with a digital scale for consistency, and think about texture, rise, and flavor before you mix. The balance of flour, yeast, liquid, fat, sweetener, and salt shapes every loaf and roll.
Flour types: all-purpose, bread flour, whole wheat
The core decision is bread flour vs all-purpose. Bread flour, like King Arthur Baking Company’s 12–13% protein option, builds strong gluten for taller loaves and chewy crusts. All-purpose, at about 10–11.7% protein, bakes up soft rolls and tender crumb.
Whole wheat brings nutty depth and fiber. Bran and germ can shorten gluten strands, so plan for higher whole wheat hydration and, when needed, a preferment to boost strength and flavor.
| Flour | Typical Protein | Best For | Hydration Notes | Texture Outcome |
|---|---|---|---|---|
| Bread Flour (e.g., King Arthur) | 12–13% | Sandwich loaves, pizza, crusty rolls | Handles higher water without slumping | Chewy, strong structure |
| All-Purpose | 10–11.7% | Dinner rolls, buns, soft loaves | Moderate water for balanced dough | Tender, fine crumb |
| Whole Wheat | Varies | Hearty loaves, multigrain | Increase whole wheat hydration; consider soakers | Robust, flavorful crumb |
Yeast varieties: active dry, instant, fresh
Know the difference in active dry vs instant yeast to control timing. Instant yeast, such as SAF Instant, mixes right into flour and takes off fast. Active dry yeast prefers blooming in warm liquid near 105–110°F to confirm it’s alive.
Fresh cake yeast offers a delicate aroma and quick action but needs refrigeration and has a shorter shelf life. Choose based on schedule, flavor goals, and storage habits.
Liquids, fats, and sweeteners: what each does
Water delivers clean flavor and crisp crust. Milk softens, adds lactose for browning, and gives a plush crumb. Eggs enrich dough with color and moisture.
Butter, olive oil, or neutral oils tenderize and help bread stay fresh. Sugar, honey, or maple syrup feed yeast, add gentle sweetness, and support caramel color without overpowering the grain.
Salt and add-ins: herbs, seeds, nuts, and cheese
The role of salt in bread is essential: it strengthens gluten, moderates fermentation, and deepens flavor. Aim for about 1.8–2.2% of flour weight to find balance without muting rise.
Fold in bread add-ins—like rosemary, thyme, garlic, cheddar, parmesan, sesame, sunflower, flax, walnuts, or pecans—after initial gluten forms to prevent tearing. This timing preserves structure while boosting character.
- Plan flours: decide on bread flour vs all-purpose based on chew and height.
- Hydrate smart: adjust for whole wheat hydration to keep dough supple.
- Match yeast to tempo: pick active dry vs instant yeast for your schedule.
- Balance flavor: mind the role of salt in bread while layering bread add-ins.
Understanding Yeast and Fermentation
Great bread starts with a living engine. During yeast fermentation, Saccharomyces cerevisiae eats sugars and releases carbon dioxide and ethanol. The gas stretches gluten so the dough rises, while flavor builds with time and balance.
How yeast works and proofing basics
To check activity when proofing bread dough, dissolve active dry yeast in warm liquid at about 105–110°F with a pinch of sugar. Look for a creamy foam within 5–10 minutes. Instant yeast from brands like Red Star or Saf-instant can go straight into the flour, though a quick slurry test still offers peace of mind.
As gas fills the dough, the gluten network traps bubbles. Keep the mixture smooth, not tight or soupy, so the rise is even and the crumb stays tender.
Temperature, hydration, and fermentation time
Dough temperature guides pace and flavor. Aim for roughly 75–78°F with commercial yeast, 76–80°F for enriched rolls, and 76–78°F for sourdough bulk fermentation. Warmer dough moves faster but can tip into trouble; cooler dough slows activity and deepens taste.
Hydration shapes texture. Around 60–65% gives a fine, tight crumb for sandwich loaves. Near 70–78% supports a more open artisan structure. Time is flexible: lean doughs may bulk 1–2.5 hours at room temp, while enriched doughs usually need a bit more.
Recognizing proper rise and avoiding overproofing
Watch for a smooth, domed surface and tiny bubbles around the edge of the bowl. The finger-dent test helps: press gently; if the dent slowly springs back, the dough is ready. If it stays put, those are classic overproofing signs.
For final shaping, aim for steady yeast fermentation and an even dough temperature. Stop bulk fermentation when volume has roughly doubled, then shape and proof just until the dough looks lively, not slack, for strong oven spring.
Tools You’ll Love for Better Baking
The right kit turns good dough into great bread. Build your bench with the best tools for bread baking, and every batch will feel easier and more consistent. Accuracy, heat, and gentle handling do the heavy lifting for you.
Mixing bowls, scales, and thermometers
Choose sturdy, nesting mixing bowls that resist tipping and make dough work clean and simple. A reliable digital kitchen scale keeps your formulas precise, so hydration and salt stay on target every time.
An instant-read thermometer like the ThermoWorks Thermapen or ThermoPop helps track dough temperature and check doneness. Lean loaves usually finish at 205–210°F; enriched loaves at 190–200°F. That quick reading guards texture and crumb.
Dutch ovens, sheet pans, and loaf tins
For dramatic oven spring and crackling crust, preheat a cast-iron Dutch oven from Lodge or Le Creuset. This setup traps steam, making Dutch oven bread shine with a glossy, blistered surface.
Heavy-gauge sheet pans lined with parchment or silicone mats are ideal for rolls and braids. For sandwich staples, use 8.5-by-4.5-inch or 9-by-5-inch loaf pans to guide shape and even bake.
Banneton baskets, scoring tools, and razor blades
A banneton for bread supports a tall rise and defined pattern on boules and batards. Line the basket, dust with rice flour, and enjoy clean releases and tidy edges.
Score with a lame or a sharp double-edge razor blade to set expansion paths. Confident slashes improve oven spring and add style, especially when paired with the best tools for bread baking for repeatable, artisan results.
- Bench scraper for tidy shaping and clean counters
- Dough whisk for quick mixing without overworking
- Spray bottle for light steam before the bake
- Cooling rack to protect crust texture
Pair these essentials with your digital kitchen scale and instant-read thermometer, and your Dutch oven bread routine becomes second nature—from mix to bake to slice.
Dough Mixing and Kneading Techniques
Great bread starts with smart handling. Whether you’re kneading dough by hand or using a stand mixer dough hook, the goal is the same: develop strong, elastic gluten without overheating or tearing the dough. Keep movements steady, keep the dough cool, and trust simple tests to guide progress.
Hand kneading vs. stand mixer
Hand work gives instant feedback. Use a push-fold-turn rhythm for 8–10 minutes on lean doughs until the surface turns smooth and slightly tacky. If it smears, rest the dough to relax it.
A KitchenAid with a stand mixer dough hook speeds things up. Mix on low to medium-low so friction heat stays down. Pause if the bowl feels warm, and scrape the sides to keep gluten strands even.
Autolyse and stretch-and-fold method
The autolyse method is simple: combine flour and water, then rest 20–60 minutes. This hydrates starch, jump-starts gluten, and boosts extensibility. Add salt—and for enriched doughs, softened butter—after the rest so structure forms first.
For wet doughs, use a gentle stretch and fold during bulk fermentation. Every 20–30 minutes, lift the edge, stretch it up, and fold it over itself, rotating the bowl. You’ll build strength without intense mixing, and the dough will stand taller between rounds.
Windowpane test for gluten development
Use the windowpane test to judge readiness. Pinch off a small piece and ease it outward. If it stretches to a thin, translucent film without tearing, you’re set to shape. If it rips, rest the dough and try again.
| Technique | When to Use | Key Cues | Common Pitfalls | Pro Tip |
|---|---|---|---|---|
| Hand Kneading | Lean doughs, small batches | Smooth, elastic, slightly tacky feel | Overflouring; tearing tight dough | Rest 5 minutes if dough fights back; resume gently |
| Stand Mixer Dough Hook | Time-saving, medium to large batches | Clean bowl sides; cohesive, springy mass | Overheating on high speed | Mix on low–medium-low; pause if dough warms |
| Autolyse Method | Better extensibility and flavor | Softer feel; easier shaping | Adding salt/fat too soon | Add salt and butter after the rest to aid gluten |
| Stretch and Fold | High-hydration doughs | Dough stands taller between sets | Skipping rests; rough handling | Do 3–4 rounds, 20–30 minutes apart |
| Windowpane Test | Assess gluten development | Thin, translucent film without tears | Testing too early or when dough is cold | Warm to room temp; let dough relax before testing |
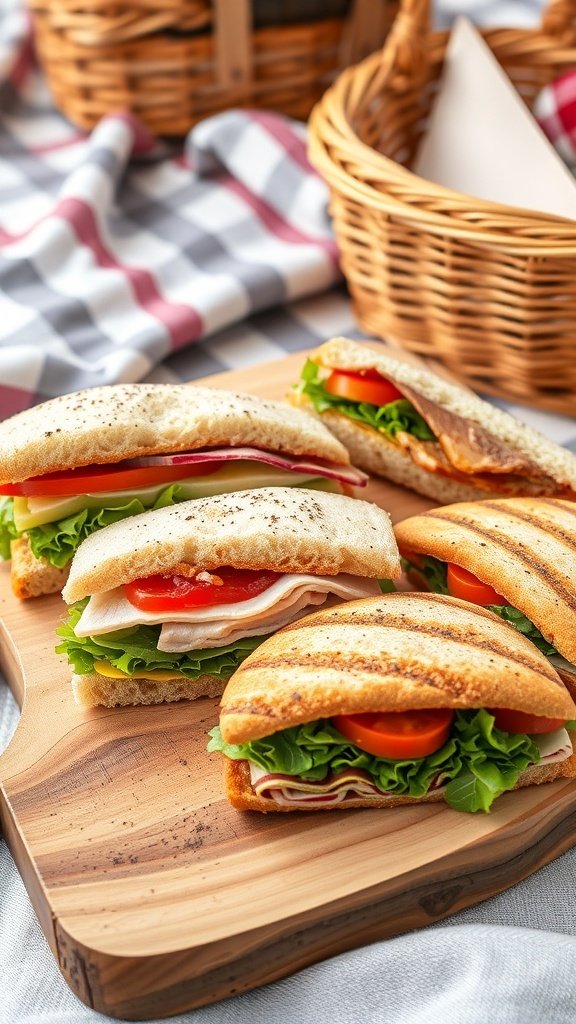
Homemade Bread & Rolls
Nothing beats a warm loaf on the counter and a pan of soft rolls ready for dinner. This quick guide covers a white sandwich bread recipe, a tender dinner rolls recipe, and crowd-pleasing pull-apart rolls. Expect practical steps and options that fit busy days, perfect for weeknight bread and smart make-ahead dough planning.
Classic white sandwich loaf
For a reliable white sandwich bread recipe, use bread flour or sturdy all-purpose, instant yeast, milk or water, a touch of sugar, and butter or oil. Mix and knead to medium gluten, then let the dough rise until doubled. Shape into a tight loaf and proof until the crown sits about an inch above the pan.
Bake at 350–375°F until the center hits 195–200°F. You’ll get a soft crumb and a light golden crust that slices cleanly for toast and school lunches. This loaf also freezes well, which helps with weeknight bread planning.
Buttery dinner rolls
Choose a dinner rolls recipe enriched with milk, sugar, and butter; an egg adds extra color and tenderness. After the first rise, divide into 12–16 pieces for a 9-by-13-inch pan and arrange evenly. Proof until puffy and jiggly, then bake at 350°F to 190–195°F inside.
Brush with melted butter while hot for shine and softness. The flavor stays mild and buttery, pairing with roast chicken, chili, or a simple salad.
Soft pull-apart rolls for gatherings
To make pull-apart rolls, nest dough balls close so the sides touch as they rise. The contact points keep the edges tender, while the tops brown evenly. This format is ideal for holidays, potlucks, and game days.
Serve warm so guests can tear and share. Add flaky salt or sesame seeds before baking to boost aroma and appeal.
Time-saving strategies for busy bakers
For speed and flexibility, lean on instant yeast and a warm proofing zone of 75–80°F. Shape loaves or rolls, then refrigerate covered for 8–16 hours; this make-ahead dough step deepens flavor and frees your schedule. It also ensures fresh weeknight bread without a rush.
Freeze shaped rolls on a tray, bag them, and bake from thawed or slightly chilled. This method supports both a dependable dinner rolls recipe and a go-to white sandwich bread recipe, while keeping pull-apart rolls within easy reach for last-minute plans.
Mastering Proofing, Shaping, and Scoring
Great loaves and rolls start with timing and touch. Understanding bulk vs final proof, building surface tension while shaping bread and shaping rolls, and scoring bread with intent sets you up for bold oven spring and a crisp, tender crust.
Bulk fermentation vs. final proof
Bulk fermentation is the first rise. The dough should look smoother, feel airy, and expand 50–100%. This is where flavor and strength grow.
Final proof follows shaping. Use the finger-dent test: a gentle press should spring back slowly, leaving a light mark. The dough should be slightly jiggly, ready for oven spring.
Shaping boules, batards, knots, and crescents
For a boule, pre-shape round and rest 15–20 minutes. Create surface tension by dragging on an unfloured bench until the skin feels taut. This helps oven spring and keeps form.
For a batard, pre-shape a log, fold sides inward, then roll into a tight oval. Keep seams sealed and placed down in the banneton or on the pan.
For knots and crescents, roll even strands or triangles. Tie or roll with steady pressure, placing the seam side down. Consistent tension prevents spreading when shaping rolls.
Scoring patterns for oven spring and style
Score just before loading. Use a sharp lame at a shallow angle for “ears” (about 30°). A single long slash suits batards; a cross works well for boules. Wheat stalks add style, while center cuts keep rolls tidy.
Clean, confident lines direct expansion and protect the crust. Thoughtful scoring bread supports lift, guides shape, and enhances contrast.
| Stage | Goal | Key Signs | Action Tips | Impact on Oven Spring |
|---|---|---|---|---|
| Bulk fermentation | Develop flavor and strength | 50–100% expansion, smooth, aerated | Stop before overproofing; dough should feel buoyant | Proper strength yields taller rise |
| Final proof | Set structure for the oven | Slow rebound on finger-dent, slight jiggle | Load when dough is just ripe, not slack | Peak timing maximizes lift |
| Shaping bread | Create tension and form | Taut surface, sealed seams | Drag on unfloured bench; rest between steps | Better direction and volume |
| Shaping rolls | Even size and texture | Uniform strands or balls, seam down | Use gentle, even pressure; avoid excess flour | Neat rise with soft crumb |
| Scoring bread | Control expansion and style | Shallow, confident cuts | 30° angle for ears; score right before baking | Directed bloom and crisp crust |
Perfect Baking: Ovens, Steam, and Doneness
Great loaves start with heat you can trust and moisture you can control. To build artisan crust at home, pair strong preheat with brief, focused steam. Then finish dry for color and crackle you can hear.
Aim for consistency: track oven behavior, note rack height, and adjust if using convection. For convection, reduce the set temperature by about 25°F and watch for faster browning.
Using a Dutch oven for artisan crust
The Dutch oven bread method traps steam right where you need it. Preheat a cast-iron pot and lid at 450–500°F for 30–45 minutes. Lift shaped dough on parchment, lower it in, cover for the first stage to boost oven spring, then uncover to brown and crisp.
This approach delivers an artisan crust at home with a glossy sheen and deep color. It also evens out weak spots in many ranges from brands like GE, Whirlpool, and KitchenAid.
Creating steam with trays or ice cubes
For open bakes, create steam in home oven setups with a preheated metal tray or a pan filled with lava rocks on a lower rack. At loading, pour in hot water or toss in a few ice cubes. Keep the steam going for 10–15 minutes, then vent for a dry finish.
Steam delays crust set, allowing maximum oven spring and a shiny surface. Switch to dry heat after the rise to lock in structure and deepen color.
Internal temperature checks and crumb cues
Use a reliable digital thermometer from ThermoWorks or OXO to confirm internal bread temperature. Lean loaves usually read 205–210°F; enriched loaves and rolls land at 190–200°F. Check in the center of the loaf after the crust looks ready.
Crust should feel firm and well browned. The bottom should sound hollow when tapped. Let loaves cool at least 1 hour so the crumb sets and stays sliceable.
| Bake Style | Heat & Steam Plan | Target Internal Bread Temperature | Visual & Tactile Cues | Notes |
|---|---|---|---|---|
| Dutch oven bread method (lean) | Preheat 450–500°F; 30–45 min. Bake covered 20–25 min, then uncover to finish. | 205–210°F | Bold caramel color, crisp ears, hollow tap on bottom. | Delivers artisan crust at home with reliable oven spring. |
| Open bake with steam in home oven | Preheat tray or lava rocks; add hot water or ice at load; steam 10–15 min, then vent. | 205–210°F (lean) | Glossy surface early, then dry, crackly finish. | Watch for faster browning on convection; reduce temp 25°F. |
| Enriched loaves and rolls | Moderate steam early; finish dry for color without scorching sugars. | 190–200°F | Even golden crust, tender crumb that resists squashing. | Allow full cooling to prevent gumminess and tearing. |
Soft Rolls for Weeknight Dinners
These easy dinner rolls fit right into weeknight baking. Use instant yeast and warm milk at about 110°F for a quick start, plus butter and a touch of sugar for tender crumb and rich color. Knead until smooth and elastic, then let the dough rest in a warm spot until it’s almost doubled.
Shape into 12–15 tight rounds and tuck them into a buttered 9-by-13-inch pan. Let the rolls grow puffy and nearly touching. Bake at 350°F until deeply golden with an internal temperature of 190–195°F. Brush with melted butter or honey butter, and finish with flaky salt for a steakhouse-style shine.
For 1-hour rolls, try a single-rise method: mix, shape, and proof once in the pan before baking. This trims time yet keeps the texture soft and springy. If you love ultra fluffy rolls, consider Japanese-style milk bread rolls using a tangzhong or yudane; the gelatinized starch helps the crumb stay moist longer.
Warm milk, real butter, and a short, gentle knead create a pillowy bite that pairs with soups, skillet chicken, or grilled steak. Freeze leftover rolls and rewarm at 300°F for 8–10 minutes to bring back that just-baked feel. Whether you choose classic easy dinner rolls or enriched milk bread rolls, the result is soft, golden, and ready for the table.
Tip: Keep dough covered during proofing to prevent a dry skin, and space rolls evenly for consistent rise and browning.

Small tweaks can tailor flavor and texture. Add a spoon of honey for gentle sweetness, swap part of the milk for buttermilk for tang, or dust with sesame seeds before baking. No matter the variation, these fluffy rolls deliver bakery-level comfort on a busy night.
Whole Wheat, Multigrain, and Seeded Loaves
Hearty loaves reward patience and precision. With whole grains, flavor deepens, the crumb stays moist, and every slice delivers real bite. Aim for balance: tender texture, steady rise, and a toasty finish that sings with seeds and grains.
Adjusting hydration for whole grains
Bran and fiber drink up water, so dial in whole wheat bread hydration by adding about 5–10% more water than a white loaf. Use an autolyse to relax the dough and improve extensibility. A small boost of vital wheat gluten—about 1–2% of flour weight—helps lift a high-fiber bread without making it tough.
Keep the dough slightly tacky rather than dry. Mix until cohesive, rest, then finish kneading. For structure and a taller sandwich crumb, bake in a loaf pan and target an internal temperature near 205°F.
Soakers and preferments for flavor
A multigrain soaker softens coarse bits and unlocks sweetness. Combine rolled oats, cracked wheat, and select seeds with hot water, then rest 20–60 minutes. The dough will feel silkier and stay moist longer.
For depth, lean on biga and poolish. A poolish uses equal parts flour and water with a pinch of yeast for a milky, custardy crumb. A firmer biga builds strength and keeps bread fresh. Either way, fermentation adds nutty notes that pair well with honey or a touch of molasses.
Mix-ins: sunflower, sesame, flax, and oats
Toast sunflower and sesame seeds to bring out aroma and crunch. Pre-soak flax so it does not steal moisture from the dough. Add oats for chew and gentle sweetness. Fold all mix-ins late in mixing to protect the gluten network and avoid tearing.
Shape for purpose: pan loaves for sandwiches, freeform batards for rustic crust. For seeded bread, press extra seeds onto the surface after shaping for a bakery look and a crisp edge.
| Technique | What It Does | When to Use | Pro Tip |
|---|---|---|---|
| Adjusted Hydration | Offsets bran absorption for a supple dough and even crumb | Whole grain formulas needing loft and softness | Increase water 5–10% for steady whole wheat bread hydration |
| Multigrain Soaker | Softens oats, cracked wheat, and seeds for better chew | Coarse blends aimed at high-fiber bread | Use hot water; rest 20–60 minutes before mixing |
| Autolyse | Improves extensibility and reduces kneading time | Doughs with high bran content | Mix flour and water only; rest, then add salt and yeast |
| Biga and Poolish | Boost flavor, strength, and freshness | Lean loaves and enriched whole grain breads | Poolish for aroma; biga for structure and keeping quality |
| Seed Prep | Toasting and soaking control flavor and moisture | Seeded bread with sunflower, sesame, flax, and oats | Toast sunflower/sesame; pre-soak flax to protect crumb |
Small changes—hydration, soakers, and preferments—turn everyday dough into wholesome, bakery‑level loaves.
Sourdough Basics for Flavorful Crust
The path to a crackling crust starts with steady habits and simple inputs. With attentive sourdough starter care and clear cues from the dough, you can guide sourdough fermentation toward a bold rise and balanced flavor. Keep the process calm, warm, and consistent, and the oven will reward you.
Maintaining a healthy starter
Feed with unbleached flour and clean water at predictable times. Many bakers use King Arthur Bread Flour or King Arthur Whole Wheat to stabilize behavior. Common feedings are 1:1:1 or 1:2:2 by weight at room temperature, a reliable track for sourdough starter care.
If you refrigerate, stretch the interval between feeds. Before baking, refresh once or twice to peak activity and mild aroma. Discard down to a small seed, then rebuild so the culture rises, domes, and smells gently sweet.
Levain builds, timings, and temperature
Match your levain ratio to your schedule and flavor goals. A 1:3:3 build at 76–78°F often peaks in 6–10 hours, offering a lively yet clean profile. Warmer rooms speed sourdough fermentation; cooler rooms slow it down and develop deeper notes.
Plan the mix when the levain is domed and airy, not collapsed. Align dough mixing so the levain’s peak meets your bulk start, and adjust water a touch warmer on cool days to keep the curve steady.
Tang, open crumb, and fermentation control
For open crumb sourdough, aim for 70–78% hydration, full gluten via gentle stretch-and-folds, and a bulk rise of about 50–75% with fine bubbles. Shape lightly to protect gas. Bake in a preheated Dutch oven to drive a blistered crust and a pronounced ear.
Control sourdough tang by tuning inoculation, time, and temperature. Longer, cooler final proofs tilt toward acetic notes; warmer, shorter paths lean lactic and mild. Small changes in levain ratio can shift acidity without losing structure.
| Goal | Levain Ratio (starter:water:flour) | Temp Target | Peak Window | Flavor Tilt | Crumb & Crust Tips |
|---|---|---|---|---|---|
| Weeknight speed | 1:1:1 | 78–80°F | 4–6 hours | Mild, lactic | Short bulk; steam early for bold ear |
| Balanced daily bake | 1:3:3 | 76–78°F | 6–10 hours | Clean, rounded | 70–75% hydration for open crumb sourdough |
| Deeper sourdough tang | 1:2:2 | 70–72°F | 8–12 hours | Acetic, bright | Long, cool proof; gentle shaping to preserve gas |
| High lift and spring | 1:4:4 | 76–78°F | 8–12 hours | Subtle, lactic | Full gluten via folds; Dutch oven preheated well |
Key takeaway: steady sourdough starter care, a thoughtful levain ratio, and responsive timing turn routine dough into bread with character.
Gluten-Free Bread and Rolls That Rise
Great rise without wheat is possible. A well-tested gluten-free bread recipe uses a smart blend of flours, strong binders, and steady heat. For celiac-friendly baking, keep ingredients certified and your tools clean to avoid cross-contact.

Choosing gluten-free flours and binders
Build your base with rice flour, sorghum, millet, or buckwheat for body. Add tapioca and potato starch for lift and chew. For structure, use xanthan gum or guar gum, and include psyllium husk for a gel-like network that slices well.
Brands like Bob’s Red Mill and King Arthur offer reliable blends. Read labels to keep the mix fully celiac-friendly baking. This approach also works for gluten-free rolls that bake up soft yet sturdy.
Hydration and structure without gluten
Expect a wetter mix than wheat dough. The batter should look like thick cake batter or a paste. That higher hydration lets starches swell and binders activate.
Mix longer than you would for wheat to hydrate every particle. Psyllium husk absorbs water and supports rise; xanthan gum adds elasticity so the loaf holds shape.
Baking tips for tender, sliceable loaves
- Pan choice: use an 8.5-by-4.5-inch loaf pan with a parchment sling for tall sides.
- Proof once: let it become puffy, then bake before it overproofs and collapses.
- Oven: bake at 350–375°F; tent with foil if the crust browns too fast.
- Doneness: aim for an internal 205–210°F; cool completely before slicing.
- For gluten-free rolls: scoop portions into a muffin tin or onto a lined sheet and smooth tops with wet fingers.
Keep your go-to gluten-free bread recipe simple at first, then adjust hydration by a spoonful at a time. Small tweaks help you lock in texture, from sandwich-ready slices to tender gluten-free rolls that please everyone.
Flavor Boosts: Herbs, Cheese, Garlic, and Sweet Options
Small tweaks can turn a plain loaf into a standout. Think fresh herbs, a hint of heat, or a sweet swirl. These flavored bread variations build aroma, add color, and keep every bite interesting.
Start with balance. Add-ins bring moisture and fat, so reduce liquid slightly or dust in a touch more flour. Fold pieces in late to protect the gluten, and keep cheese small to avoid big melted gaps.
Herb-infused doughs and compound butters
For fragrant herb bread, mix in finely chopped rosemary, thyme, or chives. Or warm milk with smashed garlic and herbs, cool, then use it in your dough for deep, even flavor.
- Fold in parsley and lemon zest for a bright finish.
- Brush hot loaves with compound butter: parsley-garlic for garlic bread rolls, or honey-cinnamon for a mellow sweet gloss.
- Try olive oil infused with basil to keep the crumb tender.
Cheddar-jalapeño, parmesan-garlic, and more
Cheese bread delivers big comfort. Use sharp cheddar and diced jalapeños for lively heat. For parmesan-garlic knots, mix grated Parmigiano Reggiano with minced garlic and a pinch of black pepper.
- Sun-dried tomato and basil add a savory, Italian twist.
- Fold in ingredients during the last minute of mixing to prevent tearing.
- Finish warm rolls with a light butter brush for sheen and a soft bite.
Sweet rolls: cinnamon, honey, and vanilla
Cinnamon rolls rely on soft, enriched dough and a brown sugar–cinnamon blend. Add chopped pecans for crunch. A cream cheese glaze or vanilla icing brings a smooth, rich finish.
- Stir honey and vanilla into the dough for a gentle aroma.
- Proof until puffy, then bake until the centers read done and the swirls set.
- Serve alongside savory batches to showcase flavored bread variations from sweet to bold.
Whether you choose garlic bread rolls, herb bread with infused milk, or cheese bread packed with cheddar, each path offers a fresh way to keep your baking new and rewarding.
Storage, Freezing, and Reviving Freshness
To store homemade bread for a day or two, keep it at room temperature in a breathable paper or cloth bag. This protects a crisp crust while slowing staling. Skip the fridge; it speeds starch retrogradation and shortens bread shelf life. For soft sandwich loaves and tender rolls, a zip-top bag keeps moisture in for 2–3 days.
Label each loaf with the bake date so you track bread shelf life at a glance. Keep bread off warm appliances; heat causes condensation and soggy crust. Slice sandwich loaves before you freeze bread and rolls for easy single-serve toasts and lunches.
For longer storage, wrap tightly in plastic, then add a layer of foil or a freezer bag and freeze bread and rolls for up to 3 months. Press out extra air to prevent freezer burn. Thaw on the counter in the wrapping to keep crumbs moist.
To reheat rolls, preheat to 300°F. Warm 8–10 minutes from room temp or 12–15 minutes from frozen. A quick spritz of water and a loose foil tent helps them steam back to life. For crusty boules, refresh stale bread by wrapping in foil and heating at 325°F for 15–20 minutes.
Want a shattering crust? Unwrap the last 5 minutes, or lightly mist the crust and bake uncovered until it crackles. For pan loaves, refresh stale bread by toasting slices straight from the freezer for fast breakfasts and grilled cheese that stays crisp.
Pro tip: Save ends for breadcrumbs. Dry them in a low oven, pulse in a food processor, and seal tight for weeknight cutlets and crunchy toppings.
- Room temp: breathable bag for crusty loaves; zip-top for soft styles.
- Freezer: plastic wrap + foil/bag; label dates; slice before freezing.
- Reheat rolls: 300°F, spritz, tent with foil; adjust time if frozen.
- Refresh stale bread: foil at 325°F; uncover briefly for crisp crust.
- Avoid warm spots to protect texture and extend bread shelf life.
Conclusion
Homemade Bread & Rolls bring comfort you can smell before the first slice. With a clear grasp of ingredient roles and yeast behavior, fresh-baked at home becomes routine, not rare. Simple gear like a kitchen scale, a Dutch oven, and a thermometer helps you bake better bread with fewer surprises. Use these bread baking tips to turn a sticky dough into a confident bake.
Lean on core techniques for homemade bread success. An autolyse jump-starts gluten, while stretch-and-fold builds strength without stress. Proper proofing and controlled steam deliver oven spring and a tender, even crumb. Follow temperature cues, track rise times, and adjust for room warmth to learn to bake bread that fits your schedule and your kitchen.
Explore more than one style. Whole wheat adds depth, sourdough brings tang, and gluten-free methods keep the table inclusive. Flavor moves—garlic butter, sesame, or parmesan—make weeknights special. Store and reheat with care to keep crusts crisp and centers soft, and keep notes so each bake gets a little better.
In the end, fresh-baked at home is a habit, not a hurdle. With steady practice, smart timing, and these bread baking tips, you will bake better bread—loaves and rolls that slice clean, smell amazing, and satisfy every time. Warm, fresh-baked goodness is close at hand, one dough at a time.
FAQ
What flour should I use for soft rolls vs. crusty artisan bread?
For soft rolls and sandwich loaves, use all-purpose or bread flour from brands like King Arthur Baking Company or Gold Medal. Bread flour’s higher protein (about 12–13%) builds chewier structure and holds more moisture. For crusty boules and batards, bread flour supports higher hydration and an open crumb. Whole wheat adds flavor and fiber but needs extra water and sometimes a preferment.
What’s the difference between active dry yeast and instant yeast?
Instant yeast, such as SAF Instant, blends directly into flour and rises faster. Active dry yeast benefits from proofing in warm liquid at about 105–110°F to confirm it’s alive. Both work well; adjust timelines slightly. Fresh cake yeast gives subtle flavor but has a shorter fridge life.
How warm should my dough be for the best rise?
Aim for a dough temperature around 75–78°F for lean breads, 76–80°F for enriched rolls, and 76–78°F for sourdough. Warmer dough ferments faster but can overproof. Cooler dough develops flavor more slowly and gives you a wider timing window.
How do I know if my dough is properly proofed?
Use the finger-dent test. Press gently—if the dent springs back slowly and not fully, it’s ready. In bulk fermentation, look for smoother dough with visible bubbles and volume increase of about 50–100%. Overproofed dough won’t spring back and may collapse in the oven.
What tools make the biggest difference for home bakers?
A digital kitchen scale, instant-read thermometer like ThermoWorks Thermapen, sturdy mixing bowls, and a bench scraper boost consistency. A Dutch oven from Lodge or Le Creuset traps steam for artisan crust. Loaf pans, heavy sheet pans, banneton baskets, and a sharp lame or double-edge razor help with shaping and scoring.
Should I knead by hand or use a stand mixer?
Both work. Hand kneading gives tactile feedback and control. A stand mixer, such as KitchenAid with a dough hook, saves time—mix on low to medium-low to avoid overheating. For wet doughs, use autolyse and stretch-and-folds to build gluten without heavy kneading.
What is autolyse and when should I use it?
Autolyse is a rest where flour and water sit together 20–60 minutes before adding salt and fat. It hydrates flour, improves extensibility, and boosts flavor. It’s especially helpful with whole wheat and higher-hydration artisan doughs.
How do I pass the windowpane test?
Gently stretch a small piece of dough. If it spreads into a thin, translucent sheet without tearing, gluten is developed. If it tears easily, knead longer or add another round of stretch-and-folds during bulk fermentation.
What’s the ideal internal temperature for doneness?
Lean loaves finish at about 205–210°F internal. Enriched breads and rolls finish around 190–200°F. Use an instant-read thermometer to check. Also look for a well-browned crust and a hollow sound when tapping the bottom.
How do I create steam without a Dutch oven?
Preheat a metal tray or lava rocks on a lower rack. When loading the dough, pour in hot water or toss in a few ice cubes to generate steam for the first 10–15 minutes. Steam keeps the crust flexible for maximum oven spring.
Can I make weeknight rolls fast?
Yes. Use instant yeast and warm milk around 110°F, and a bit of sugar and butter for tenderness. Try a single-rise method: shape right after mixing and do one longer proof in the pan before baking at 350°F. Brush with melted butter or honey butter for a steakhouse finish.
What is tangzhong and why does it make rolls softer?
Tangzhong is a simple cooked paste of flour and liquid that gelatinizes starch. When added to dough, it locks in moisture, keeping rolls pillowy and fresh longer. Yudane, a similar method, uses boiling water over flour for the same effect.
How should I adjust hydration for whole wheat and multigrain loaves?
Increase water by about 5–10%. Bran absorbs more moisture and can cut gluten strands. Autolyse helps, and a small amount of vital wheat gluten (about 1–2% of flour weight) improves loft. Soakers for oats and cracked grains keep the crumb moist.
How do I add seeds, nuts, and cheese without ruining the crumb?
Fold add-ins like sunflower seeds, sesame, flax, walnuts, pecans, or cheddar late in mixing after gluten starts forming. Keep cheese pieces small to avoid large pockets. For flax or chia, pre-soak to prevent drying out the loaf.
What’s the best way to maintain a sourdough starter?
Feed with unbleached flour and water at ratios like 1:1:1 or 1:2:2 by weight. Keep at room temperature for frequent baking, or refrigerate to slow it down. Before baking, give 1–2 refreshments for peak activity. Many bakers rely on King Arthur flours for consistency.
How do I adjust sourdough flavor and tang?
Control tang by tweaking temperature, inoculation, and time. Warmer, shorter ferments tend toward milder lactic notes. Cooler, longer ferments boost acetic tang. A longer, cooler final proof increases acidity and complexity.
Can gluten-free bread really rise well?
Yes, with a smart blend. Use flours like rice, sorghum, or millet plus tapioca or potato starch for lightness. Bind with xanthan gum or psyllium husk for elasticity. Expect a thick batter rather than a kneadable dough. Bake to about 205–210°F and cool completely before slicing.
What size pans should I use for sandwich bread?
Standard loaf pans are 8.5-by-4.5 inches or 9-by-5 inches. The smaller pan yields a taller, rounder crown; the larger pan gives a wider slice. For gluten-free batters, an 8.5-by-4.5-inch pan supports better height.
How can I prevent my rolls from spreading flat?
Build surface tension during shaping. Round pieces tightly, keep seam-side down, and place rolls close so they proof into each other for support. Proper proofing and a hot oven help set the structure quickly.
What are easy ways to boost flavor?
Add herbs like rosemary, thyme, or chives to the dough. Infuse milk with garlic or bay leaves, then cool before mixing. Try cheddar-jalapeño or parmesan-garlic variations. For sweet rolls, use cinnamon, honey, and vanilla with a cream cheese glaze.
How should I store bread and rolls to keep them fresh?
Keep crusty loaves in paper or cloth at room temperature. For soft bread, use a zip-top bag for 2–3 days. Avoid the fridge—it stales bread faster. Freeze tightly wrapped for up to 3 months. Rewarm rolls at 300°F, and refresh loaves in a 325°F oven to re-crisp the crust.
Can I refrigerate dough overnight?
Absolutely. Cold-retard shaped loaves or rolls 8–16 hours for flexible timing and deeper flavor. Bake straight from the fridge or let the dough sit at room temperature until slightly puffy before baking.
How do I get better oven spring?
Use proper gluten development, tight shaping, and strategic scoring with a sharp lame. Bake with steam in a preheated Dutch oven or with a hot water tray. Load dough into a fully preheated oven and avoid opening the door early.
Why is my crust pale?
Check oven temperature calibration and bake time. Ensure enough sugar, milk, or fat for browning in enriched doughs. Use steam early on, then bake uncovered to finish color. A convection setting may need a 25°F reduction to prevent over-browning while still fully baking.
What’s the safest way to check bread temperature?
Insert an instant-read thermometer into the center from the side to avoid a visible hole on top. For lean loaves, target 205–210°F; for enriched loaves and rolls, 190–200°F. Let loaves cool at least an hour so the crumb sets and slices cleanly.