Surprising fact: Nearly 70% of hosts say the dessert sets the mood for the whole event, so a fail-safe treat matters more than you think.
This Website contains affiliate links. That means I may earn a small commission if you purchase through my links, at no extra cost to you.
This guide gives you an easy, reliable recipe that yields a moist, bakery-style cake you can style for any theme. Follow clear US measurements, step-by-step instructions, and pro tips for level layers and neat finishes.
Choose a base—vanilla, chocolate, or funfetti—and pair it with buttercream, ganache, or fruit fillings to match the guest of honor. Expect practical details like pan sizes, oven temps, and timing cues so you can plan fast and bake with confidence.
Make-ahead and storage tips are included so you can bake early, frost later, and cut party-day stress. The guide covers simple decoration palettes and styles that photograph well for social media, plus dietary swaps that keep flavor and tenderness.
Key Takeaways
Reliable recipe for a moist, bakery-style cake with US measurements.
Options for bases and fillings to match any taste.
Practical timing, pan sizes, and make-ahead tips to reduce stress.
Decoration ideas by palette and style for great photos.
Dietary swaps included—gluten-free, dairy-free, and nut-free options.
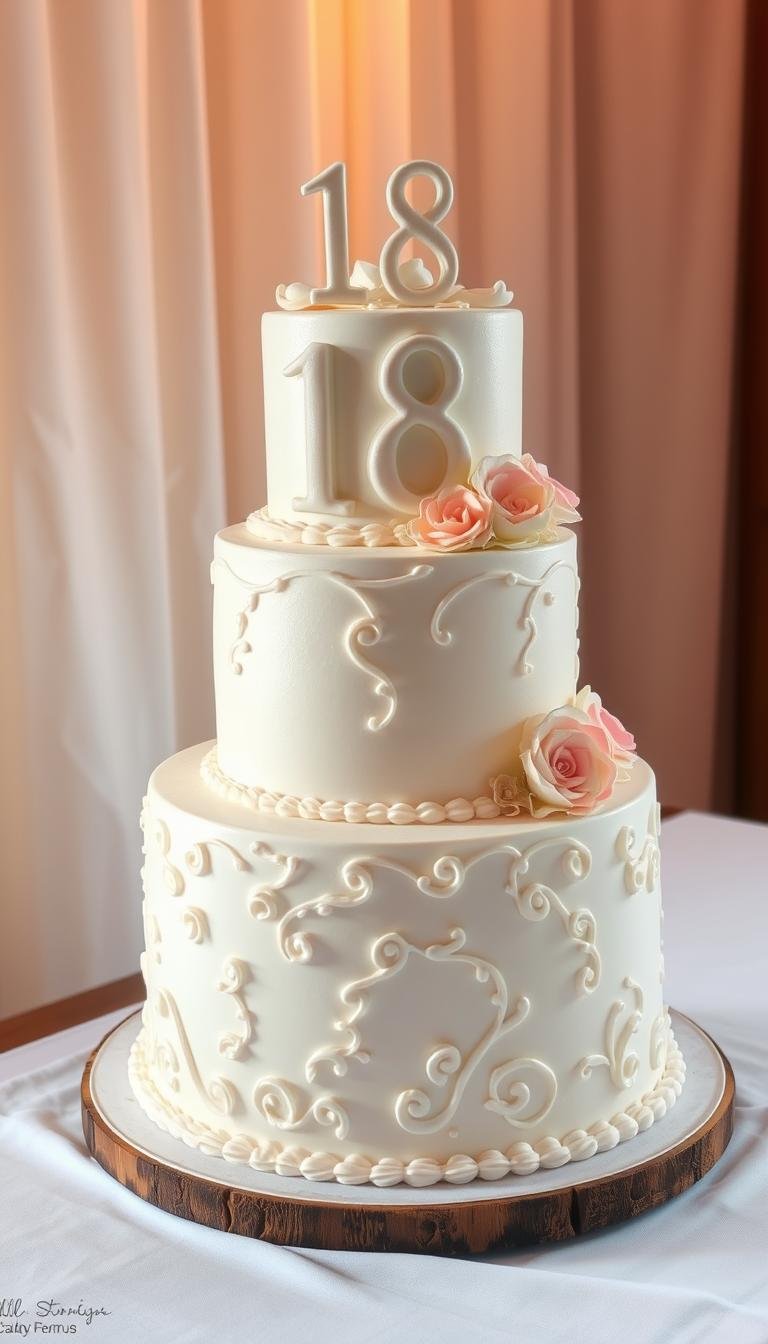
Why This 18th Birthday Cake Rocks Right Now
Trendy toppers, metallic touches, and bold color blocks instantly turn a simple bake into a social-media-ready showstopper.
Visual trends like large numeral toppers, gold leaf accents, and color-blocked buttercream make the dessert pop in photos and reels. Pair those looks with flavor-forward combos—vanilla bean with strawberry compote, double-chocolate with salted caramel, or lemon zest with raspberry—for a crowd-pleasing centerpiece.
The recipe stays approachable. It uses a one-bowl batter and pantry staples, and needs only two 8-inch pans, a mixer, and an offset spatula. The crumb is sturdy yet tender so layers stack cleanly and support toppers or sprinkle borders.
Beginner-friendly buttercream is easy to tint, rewhip, and smooth. A quick crumb coat locks in stray crumbs for a neat finish. Time-savers include baking layers a day ahead and premaking frosting to rewhip just before decorating.
Fast personalization: pipe numbers, add acrylic toppers, or cut fondant numerals.
Color ideas: black & gold, school colors, or neon confetti for a party-ready vibe.
Versatile servings: convert to ~24 cupcakes or a tall three-layer 6-inch version.
18th birthday cake: Ingredients, Tools, and Prep
Get your pans, tools, and ingredients lined up so mixing and assembly flow without last‑minute scrambling.
Pan sizes, tools, and quick prep checklist
Pan options: Two 8×2‑inch round pans for layers or one 9×13‑inch sheet. Grease, line with parchment, and flour for clean edges.
Tools: Stand or hand mixer, two mixing bowls, digital scale (optional), measuring cups/spoons, offset spatula, bench scraper, serrated knife, wire racks, rotating stand (nice‑to‑have), piping bags and tips (1M, large round), and number cookie cutters for fondant.
Oven prep: Preheat to 350°F, center rack, verify with an oven thermometer, and avoid opening the door for the first 20 minutes.
Ingredient list with US measurements
2½ cups (300 g) all‑purpose flour
1¾ cups (350 g) granulated sugar
1 tbsp baking powder; ½ tsp fine salt
1 cup (240 ml) whole milk; ¾ cup (170 g) unsalted butter
3 large eggs; 2 tsp pure vanilla
Optional: ¼ cup neutral oil; ¼ cup rainbow jimmies for funfetti
Smart substitutions and dietary tweaks
Chocolate variant: Swap ¾ cup cocoa for ¾ cup flour and add ½ cup hot coffee; increase sugar by ¼ cup if desired.
Swaps: 1:1 gluten‑free flour, plant‑based butter plus almond milk, or use 3 tbsp aquafaba per egg for an egg‑free batter. Check sprinkles and decorations for nut‑free and gluten‑free labels.
Party tip: If you plan to skip main, set a dessert board with cookies, brownies, fruit, and mini cupcakes to complement the centerpiece.
Step-by-Step Recipe and Creative Decoration Ideas
Follow clear steps to bake, fill, and decorate so the final result looks and tastes like a pro’s work.
Make the batter: fluffy, moist, party-ready
Cream butter and sugar 2–3 minutes until pale and light. Add eggs one at a time, mixing well between additions.
Alternate dry and wet in three additions, ending with dry. Fold in jimmies for a funfetti version. Avoid overmixing to keep the crumb tender.
Bake and cool like a pro for even layers
Divide batter evenly and level with an offset spatula. Bake 25–30 minutes for two 8-inch rounds.
Check doneness with a toothpick and a gentle press; centers should spring back. Rest in pans 10 minutes, then turn out to cool on wire racks.
Cool fully 60–90 minutes and trim domes with a serrated knife. Brush layers with simple syrup for extra moisture if desired.
Frosting and filling options that wow
American buttercream is easy and sweet. Use Swiss meringue buttercream for a silky, less-sweet finish.
Chocolate ganache works as a drip or filling. Add fruit compote and pipe a buttercream dam to prevent seepage.
Decorating ideas for the big one-eight
Tint buttercream with gel colors and apply a thin crumb coat. Chill 20 minutes, then smooth the final layer with a bench scraper.
Make the “18” pop with acrylic toppers, piped numerals, or fondant cutouts. Add edible glitter or metallic pearls for photo-ready sparkle.
Make-ahead, storage, and “skip main” serving tips
Bake layers up to 2 days ahead; wrap well. Freeze up to 2 months and thaw at room temp.
Chill assembled cake 30–60 minutes for transport and use a non-slip mat in the box. Store a frosted cake at cool room temp 1 day or refrigerate up to 3 days.
Serving tip: If you plan to skip main, offer coffee, tea, sparkling water, and a fruit platter to balance sweets.
Step
Time
Key Tip
Creaming
2–3 min
Beat until pale and airy
Baking (8″ rounds)
25–30 min
Rotate after 20 min if hot oven
Cooling
60–90 min
Trim domes for level stacking
Make-ahead storage
2 days (fridge) / 2 months (freeze)
Wrap layers tightly in plastic + foil
Conclusion
Finish strong with a simple plan that keeps the dessert moist, photo-ready, and stress-free.
This recipe delivers a reliable, flexible result using easy steps, common tools, and clear timing so hosts can bake with confidence even on a busy party day.
Personalize with color palettes, number toppers, drips, or a quick fondant accent to make the design one-of-a-kind. Use swaps like vanilla, chocolate, lemon, or funfetti and try fillings such as berry compote or salted caramel.
Make-ahead tips preserve texture and flavor: wrap layers, chill assembled cakes for transport, or freeze for longer storage. Choose layer, sheet, or cupcake formats based on guest count, or add a dessert board for variety.
Save or print the recipe and prep checklist (US measurements included) and share photos of your final look and notes on color or topper choices. With these steps, anyone can create a centerpiece that looks impressive and tastes even better.
FAQ
How many servings does a two-layer 8-inch cake provide?
A two-layer 8-inch cake typically yields about 20–24 small party slices. For larger slices, expect closer to 12–16 servings. If you need more portions, consider a 9×13 sheet which serves about 24 small slices or convert the recipe to cupcakes (about 24 standard cupcakes).
What pan sizes and oven temperature should I use?
Use two 8×2-inch round pans for classic layers or one 9×13-inch pan for a sheet cake. Preheat your oven to 350°F and place the rack in the center. An oven thermometer helps ensure accurate temperature and avoid uneven baking.
Can I make the layers ahead of time?
Yes. Bake layers up to 2 days ahead, wrap them tightly in plastic wrap and foil, and refrigerate. You can freeze layers up to 2 months; thaw wrapped at room temperature before decorating. Bake-day timing is batter in 15 minutes, bake 25–30 minutes, and cool 60–90 minutes.
What frosting works best for smoothing and decorating?
American buttercream is beginner-friendly—easy to tint and rewhip. Swiss meringue buttercream gives a silky, less-sweet finish if you want a cleaner look. For drips, use a chocolate ganache applied to a chilled cake for controlled results.
How do I keep layers moist and avoid crumbs in the final finish?
Brush layers with a simple syrup (1:1 sugar:water) for added moisture. Apply a thin crumb coat of frosting, chill 15–20 minutes, then add the final coat. Chilling between steps helps achieve smooth sides and minimizes loose crumbs.
What are smart ingredient substitutions for allergies or dietary needs?
For gluten-free, use a 1:1 gluten-free baking flour. For dairy-free, try plant-based butter like Country Crock Plant Butter and unsweetened almond milk. For egg-free, use 3 tbsp aquafaba per egg or a commercial egg replacer. Always verify labels for cross-contact and allergen info.
How can I make the number decorations stand out in photos?
Use a mix of height and shine: acrylic number toppers, piped numerals with a large round tip, or fondant cutouts. Add edible luster dust, metallic sugar pearls, or a gold leaf accent. Choose contrasting colors—black-and-gold or pastel ombré—to make numbers pop on camera.
What are quick ways to adapt this for a party that skips a main course?
Offer a dessert-focused spread: the centerpiece cake plus cookies, brownies, mini cupcakes, and a fruit platter. Pair with coffee, tea, sparkling water, and a few salty snacks to balance sweetness and keep guests satisfied without a full meal.
How long can a frosted cake sit out, and when should I refrigerate?
A frosted cake can sit at cool room temperature for up to 24 hours if ingredients are shelf-stable. Refrigerate for longer storage—up to 3 days for a fully frosted cake. Bring refrigerated buttercream to room temperature and rewhip 1–2 minutes before serving for best texture.
Any tips for transporting a decorated cake safely?
Chill the assembled cake for 30–60 minutes to firm the frosting. Use a sturdy cake board and a non-slip mat in the box or vehicle. Choose a box with headroom for toppers, and keep the cake on a flat surface in the car, not the seat.
Can I convert the recipe to chocolate or funfetti without changing technique?
Yes. For a chocolate version, swap ¾ cup cocoa for ¾ cup flour and add ½ cup hot coffee to bloom the cocoa, and increase sugar slightly if desired. For funfetti, fold in about ¼ cup rainbow jimmies at the end. Keep the same mixing and bake times, adjusting doneness checks as needed.
What tools are essential versus nice-to-have?
Essential: two 8-inch pans (or 9×13), hand or stand mixer, measuring cups/spoons, offset spatula, serrated knife, and wire racks. Nice-to-have: rotating cake stand, bench scraper, piping tips (1M and a large round), and a digital scale for precision.
How can I ensure even cake layers and avoid domes?
Level batter between pans and smooth with an offset spatula. Use bake-even strips or reduce oven temperature slightly if your pans run hot. Cool layers in pans for 10 minutes, then transfer to wire racks and trim domes with a serrated knife before stacking.
Are the measurements in US units and suitable for home ovens?
Yes. All ingredient amounts are provided in US measurements and tested for standard home ovens. Use an oven thermometer for best accuracy, and follow the recommended bake times and doneness checks to avoid dry or underbaked results.
Surprising fact: one bakery reports trending men’s themes selling for as little as $132 and up to $225, showing how serious celebrations now invest in bold dessert design.This Website contains affiliate links. That means I may earn a small commission if you purchase through my links, at no extra cost to you. This guide presents…
Nearly 80% of milestone parties spark a lasting theme that guests remember for years — so the dessert should do more than taste great.This Website contains affiliate links. That means I may earn a small commission if you purchase through my links, at no extra cost to you. Turning fifty calls for a centerpiece that…
Your birthday is the perfect occasion to shine and celebrate in style. Finding that ideal birthday dress can set the tone for your entire celebration, making you feel confident, beautiful, and ready to make memories. Whether you’re planning an intimate dinner, a night out dancing, or a casual gathering with friends, the right outfit can…
Your birthday is the one day a year that’s all about celebrating you, so why not make your nails part of the festivities? Birthday nails are the perfect way to add an extra touch of glamour and personality to your special day look. Whether you prefer subtle shimmer, bold glitter, or eye-catching designs, the right…
Fact: Nearly half of people say turning 30th birthday felt like the biggest milestone of their life, shifting their sense of youth into a more settled chapter.This Website contains affiliate links. That means I may earn a small commission if you purchase through my links, at no extra cost to you. This guide helps you…
Surprising fact: more than 300 million stock images and clips now fuel party planning, letting anyone storyboard a show-stopping reveal in minutes.This Website contains affiliate links. That means I may earn a small commission if you purchase through my links, at no extra cost to you. This guide gives you 23 creative ideas that balance…