Surprising fact: nearly 70% of hosts say the dessert table becomes the most photographed spot at a party, so your centerpiece matters more than you think.
This Website contains affiliate links. That means I may earn a small commission if you purchase through my links, at no extra cost to you.
A well-made centerpiece can set the tone for the whole celebration. It should look stunning, taste memorable, and match the guest of honor’s style.
In this guide, we’ll outline design routes from minimalist buttercream to luxe drip styles. You’ll learn how to pick flavors that please a crowd and how to size servings to avoid last-minute runs to the store.
We also cover personalization tips—edible images, custom toppers, and number candles—to make “25” feel stylish and fun. Expect texture ideas like smooth, semi-naked, and rosettes to elevate the finish.
Key Takeaways
Make the centerpiece both photogenic and flavorful.
Choose a design that matches theme and budget.
Plan servings and lead time to avoid stress.
Use toppers and metallic accents for polish.
Explore creative formats for easy serving.
25th birthday cake ideas to inspire every style and budget
From gallery-chic minimalism to playful dessert mash-ups, these ideas help you pick a centerpiece that looks great and tastes even better.
Modern minimalist: Choose ultra-smooth buttercream in ivory, blush, or slate and add a sleek metallic “25” for a refined finish. Keep edges sharp and décor sparse for a photo-ready look.
Photo nostalgia: Use edible image panels to tell a story from childhood to the present. A neutral buttercream unifies the visuals without overwhelming flavor.
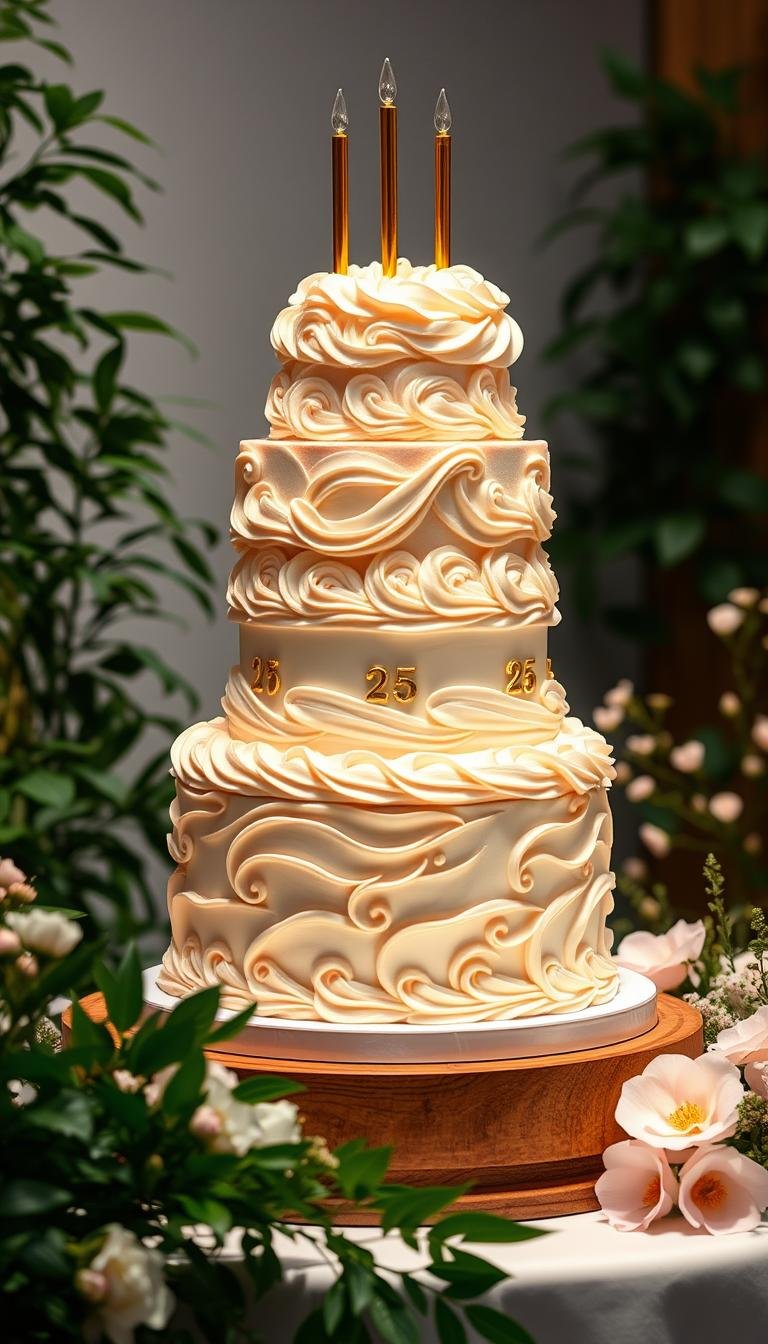
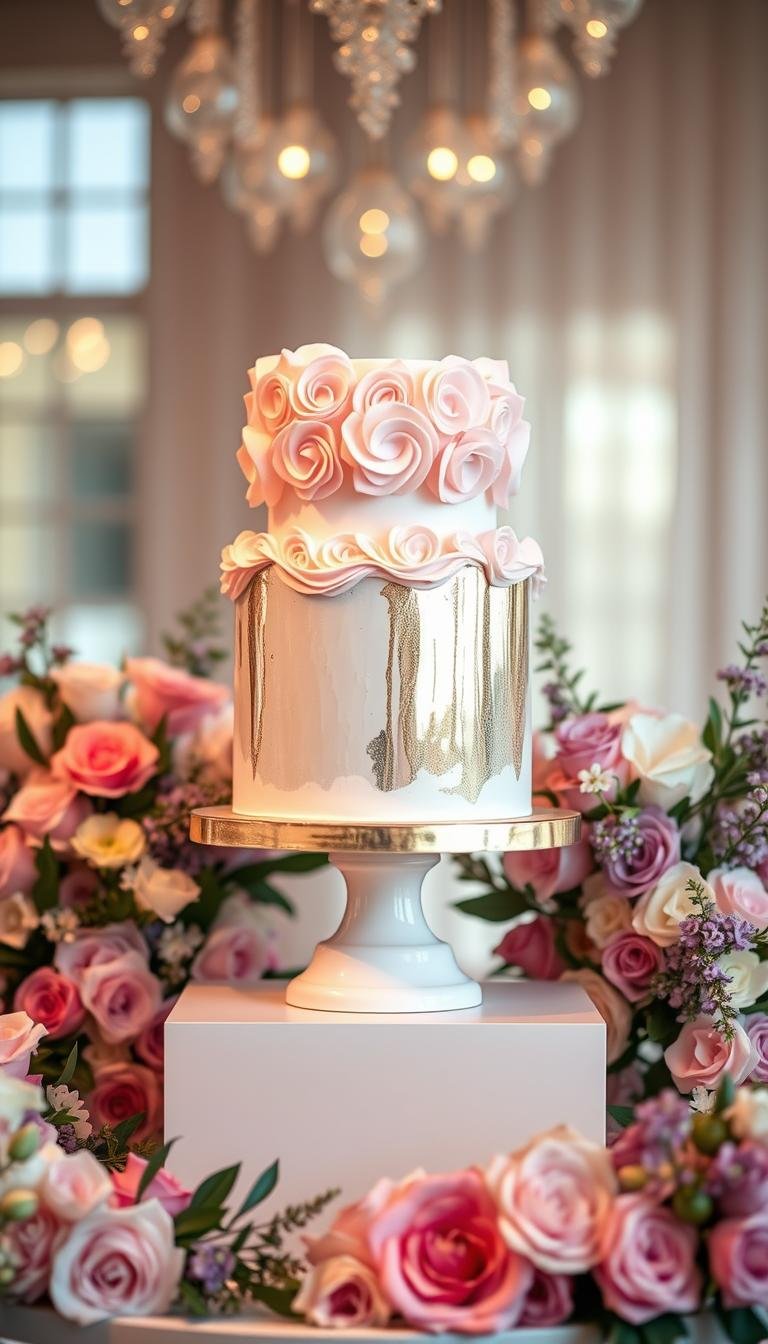
Quarter-century luxe: Black and gold drip with macarons and sparklers suits evening parties.
Flavor-first: Try lemon blueberry, mocha, or red velvet layers to make taste the star.
Hobby highlight: Incorporate travel, fitness, gaming, or music motifs for a personalized touch.
Champagne celebration: Brush layers with a prosecco simple syrup and finish with rosettes.
Rustic chic: A semi-naked style with fresh florals and seasonal fruit feels natural and elegant.
Style
Budget
Best Pairing
Modern minimalist
$$
Vanilla bean buttercream
Quarter-century luxe
$$$
Chocolate ganache & macarons
Rustic chic
$-$$
Seasonal fruit & light frosting
Single-serve twist
$-$$
Cupcake towers or mini cakes
Design tips to personalize their cake and make it unforgettable
Make design choices that reflect the guest of honor and keep flavor front and center. Start by listing a few defining interests—travel, music, fashion, fitness, or pop culture—and blend two for a layered, adult look.
Choose a theme that reflects personality
Pick two interests and let them guide color, toppers, and small props. Travel + fashion might mean passport motifs with a chic palette. Music + pop culture can use vinyl-inspired textures and bold color pops.
Balance visuals and taste
Pair rich sponges with bright or rich fillings to avoid flavor fatigue. Citrus curd brings lift, ganache adds depth, berry compote gives freshness, and salted caramel adds a savory-sweet pop.
Add dimension and top it off
Create a two- or three-tier build with different finishes: smooth top, textured middle, stenciled bottom. Use rosettes or fault-line details sparingly and add edible gold leaf for a touch of shine.
Limit the palette to two colors + one metallic.
Choose safe, wrapped florals and a personalized acrylic or wooden topper.
Match serving temp to frosting for best slices and photos.
Planning, ordering, and timing your cake in the United States
A calm, organized plan keeps the dessert moment memorable — not stressful.
Start early. For custom designs, contact bakers 2–4 weeks ahead for simple single-tier work and 4–8 weeks for multi-tier or sculpted orders. Peak months (graduation and wedding season) need extra lead time.
Lead times, delivery options, and budget-friendly choices
Clarify portions first: estimate guest count and pick party or coffee slices so you buy the right diameter and tier count. This prevents overspending while keeping looks intact.
Request a tasting when possible. Sample 2–4 flavor combos and finalize flavors at least two weeks before the event.
Delivery vs. pickup: Delivery suits fragile, tiered finishes; pickup saves fees for single tiers. If you self-transport, keep the vehicle cool, level, and use a non-slip mat.
Stretch your budget: Favor buttercream textures over full fondant, or pair a small statement cake with matching cupcakes for extra servings.
Lock logistics: Share venue access times, refrigeration availability, and table dimensions. Rent or bring a sturdy stand with at least a one-inch margin.
Get it in writing: Confirm sketches, flavors, allergen notes, serving size, topper details, and cancellation policies to avoid surprises.
Cutting prep: Ask for a cutting guide, bring a warm knife, napkins, and boxes for leftovers. Label any gluten-free or nut-free options and keep them separate during transport.
Conclusion
The right dessert centerpiece balances taste, theme, and timing to make serving effortless and photos pop.
Personalization turns a nice treat into a story. Mix texture and finishes — from minimalist buttercream to luxe drip or metallic accents — and finish with a custom topper or safe florals. Keep flavors bright and layered so every slice delights.
Plan logistics early. Secure lead times, confirm delivery or pickup, and discuss serving size with your baker. Small swaps, like a buttercream finish or paired cupcakes, save budget without losing impact.
Use these tips to brief your baker or guide your own bake. With a clear color story, smart flavor choices, and tidy logistics, your milestone dessert will look great and taste even better.
FAQ
How far in advance should I order a custom 25th birthday cake?
For simple single-tier designs, contact a bakery 2–4 weeks before the event. For multi-tier, sculpted, or highly customized cakes, allow 4–8 weeks. Busy seasons like graduation and wedding months require extra lead time, so book early to secure your preferred date and baker.
How many servings do I need and how do I estimate cake size?
Start with your guest count and decide between party slices (larger) or coffee slices (smaller). Ask the baker for a serving chart based on diameter and tier heights. Consider a small statement cake with matching cupcakes to stretch servings while keeping costs down.
What flavor combinations work best for wide appeal?
Crowd-pleasers include lemon-blueberry, mocha or espresso with chocolate, and classic red velvet with cream cheese. Pair a rich sponge with a bright filling—like citrus curd—or a salted caramel to balance sweetness. Offer one adventurous and one familiar flavor to satisfy most guests.
Should I choose buttercream or fondant for a 25th cake?
Buttercream offers excellent flavor and photo-friendly textures (smooth, rosettes, fault-line) and is more budget-friendly. Fondant gives a polished, sculpted look and works for intricate shapes. For warm venues, choose ganache or sturdier finishes to help decorations hold up.
How can I personalize the cake to reflect the guest of honor?
Start with 3–5 defining interests—travel, music, fashion—and blend two for a layered concept. Add edible images, custom acrylic or wooden toppers with a name, hobby-themed fondant elements, or a sleek metallic “25” for a clear milestone detail.
What are safe ways to add fresh flowers to the cake?
Use non-toxic, food-safe blooms and wrap stems in floral tape or use picks before inserting into the cake. Choose seasonal flowers like roses, ranunculus, or eucalyptus sprigs that complement the color palette. Coordinate with the florist so the cake flowers match the overall tablescape.
Can I have a small display cake plus cupcakes or mini cakes?
Yes—pairing a small statement cake with coordinated cupcakes or mini cakes is practical and cost-effective. It streamlines serving, allows multiple flavors, and keeps a visually cohesive dessert table. Use matching wrappers and mini toppers for a polished look.
What delivery or pickup considerations should I know?
Delivery is recommended for tiered or fragile finishes; confirm evidence of a cool, level vehicle and a non-slip mat. Pickup can save fees for single-tier cakes—bring a sturdy box and a cool vehicle. Provide the bakery with venue access times and setup details in advance.
How should I store the cake before serving?
Buttercream cakes can be refrigerated briefly for cleaner cuts but should sit at room temperature 20–30 minutes before serving to soften. Avoid prolonged refrigeration for fondant-decorated cakes with moisture-sensitive fillings. Confirm storage advice with your baker based on filling and frosting choices.
What is the best way to decorate for photos and the cake reveal?
Position the cake in natural light and place toppers and candles facing the camera. Keep the color story simple—two main colors plus one metallic—to ensure the cake photographs well. Stage coordinating plates, napkins, and a cake stand to enhance slice and reveal photos.
How can I accommodate dietary restrictions like gluten-free or nut-free?
Request clearly labeled alternative cakes and ask the bakery about cross-contact precautions. If offering a separate gluten-free or nut-free option, keep it boxed separately during transport and serving. Confirm ingredient lists and allergen handling policies in writing.
What budget-friendly choices can still look upscale?
Choose buttercream textures over full fondant, simplify labor-intensive details, or make one tier the feature and keep the others plain. A small statement cake paired with matching cupcakes stretches servings while preserving a luxe look. Discuss cost-saving swaps with your baker.
When should I schedule a tasting and finalize flavors?
Request a tasting 3–4 weeks before the event when possible, and finalize flavors at least two weeks prior so the bakery can source ingredients and schedule the build. For high-demand seasons, confirm flavors when you place the order to avoid last-minute substitutions.
What paperwork or confirmations should I get from the bakery?
Get the design sketch or reference photos, flavor choices, serving size, allergen notes, delivery/pickup details, cancellation policy, and final price in writing. A signed agreement reduces surprises and clarifies responsibilities for both parties.
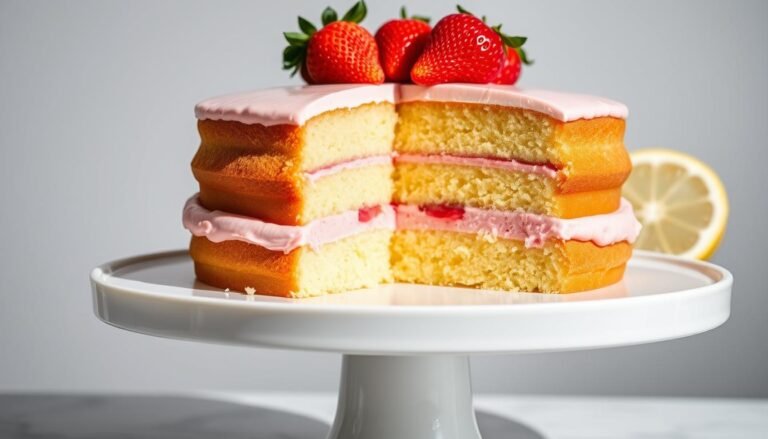
There’s something magical about the combination of bright, zesty lemon and sweet, juicy strawberries in a cake. This lemon strawberry cake brings together these two beloved flavors in perfect harmony, creating a dessert that’s as beautiful as it is delicious. With its soft, tender crumb, vibrant colors, and refreshing taste, this cake is guaranteed to…
Surprising fact: a typical three-tier party centerpiece can serve up to 120 guests while still costing less than many full-service event rentals.This Website contains affiliate links. That means I may earn a small commission if you purchase through my links, at no extra cost to you. Make your milestone birthday shine. Our three-tier builds—6″, 8″…
There’s something magical about biting into a slice of fresh strawberry cake made with real berries. The delicate pink hue, the sweet aroma of strawberries, and that perfect balance of moist cake with bursts of fruit flavor create an unforgettable dessert experience. Today, I’m sharing my favorite recipe for a from-scratch strawberry cake that showcases…
Surprising fact: nearly one in four home bakers says a DIY centerpiece draws more compliments than a store‑bought showpiece.This Website contains affiliate links. That means I may earn a small commission if you purchase through my links, at no extra cost to you. This guide shows how a homemade centerpiece can look bakery‑level while staying…
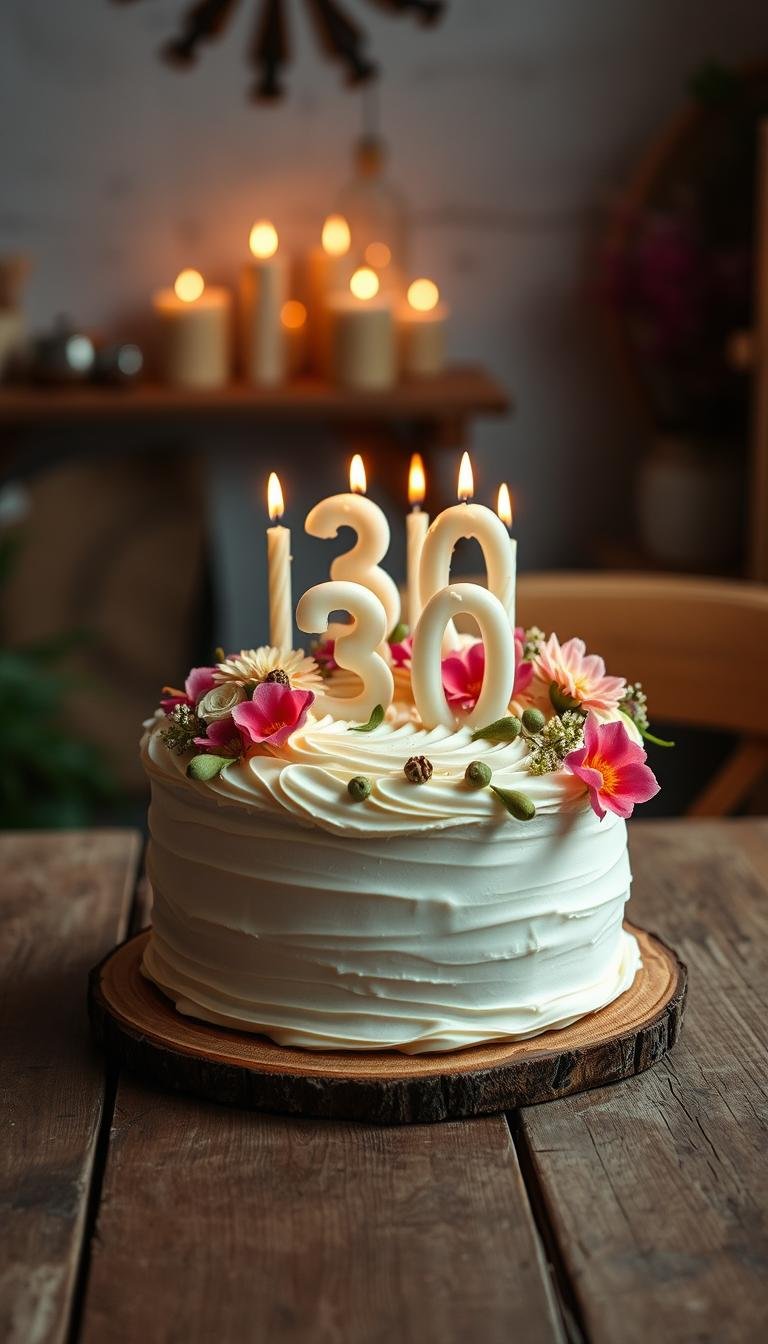
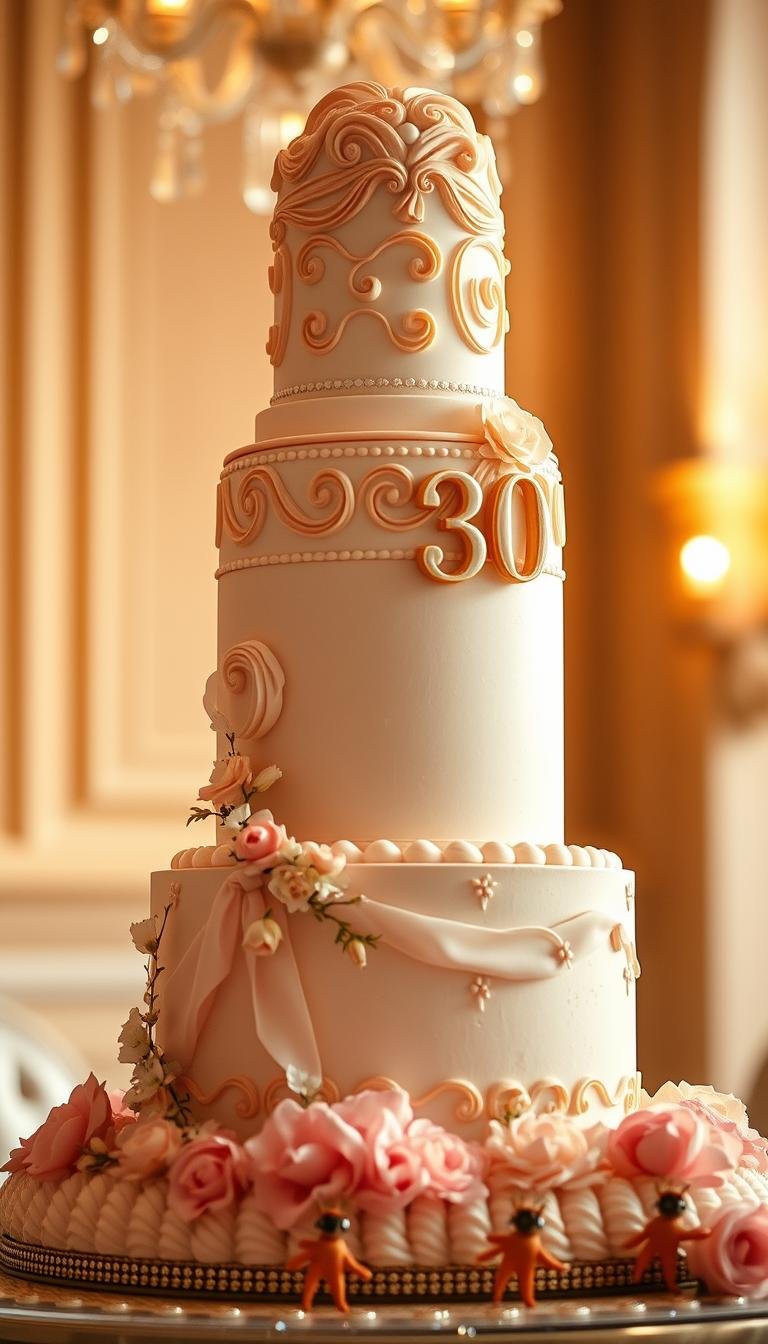
Surprising fact: nearly half of milestone gatherings center on a single dessert that guests remember most.This Website contains affiliate links. That means I may earn a small commission if you purchase through my links, at no extra cost to you. Your 30th birthday marks a clear shift between youthful years and proper grown-up life. Whether…
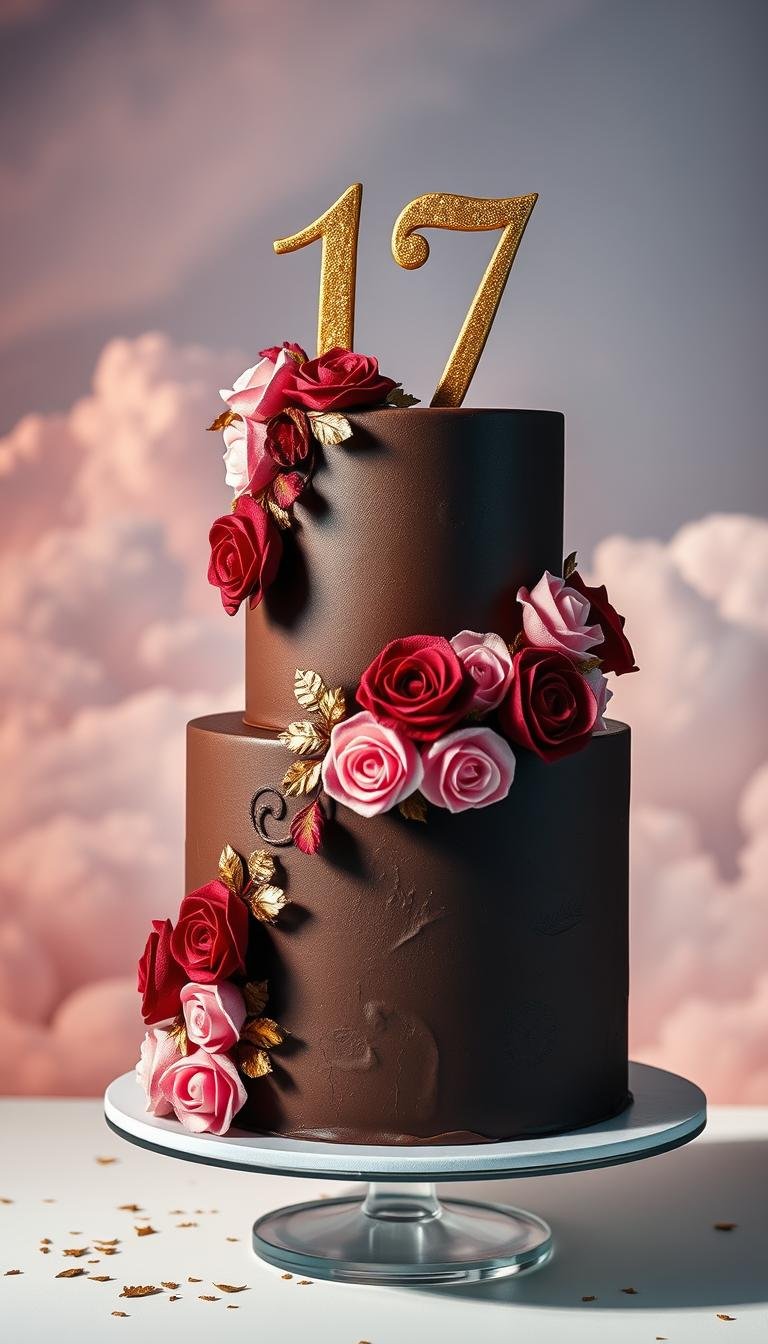
Surprising fact: nearly 70% of teens say the look of a dessert matters as much as the flavor when celebrating a milestone.This Website contains affiliate links. That means I may earn a small commission if you purchase through my links, at no extra cost to you. Set the vibe with a show-stopping centerpiece that reflects…