Summer cake is the perfect treat to celebrate the sunny days ahead! This light and fluffy dessert bursts with seasonal fruits and fresh flavors, making it a must-have for barbecues, picnics, or just a sweet afternoon snack. Whether it’s topped with whipped cream, drizzled with a fruity glaze, or simply enjoyed on its own, summer cake is all about bringing a taste of the season right to your table.
This Website contains affiliate links. That means I may earn a small commission if you purchase through my links, at no extra cost to you.
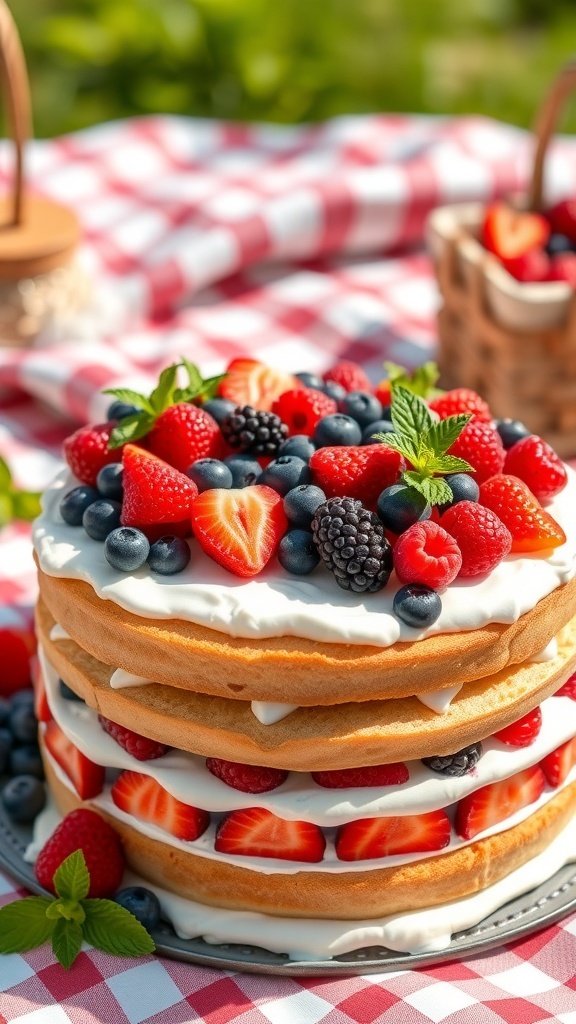
Refreshing Summer Berry Bliss Cake
Summer is the perfect time for a light and fruity dessert, and this Refreshing Summer Berry Bliss Cake fits the bill. Imagine a tall, fluffy cake layered with fresh berries and creamy frosting. The vibrant colors of strawberries, blueberries, and blackberries create a feast for the eyes, making it a showstopper at any gathering.
This cake is not just pretty; it’s also incredibly easy to make. The layers are soft and airy, complemented by a smooth frosting that balances the sweetness of the berries. It’s a delightful treat that captures the essence of summer.
Perfect for picnics or backyard barbecues, this cake can be made ahead of time. Just keep it chilled until you’re ready to serve. Your friends and family will love the fresh flavors and the beautiful presentation!
Preheat the oven to 350°F (175°C). Grease and flour three 9-inch round cake pans.
In a large bowl, mix flour, sugar, baking powder, and salt. Add butter, eggs, vanilla, and milk. Beat on medium speed until smooth.
Divide the batter evenly among the prepared pans. Bake for 25-30 minutes or until a toothpick inserted in the center comes out clean.
Let the cakes cool in the pans for 10 minutes, then transfer to wire racks to cool completely.
In a separate bowl, whip the heavy cream with powdered sugar until soft peaks form.
Once the cakes are cool, layer them with whipped cream and fresh berries in between each layer.
Frost the top and sides of the cake with the remaining whipped cream. Decorate with more fresh berries and mint leaves.
Chill the cake for at least an hour before serving to let the flavors meld.
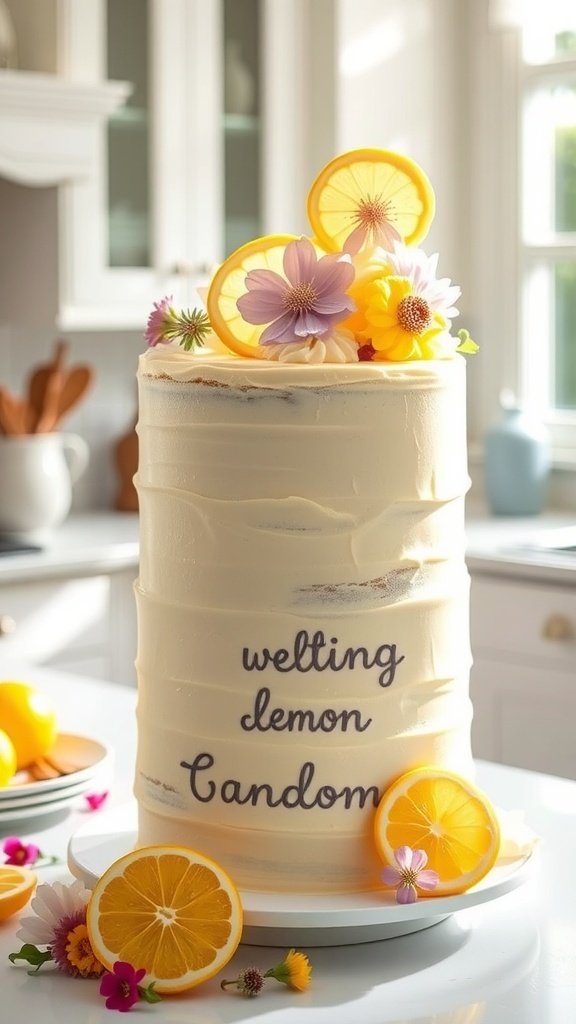
Zesty Lemonade Layer Cake
This Zesty Lemonade Layer Cake is a delightful treat perfect for summer gatherings. The cake is tall and layered, showcasing a smooth, creamy frosting that hints at the refreshing lemon flavor inside. Topped with fresh lemon slices and colorful flowers, it’s not just a dessert; it’s a centerpiece!
The bright yellow of the lemons and the vibrant flowers create a cheerful vibe. This cake is ideal for warm days when you want something light and refreshing. Each slice promises a burst of citrusy goodness, making it a favorite among friends and family.
Now, let’s get to the fun part—making this delicious cake!
Ingredients
2 ½ cups all-purpose flour
2 ½ teaspoons baking powder
½ teaspoon salt
1 cup unsalted butter, softened
2 cups granulated sugar
4 large eggs
1 tablespoon lemon zest
1 cup buttermilk
1 teaspoon vanilla extract
1 cup lemon juice (freshly squeezed)
4 cups powdered sugar
1 cup unsalted butter, softened (for frosting)
2 tablespoons heavy cream
Fresh lemon slices and edible flowers for decoration
Instructions
Preheat your oven to 350°F (175°C). Grease and flour three 9-inch round cake pans.
In a bowl, whisk together flour, baking powder, and salt. Set aside.
In a large mixing bowl, cream together the softened butter and granulated sugar until light and fluffy. Add the eggs one at a time, mixing well after each addition.
Stir in the lemon zest, buttermilk, and vanilla extract. Gradually add the flour mixture, mixing until just combined.
Pour in the lemon juice and mix until smooth. Divide the batter evenly among the prepared pans.
Bake for 25-30 minutes or until a toothpick inserted in the center comes out clean. Let the cakes cool in the pans for 10 minutes before transferring them to wire racks to cool completely.
For the frosting, beat together the softened butter and powdered sugar until creamy. Add heavy cream and mix until smooth and fluffy.
Once the cakes are completely cool, place one layer on a serving plate. Spread a layer of frosting on top, then add the second cake layer. Repeat with the third layer.
Frost the top and sides of the cake. Decorate with fresh lemon slices and edible flowers.
Slice and serve this refreshing cake at your next summer gathering!
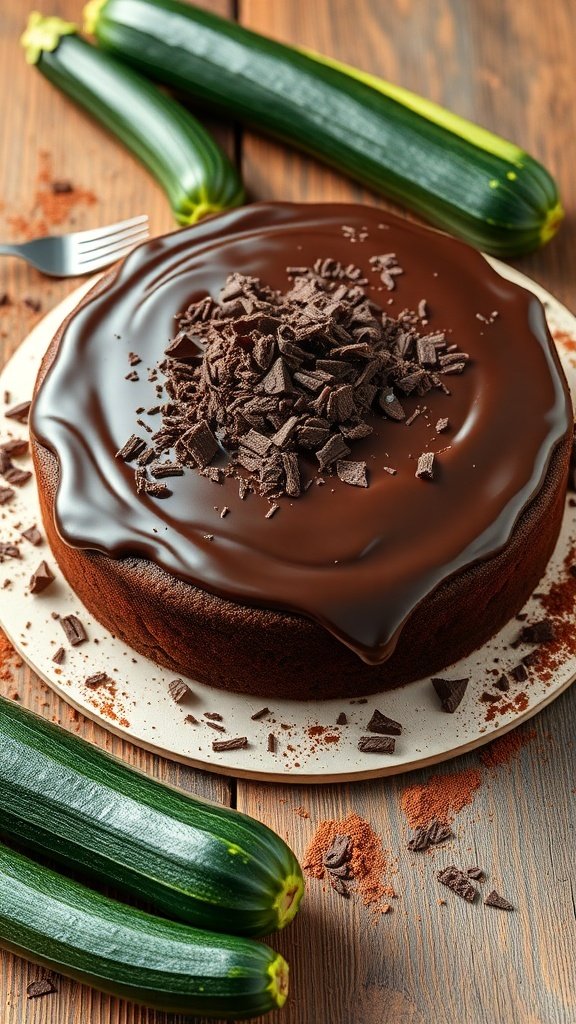
Decadent Chocolate Zucchini Cake
Summer is the perfect time for a delightful treat, and nothing says summer quite like a rich chocolate zucchini cake. This cake is not only delicious but also a great way to sneak in some veggies. The image showcases a beautifully frosted chocolate cake topped with shavings of dark chocolate, surrounded by fresh zucchinis. It’s a feast for the eyes and the taste buds!
The combination of chocolate and zucchini might sound unusual, but it works wonders. The zucchini keeps the cake moist and adds a subtle sweetness. Plus, it’s a fun way to use up that summer garden bounty. Whether you’re hosting a barbecue or just enjoying a quiet afternoon, this cake is sure to impress.
Let’s get to the good stuff! Here’s how to whip up this amazing chocolate zucchini cake.
Ingredients
1 ½ cups all-purpose flour
1 cup granulated sugar
½ cup unsweetened cocoa powder
1 teaspoon baking soda
½ teaspoon baking powder
½ teaspoon salt
1 teaspoon vanilla extract
2 large eggs
1 cup vegetable oil
2 cups grated zucchini (about 2 medium zucchinis)
1 cup semi-sweet chocolate chips
1 cup chocolate frosting (store-bought or homemade)
Chocolate shavings for topping
Instructions
Preheat your oven to 350°F (175°C). Grease and flour a 9-inch round cake pan.
In a large bowl, mix together the flour, sugar, cocoa powder, baking soda, baking powder, and salt.
In another bowl, whisk together the eggs, oil, and vanilla extract. Gradually add this mixture to the dry ingredients, stirring until just combined.
Fold in the grated zucchini and chocolate chips until evenly distributed.
Pour the batter into the prepared cake pan and smooth the top. Bake for 30-35 minutes or until a toothpick inserted in the center comes out clean.
Let the cake cool in the pan for 10 minutes before transferring it to a wire rack to cool completely.
Once cooled, spread the chocolate frosting on top and sprinkle with chocolate shavings for a finishing touch.
Enjoy a slice of this chocolate zucchini cake with friends and family. It’s a sweet way to celebrate summer!
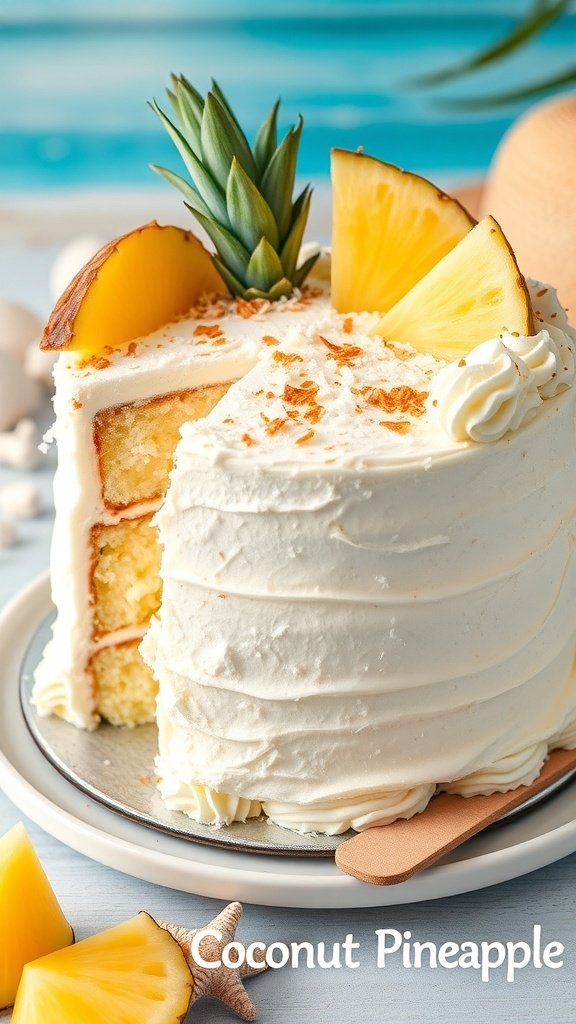
Tropical Coconut Pineapple Cake
Summer is the perfect time for a refreshing treat, and what could be better than a Tropical Coconut Pineapple Cake? This delightful dessert captures the essence of sunny days with its light, fluffy layers and tropical flavors.
The cake features a moist vanilla base, complemented by rich coconut and sweet pineapple. Topped with a creamy frosting, it’s a feast for the eyes and the taste buds. The vibrant pineapple slices and a touch of toasted coconut on top add a beautiful finish, making it a showstopper for any summer gathering.
Whether you’re hosting a backyard barbecue or just enjoying a sunny afternoon, this cake is sure to impress. It’s light enough to enjoy after a hearty meal, yet satisfying enough to be the star of the dessert table.
Ingredients
2 cups all-purpose flour
1 1/2 cups granulated sugar
1/2 cup unsalted butter, softened
1 cup coconut milk
4 large eggs
1 tablespoon baking powder
1/2 teaspoon salt
1 cup crushed pineapple, drained
1 cup shredded coconut
1 teaspoon vanilla extract
2 cups heavy whipping cream
1/4 cup powdered sugar
1 teaspoon vanilla extract (for frosting)
Toasted coconut and pineapple slices for garnish
Instructions
Preheat the oven to 350°F (175°C). Grease and flour two 9-inch round cake pans.
In a large bowl, cream together the butter and sugar until light and fluffy. Beat in the eggs one at a time, then stir in the vanilla extract.
In another bowl, combine the flour, baking powder, and salt. Gradually add this to the creamed mixture, alternating with the coconut milk. Mix until just combined.
Fold in the crushed pineapple and shredded coconut.
Divide the batter evenly between the prepared pans. Bake for 25-30 minutes, or until a toothpick inserted into the center comes out clean.
Let the cakes cool in the pans for 10 minutes, then turn them out onto wire racks to cool completely.
For the frosting, whip the heavy cream with powdered sugar and vanilla until stiff peaks form.
Once the cakes are cool, spread a layer of frosting on top of one cake layer. Place the second layer on top and frost the top and sides of the cake.
Garnish with toasted coconut and pineapple slices. Serve chilled and enjoy!
Classic Strawberry Shortcake Delight
Summer is the perfect time for a refreshing dessert, and nothing says summer quite like a classic strawberry shortcake. This delightful treat features layers of fluffy sponge cake, fresh strawberries, and whipped cream. The vibrant colors and fresh flavors make it a showstopper at any gathering.
The cake is light and airy, providing a perfect base for the sweet strawberries. Each bite is a mix of soft cake, juicy fruit, and creamy topping, creating a delightful experience. Topped with a few mint leaves, it’s not just tasty but also visually appealing.
Making strawberry shortcake is simple and fun. You can even involve the kids in the kitchen for a family activity. Gather your ingredients, and let’s get baking!
Ingredients
2 cups all-purpose flour
1/2 cup granulated sugar
1 tablespoon baking powder
1/2 teaspoon salt
1/2 cup unsalted butter, softened
1 cup milk
2 large eggs
2 cups fresh strawberries, sliced
1 cup heavy whipping cream
2 tablespoons powdered sugar
Fresh mint leaves for garnish
Instructions
Preheat your oven to 350°F (175°C). Grease and flour two 9-inch round cake pans.
In a large bowl, mix flour, sugar, baking powder, and salt. Add the softened butter, milk, and eggs. Beat until smooth.
Divide the batter evenly between the prepared pans. Bake for 25-30 minutes or until a toothpick comes out clean.
Let the cakes cool in the pans for 10 minutes, then transfer to wire racks to cool completely.
While the cakes cool, whip the heavy cream with powdered sugar until soft peaks form.
Once the cakes are cool, slice each in half horizontally. Layer the bottom half with whipped cream and strawberries, then place the top half back on.
Repeat for the second cake. Top with remaining whipped cream, strawberries, and mint leaves.
Serve immediately and enjoy your classic strawberry shortcake!
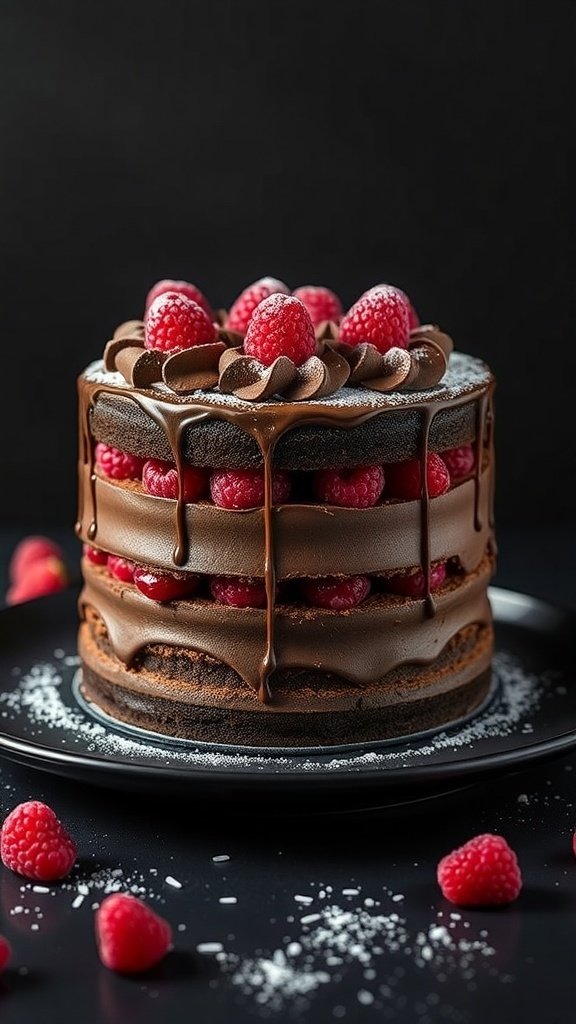
Indulgent Chocolate Raspberry Cake
Summer is the perfect time for a delightful dessert, and what could be better than a rich chocolate raspberry cake? This cake is a feast for the eyes and the taste buds. Layers of moist chocolate cake are sandwiched with fresh raspberries and creamy chocolate frosting. The glossy chocolate ganache drips down the sides, making it look even more tempting.
The bright red raspberries add a pop of color and a tart contrast to the sweet chocolate. This cake is not just a treat; it’s a celebration of summer flavors. Whether it’s for a birthday, a picnic, or just a sweet indulgence at home, this cake is sure to impress.
Ingredients
1 ¾ cups all-purpose flour
1 ¾ cups granulated sugar
¾ cup unsweetened cocoa powder
1 ½ teaspoons baking powder
1 ½ teaspoons baking soda
1 teaspoon salt
2 large eggs
1 cup whole milk
½ cup vegetable oil
2 teaspoons vanilla extract
1 cup boiling water
2 cups fresh raspberries
1 cup heavy cream
8 ounces semi-sweet chocolate, chopped
Powdered sugar for dusting
Instructions
Preheat the oven to 350°F (175°C). Grease and flour two 9-inch round cake pans.
In a large bowl, mix flour, sugar, cocoa powder, baking powder, baking soda, and salt. Add eggs, milk, oil, and vanilla. Beat on medium speed for 2 minutes. Stir in boiling water until smooth.
Pour the batter evenly into the prepared pans. Bake for 30-35 minutes or until a toothpick comes out clean. Let the cakes cool in the pans for 10 minutes, then turn them out onto wire racks to cool completely.
For the ganache, heat the heavy cream in a saucepan until it just begins to simmer. Pour it over the chopped chocolate in a bowl. Let it sit for a few minutes, then stir until smooth.
Once the cakes are cool, place one layer on a serving plate. Spread a layer of ganache on top and sprinkle with fresh raspberries. Place the second layer on top and frost the entire cake with the remaining ganache.
Garnish with more raspberries and dust with powdered sugar before serving.
Peach Melba Cake Extravaganza
Summer is the perfect time to enjoy light and fruity desserts, and the Peach Melba Cake is a delightful choice. This cake showcases layers of fluffy sponge, creamy frosting, and fresh fruit. The vibrant colors of peaches and raspberries make it visually stunning, perfect for any summer gathering.
Each slice reveals a beautiful combination of flavors. The sweetness of ripe peaches pairs wonderfully with the tartness of raspberries. Topped with a light frosting, this cake is a refreshing treat on a warm day. It’s not just a dessert; it’s a celebration of summer!
Ingredients
2 cups all-purpose flour
1 ½ cups granulated sugar
1 cup unsalted butter, softened
4 large eggs
1 cup milk
2 teaspoons baking powder
1 teaspoon vanilla extract
1 cup fresh peaches, sliced
1 cup fresh raspberries
1 cup heavy cream
2 tablespoons powdered sugar
Instructions
Preheat the oven to 350°F (175°C). Grease and flour three 8-inch round cake pans.
In a large bowl, cream together the butter and granulated sugar until light and fluffy. Add the eggs one at a time, mixing well after each addition.
Stir in the vanilla extract. In another bowl, combine the flour and baking powder. Gradually add this to the butter mixture, alternating with the milk. Mix until just combined.
Divide the batter evenly among the prepared pans. Bake for 25-30 minutes or until a toothpick inserted in the center comes out clean. Let the cakes cool in the pans for 10 minutes before transferring to wire racks to cool completely.
While the cakes cool, whip the heavy cream with powdered sugar until soft peaks form.
Once the cakes are cool, layer them with whipped cream, sliced peaches, and raspberries in between each layer. Frost the top and sides with remaining whipped cream, and decorate with more fresh fruit.
Slice and serve chilled for a refreshing summer dessert!
Light And Airy Vanilla Bean Cake
This Light and Airy Vanilla Bean Cake is a perfect treat for summer gatherings. The cake is beautifully decorated with vibrant edible flowers, making it not just delicious but also a feast for the eyes. The soft, fluffy texture pairs wonderfully with the rich vanilla flavor, creating a delightful experience with every bite.
Surrounding the cake are fresh fruits like bananas and berries, adding a refreshing touch. These fruits can also be used as toppings or served on the side, enhancing the summer vibe. The combination of the cake and fruits makes it a light dessert that won’t weigh you down during those warm days.
Here’s how to make your own Light and Airy Vanilla Bean Cake!
Ingredients
2 cups all-purpose flour
1 ½ cups granulated sugar
½ cup unsalted butter, softened
1 cup milk
3 large eggs
2 ½ teaspoons baking powder
1 teaspoon vanilla bean paste
½ teaspoon salt
1 cup heavy cream (for frosting)
2 tablespoons powdered sugar (for frosting)
Edible flowers for decoration
Instructions
Preheat your oven to 350°F (175°C). Grease and flour two 9-inch round cake pans.
In a large bowl, cream together the softened butter and granulated sugar until light and fluffy. Add eggs one at a time, mixing well after each addition.
Stir in the vanilla bean paste. In another bowl, combine flour, baking powder, and salt. Gradually add this dry mixture to the wet ingredients, alternating with milk. Mix until just combined.
Divide the batter evenly between the prepared pans. Bake for 25-30 minutes, or until a toothpick inserted in the center comes out clean.
Let the cakes cool in the pans for 10 minutes, then transfer to wire racks to cool completely.
For the frosting, whip the heavy cream with powdered sugar until soft peaks form. Frost the cooled cakes and stack them.
Decorate with edible flowers and serve with fresh fruits on the side. Enjoy your summer cake!
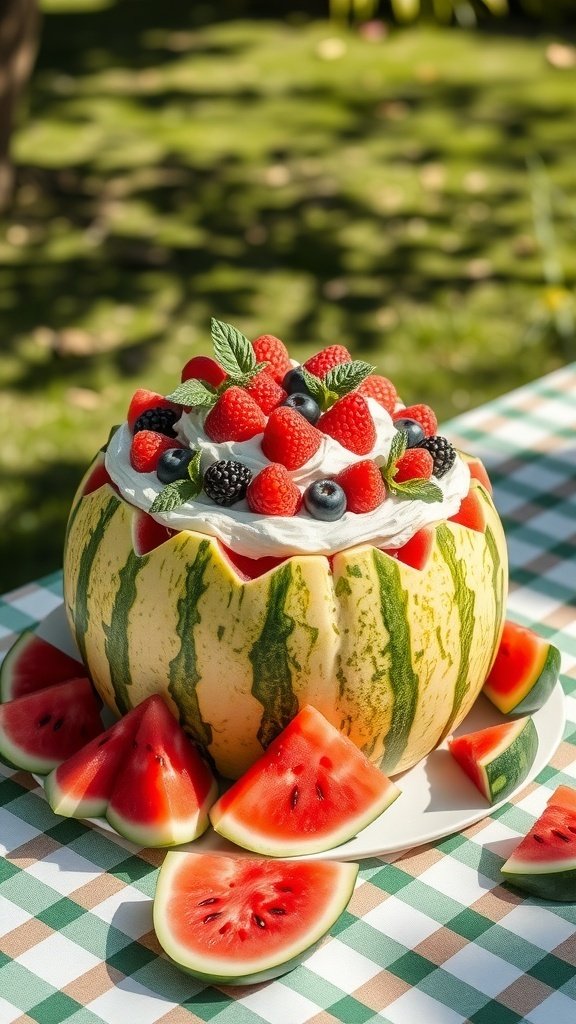
Refreshing Watermelon Cake
Summer is the perfect time for a refreshing treat, and what could be better than a watermelon cake? This delightful dessert takes the classic watermelon and transforms it into a stunning cake that’s both beautiful and delicious. The vibrant colors of the watermelon, combined with fresh berries and whipped cream, create a feast for the eyes and the taste buds.
The cake is made by hollowing out a watermelon and filling it with layers of whipped cream and assorted berries. This not only keeps the cake light and refreshing but also adds a burst of flavor with every bite. It’s a great centerpiece for summer gatherings, picnics, or just a fun dessert at home.
To make your own watermelon cake, you’ll need a few simple ingredients. Gather a ripe watermelon, some fresh berries like strawberries, blueberries, and raspberries, and whipped cream. The process is easy and can be a fun activity to do with family or friends.
Ingredients
1 large watermelon
2 cups heavy whipping cream
1/4 cup powdered sugar
1 teaspoon vanilla extract
1 cup strawberries, sliced
1 cup blueberries
1 cup raspberries
Fresh mint leaves for garnish
Instructions
Prepare the Watermelon: Cut the watermelon in half lengthwise. Carefully scoop out the flesh, leaving a sturdy shell. Cut the watermelon flesh into small cubes and set aside.
Make the Whipped Cream: In a mixing bowl, beat the heavy whipping cream, powdered sugar, and vanilla extract until soft peaks form.
Layer the Cake: Start by adding a layer of whipped cream to the bottom of the watermelon shell. Then, add a layer of watermelon cubes and a mix of berries. Repeat the layers until the shell is filled, finishing with whipped cream on top.
Decorate: Top the cake with additional berries and mint leaves for a fresh touch.
Chill and Serve: Place the watermelon cake in the refrigerator for at least an hour before serving. Slice into wedges and enjoy!
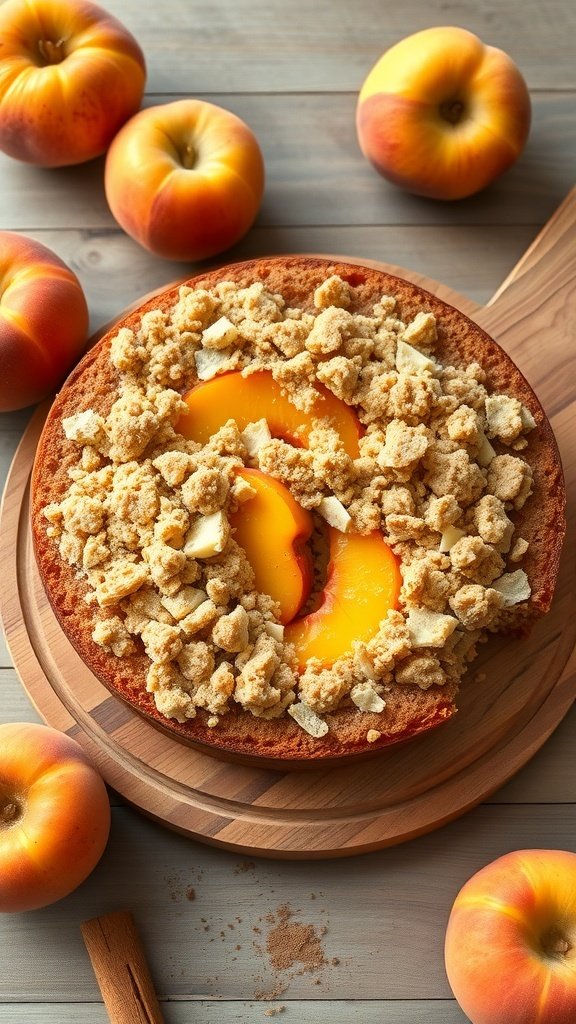
Cinnamon Peach Crumble Cake
Summer is the perfect time for a delightful treat, and nothing says summer quite like a Cinnamon Peach Crumble Cake. This cake combines the sweetness of ripe peaches with a crunchy crumble topping, making it a fantastic dessert for any occasion.
The image showcases a beautifully baked cake topped with golden peaches and a generous layer of crumble. The warm colors of the peaches and the golden crust are inviting, hinting at the delicious flavors waiting inside. Surrounding the cake are fresh peaches, adding to the seasonal charm.
Making this cake is simple and rewarding. You’ll love the aroma of cinnamon wafting through your kitchen as it bakes. It’s perfect for summer picnics, family gatherings, or just a cozy evening at home.
Ingredients
2 cups all-purpose flour
1 cup granulated sugar
1 teaspoon baking powder
1/2 teaspoon baking soda
1/2 teaspoon salt
1 teaspoon ground cinnamon
1/2 cup unsalted butter, softened
2 large eggs
1 teaspoon vanilla extract
1/2 cup buttermilk
4 cups fresh peaches, sliced
1 cup brown sugar, packed
1 cup rolled oats
1/2 cup cold butter, cubed
1/2 cup chopped nuts (optional)
Instructions
Preheat the oven to 350°F (175°C). Grease a 9-inch round cake pan.
In a large bowl, mix flour, sugar, baking powder, baking soda, salt, and cinnamon. Add softened butter and mix until crumbly.
In another bowl, whisk together eggs, vanilla, and buttermilk. Pour this mixture into the dry ingredients and stir until just combined.
Fold in the sliced peaches gently. Pour the batter into the prepared cake pan.
In a separate bowl, combine brown sugar, oats, and cold butter. Mix until crumbly. If using, stir in chopped nuts.
Spread the crumble mixture over the top of the cake batter.
Bake for 40-45 minutes or until a toothpick inserted in the center comes out clean.
Let the cake cool for a bit before serving. Enjoy it warm or at room temperature!
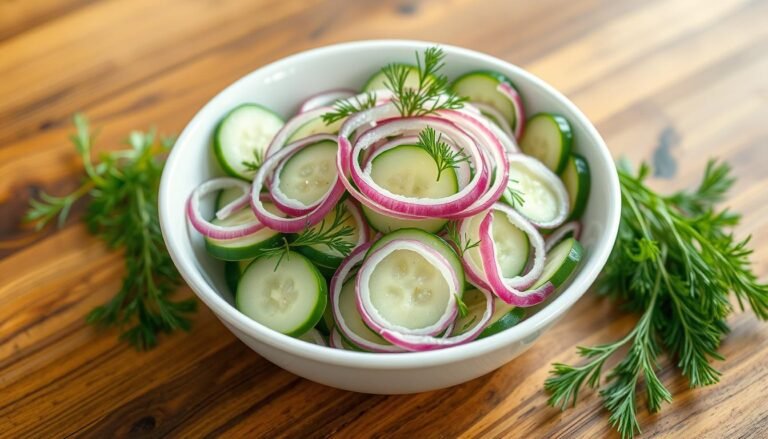
There’s something undeniably refreshing about a crisp cucumber salad on a hot summer day. This versatile dish has graced tables across cultures for generations, offering the perfect balance of crunch, tang, and garden-fresh flavor. Whether you’re planning a backyard barbecue, looking for a light lunch option, or seeking a simple side dish that complements virtually…
Surprising fact: Americans spend an average of 37 minutes preparing an evening meal, yet most nights end with stress and takeout. This Website contains affiliate links. That means I may earn a small commission if you purchase through my links, at no extra cost to you. This guide is made to change that. You’ll find…
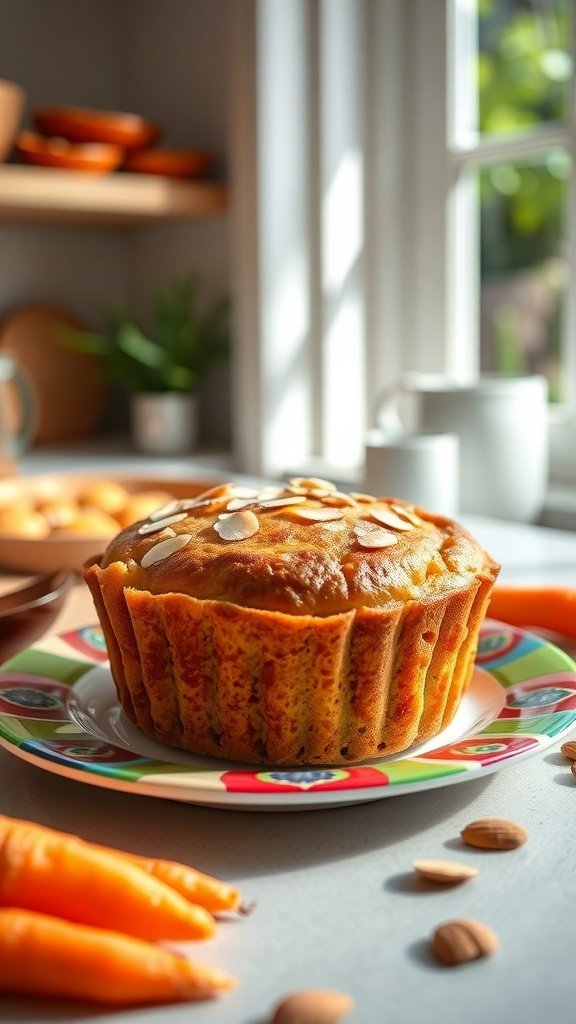
Carrot souffle is a delightful dish that combines the natural sweetness of carrots with a light, airy texture that’s perfect for any meal. It’s surprisingly simple to make and can serve as a unique side dish or a comforting main course. With a hint of nutmeg and a touch of creaminess, this dish elevates the…
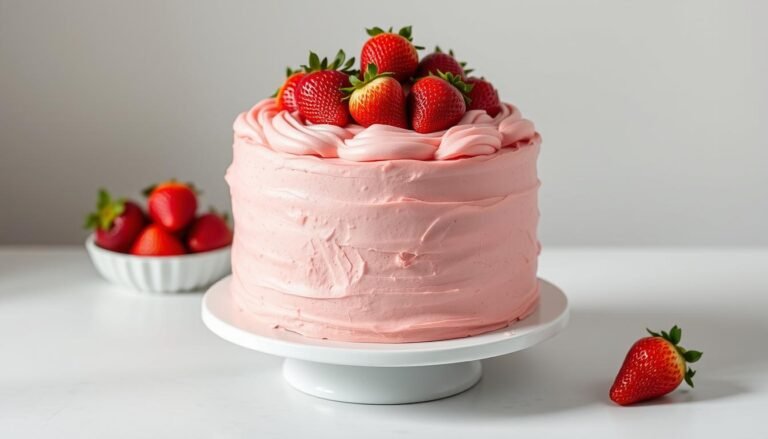
There’s something magical about a beautifully designed strawberry cake that captures attention and makes mouths water. Whether you’re planning a birthday celebration, wedding reception, or simply want to create something special for your Instagram or Pinterest feed, strawberry cake designs offer endless creative possibilities. The vibrant red berries, delicate pink frosting, and sweet flavor profile…
A son’s birthday is more than just another day on the calendar—it’s a celebration of the joy, love, and pride that fills a parent’s heart every day. Whether your son is taking his first steps or walking his own path in adulthood, finding the perfect way to express your love on his special day matters…
There’s something truly magical about a granddaughter’s birthday. It’s a day that celebrates not just another year of her life, but the beautiful bond you share—a connection that spans generations and grows stronger with each passing year. As a grandparent, you hold a special place in her heart, offering a unique blend of unconditional love,…