Celebrating a summer birthday brings a unique flavor to your special day! With longer days, warm weather, and a spirit of relaxation in the air, it’s the perfect time for beach parties, barbecues, and outdoor fun. Whether you’re planning a big bash or a simple gathering, summer birthdays offer endless opportunities to create memorable moments with friends and family.
This Website contains affiliate links. That means I may earn a small commission if you purchase through my links, at no extra cost to you.
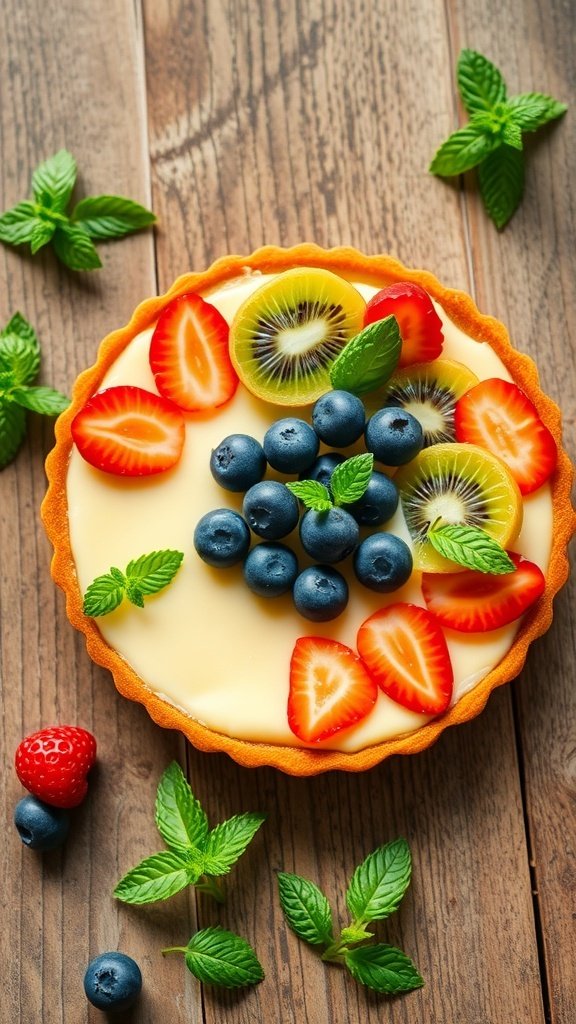
Delightful Summer Fruit Tart
Summer is the perfect time for fresh fruits, and a fruit tart is a delightful way to celebrate a birthday. This tart is vibrant and colorful, showcasing a variety of fruits like strawberries, blueberries, and kiwi. Each slice offers a burst of flavor, making it a hit at any summer gathering.
The creamy filling complements the crisp crust, creating a balance that everyone loves. Topped with mint leaves, this tart not only looks beautiful but also adds a refreshing touch. It’s a simple yet elegant dessert that can brighten up any birthday celebration.
Ingredients
1 pre-made tart shell
1 cup heavy cream
1/2 cup powdered sugar
1 teaspoon vanilla extract
1 cup strawberries, sliced
1 cup blueberries
1 kiwi, sliced
Fresh mint leaves for garnish
Instructions
Prepare the Filling: In a mixing bowl, whip the heavy cream until soft peaks form. Gradually add powdered sugar and vanilla extract, continuing to whip until stiff peaks form.
Fill the Tart: Spoon the whipped cream mixture into the pre-made tart shell, spreading it evenly.
Arrange the Fruits: Decorate the top with sliced strawberries, blueberries, and kiwi. Be creative with the arrangement!
Chill: Place the tart in the refrigerator for at least 1 hour to set.
Serve: Garnish with fresh mint leaves before serving. Enjoy your refreshing summer fruit tart!
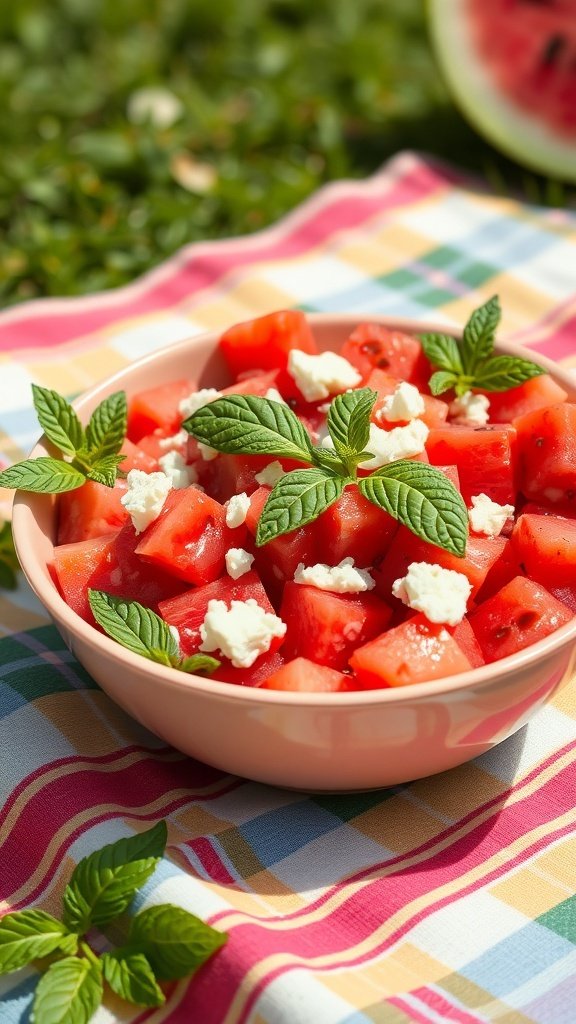
Refreshing Watermelon Salad
Summer birthdays call for cool and refreshing treats, and nothing fits the bill quite like a watermelon salad. This dish is not only vibrant but also incredibly easy to whip up. The juicy watermelon cubes, paired with creamy feta and fresh mint, create a delightful combination that’s perfect for any summer gathering.
Imagine a sunny day, friends gathered around, and this colorful salad sitting center stage. The sweet and savory flavors dance together, making every bite a joy. It’s a great way to stay hydrated while enjoying a delicious dish that everyone will love.
Here’s how to make this refreshing watermelon salad:
Ingredients
4 cups watermelon, cubed
1 cup feta cheese, crumbled
1/4 cup fresh mint leaves, chopped
2 tablespoons olive oil
1 tablespoon balsamic vinegar
Salt and pepper to taste
Instructions
Prepare the Watermelon: Start by cutting the watermelon into bite-sized cubes. Place them in a large mixing bowl.
Add Feta and Mint: Sprinkle the crumbled feta cheese and chopped mint leaves over the watermelon.
Make the Dressing: In a small bowl, whisk together the olive oil, balsamic vinegar, salt, and pepper.
Toss Together: Drizzle the dressing over the salad and gently toss everything together until well combined.
Serve: Transfer the salad to a serving bowl and enjoy immediately, or chill in the fridge for a bit before serving.
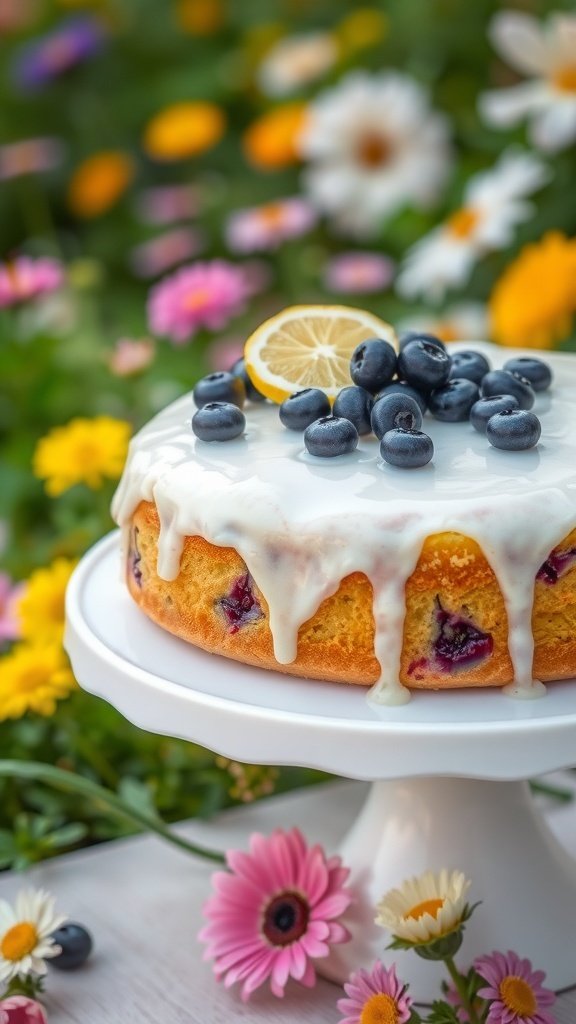
Zesty Lemon Blueberry Cake
Summer birthdays call for bright flavors and refreshing treats. This Zesty Lemon Blueberry Cake is perfect for celebrating those sunny days. The cake is moist and fluffy, bursting with juicy blueberries and a hint of lemon zest. Topped with a creamy glaze, it’s a delightful addition to any birthday party.
The vibrant colors of the cake, combined with the beautiful flowers in the background, create a cheerful atmosphere. Imagine serving this cake outdoors, surrounded by friends and family, with laughter and sunshine all around. It’s a simple yet stunning dessert that everyone will love.
Now, let’s get to the fun part—making this delicious cake!
Ingredients
1 ½ cups all-purpose flour
1 cup granulated sugar
2 teaspoons baking powder
½ teaspoon salt
½ cup unsalted butter, softened
2 large eggs
1 teaspoon vanilla extract
½ cup milk
1 tablespoon lemon zest
1 cup fresh blueberries
Instructions
Preheat the oven to 350°F (175°C). Grease and flour an 8-inch round cake pan.
In a large bowl, mix flour, sugar, baking powder, and salt. Add softened butter, eggs, vanilla, milk, and lemon zest. Beat until smooth.
Gently fold in the blueberries, being careful not to break them.
Pour the batter into the prepared pan and smooth the top. Bake for 30-35 minutes, or until a toothpick comes out clean.
Let the cake cool in the pan for 10 minutes, then transfer it to a wire rack to cool completely.
Once cooled, drizzle with a simple glaze made from powdered sugar and lemon juice, then top with extra blueberries and lemon slices for decoration.
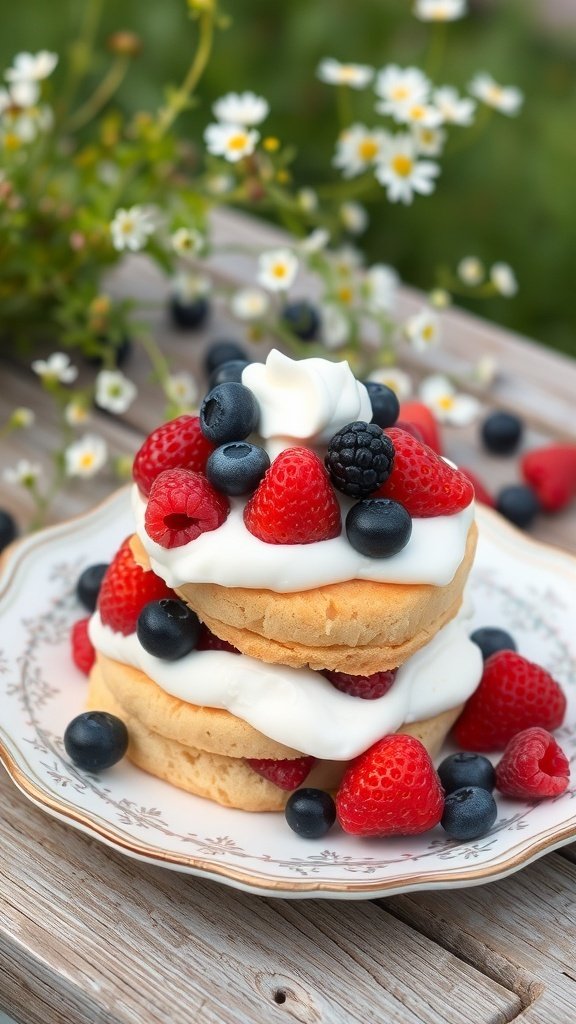
Classic Berry Shortcake
Summer birthdays are a perfect time to enjoy light and refreshing desserts. One classic choice is the berry shortcake. This delightful treat features layers of fluffy cake, whipped cream, and an assortment of fresh berries. The vibrant colors of strawberries, blueberries, and raspberries make it visually appealing and perfect for any celebration.
Imagine a sunny afternoon, friends gathered around, and a beautiful plate of berry shortcake at the center. Each bite is a burst of flavor, combining the sweetness of the berries with the creamy texture of the whipped cream. It’s a simple yet elegant dessert that captures the essence of summer.
Making berry shortcake is easy and fun. You can customize it with your favorite berries or even add a hint of lemon zest for extra freshness. It’s a great way to showcase seasonal fruits and impress your guests.
Preheat the oven to 400°F (200°C). In a bowl, mix flour, sugar, baking powder, and salt.
Add the cold butter and mix until crumbly. Stir in heavy cream and vanilla until just combined.
Turn the dough onto a floured surface and gently knead a few times. Roll out to about 1-inch thick and cut into rounds.
Place the rounds on a baking sheet and bake for 15-20 minutes until golden brown.
Let the cakes cool. Once cooled, slice each cake in half horizontally.
Layer the bottom half with whipped cream and a generous amount of mixed berries. Replace the top half and add more whipped cream and berries on top.
Serve immediately and enjoy your summer birthday celebration!
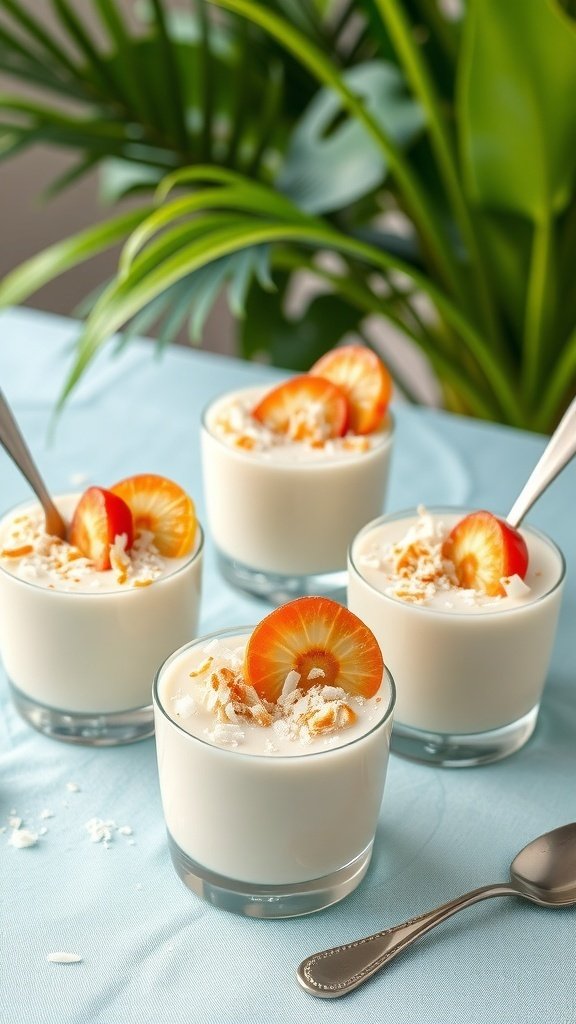
Creamy Coconut Pudding Cups
Summer birthdays call for refreshing treats, and creamy coconut pudding cups fit the bill perfectly. These delightful desserts are light, smooth, and packed with tropical flavor. The presentation is just as appealing as the taste, with each cup topped with a sprinkle of toasted coconut and vibrant fruit slices.
Imagine serving these at your next birthday bash. They bring a touch of elegance to any table and are easy to make ahead of time. The creamy texture is sure to impress your guests, making them feel special on their big day.
Let’s get to the recipe so you can whip these up for your summer celebration!
Ingredients
1 cup coconut milk
1 cup heavy cream
1/2 cup granulated sugar
1/4 cup cornstarch
1/4 teaspoon salt
1 teaspoon vanilla extract
1/2 cup shredded coconut, toasted
Fresh fruit for topping (like mango or strawberries)
Instructions
In a medium saucepan, combine coconut milk, heavy cream, sugar, cornstarch, and salt. Whisk until smooth.
Heat the mixture over medium heat, stirring constantly until it thickens, about 5-7 minutes.
Remove from heat and stir in vanilla extract. Let it cool slightly.
Pour the pudding into serving cups and refrigerate for at least 2 hours until set.
Before serving, top with toasted coconut and fresh fruit slices. Enjoy!
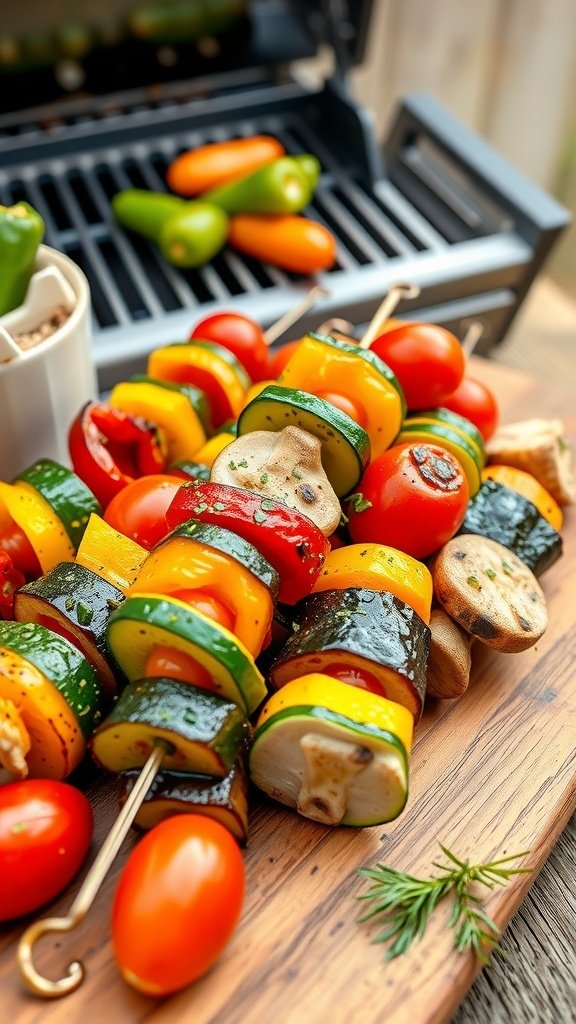
Savory Grilled Vegetable Skewers
Summer birthdays are perfect for outdoor gatherings, and what better way to celebrate than with delicious grilled vegetable skewers? These colorful skewers are not only easy to make but also a hit with everyone. They bring a burst of flavor and a healthy twist to your birthday feast.
Picture vibrant bell peppers, juicy cherry tomatoes, and tender zucchini all threaded onto skewers, ready to be grilled to perfection. The smoky aroma wafting through the air adds to the festive atmosphere. Plus, they’re a great way to enjoy seasonal veggies!
Gather your friends and family around the grill, and let everyone customize their skewers with their favorite vegetables. This interactive cooking experience makes the celebration even more fun!
Ingredients
1 zucchini, sliced
1 bell pepper (any color), cut into chunks
1 cup cherry tomatoes
1 red onion, cut into wedges
1 cup mushrooms, whole
2 tablespoons olive oil
1 teaspoon garlic powder
1 teaspoon dried oregano
Salt and pepper to taste
Skewers (wooden or metal)
Instructions
Prep the Skewers: If using wooden skewers, soak them in water for about 30 minutes to prevent burning.
Mix the Marinade: In a large bowl, combine olive oil, garlic powder, oregano, salt, and pepper. Toss in the sliced vegetables until they are well coated.
Assemble the Skewers: Thread the vegetables onto the skewers, alternating between different types for a colorful display.
Preheat the Grill: Heat the grill to medium-high. Once hot, place the skewers on the grill.
Grill: Cook for about 10-15 minutes, turning occasionally, until the vegetables are tender and slightly charred.
Serve: Remove from the grill and enjoy hot. These skewers are perfect as a side dish or a main course!
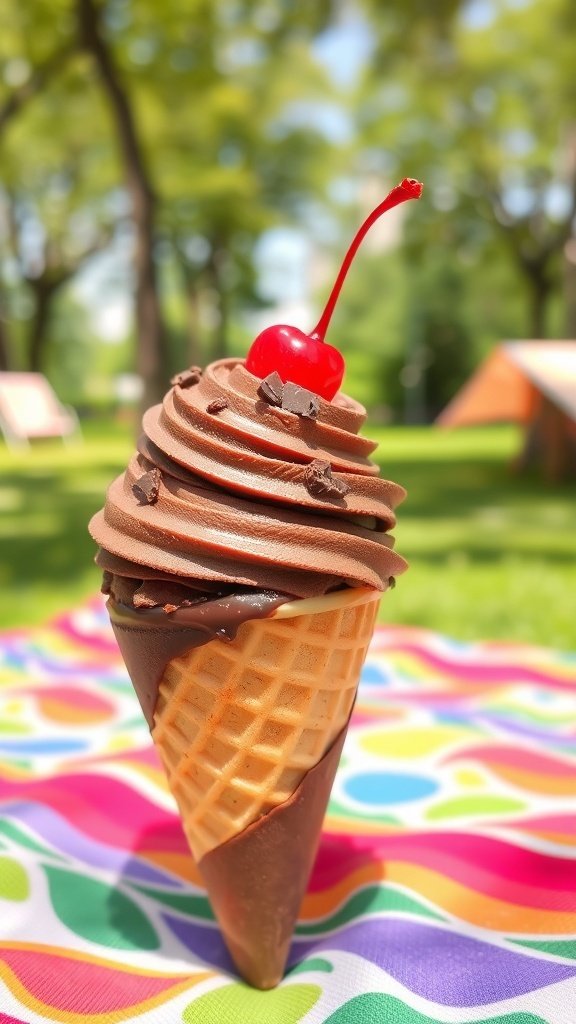
Decadent Chocolate Ice Cream
Summer birthdays are the perfect time for cool treats, and nothing beats a classic chocolate ice cream cone. Picture a swirl of rich, creamy chocolate ice cream piled high on a crunchy waffle cone. Topped with a bright red cherry and a sprinkle of chocolate shavings, it’s a delightful sight that brings smiles to everyone’s face.
This chocolate ice cream is not just a treat; it’s a celebration in a cone. Whether you’re at a picnic or a backyard party, it adds a touch of sweetness to the festivities. The combination of smooth chocolate and the satisfying crunch of the cone creates a delightful contrast that makes each bite irresistible.
Making your own chocolate ice cream at home can be a fun activity. It’s simple and allows you to customize the flavors to your liking. Plus, it’s a great way to involve friends and family in the birthday fun!
Ingredients
2 cups heavy cream
1 cup whole milk
3/4 cup granulated sugar
1 cup unsweetened cocoa powder
1 teaspoon vanilla extract
1/2 cup chocolate shavings (optional)
Waffle cones
Cherries for topping
Instructions
In a large bowl, whisk together the heavy cream, whole milk, sugar, cocoa powder, and vanilla extract until well combined.
Pour the mixture into an ice cream maker and churn according to the manufacturer’s instructions, usually about 20-25 minutes.
If you like, fold in chocolate shavings during the last few minutes of churning.
Transfer the ice cream to an airtight container and freeze for at least 4 hours or until firm.
When ready to serve, scoop the chocolate ice cream into waffle cones and top with cherries.
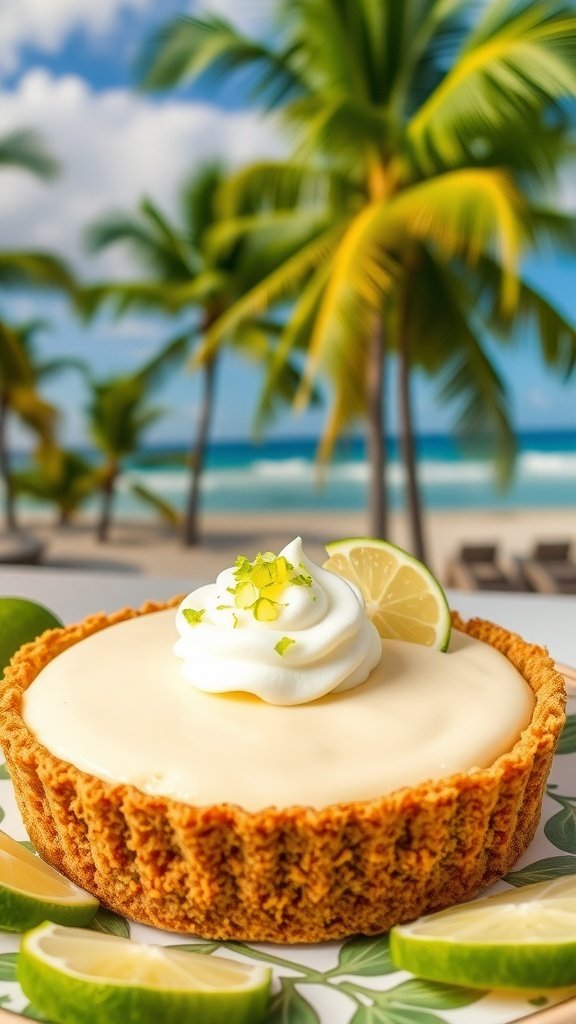
Light And Tangy Key Lime Pie
Summer birthdays are the perfect time to enjoy refreshing desserts, and nothing says summer quite like a key lime pie. This delightful treat combines the tartness of fresh limes with a creamy filling, all nestled in a buttery graham cracker crust. The vibrant colors of the pie, paired with the tropical backdrop of palm trees and a sunny beach, make it an ideal centerpiece for any summer celebration.
The key lime pie is not just a feast for the taste buds; it’s also visually appealing. The bright green lime slices and the fluffy whipped cream on top add a pop of color that captures the essence of summer. Whether you’re celebrating a birthday or just enjoying a sunny day, this pie brings a light and tangy flavor that everyone will love.
Ingredients
1 ½ cups graham cracker crumbs
½ cup granulated sugar
½ cup unsalted butter, melted
4 large egg yolks
1 can (14 ounces) sweetened condensed milk
½ cup key lime juice (fresh or bottled)
1 teaspoon lime zest
Whipped cream for topping
Additional lime slices for garnish
Instructions
Preheat the oven to 350°F (175°C). In a bowl, mix graham cracker crumbs, sugar, and melted butter until well combined.
Press the mixture into the bottom and up the sides of a 9-inch pie pan. Bake for 8-10 minutes until golden brown. Remove and let cool.
In another bowl, whisk together egg yolks, sweetened condensed milk, key lime juice, and lime zest until smooth.
Pour the filling into the cooled crust and bake for an additional 15 minutes. Remove from the oven and let it cool to room temperature.
Chill the pie in the refrigerator for at least 3 hours before serving. Top with whipped cream and garnish with lime slices before enjoying.
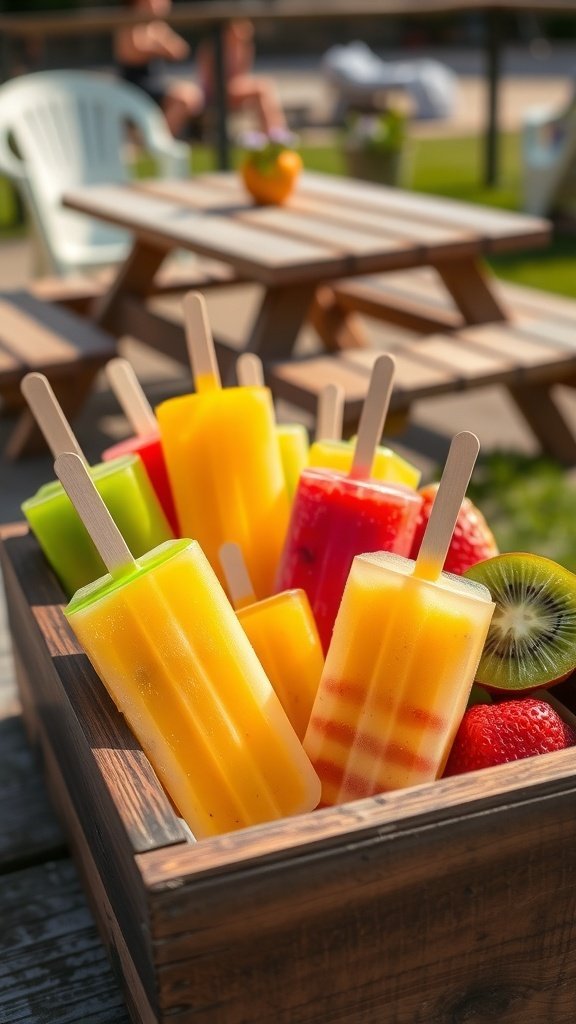
Fruity Popsicle Medley
Summer birthdays are the perfect time to enjoy refreshing treats, and fruity popsicles are a hit! These colorful popsicles bring a burst of flavor and fun to any celebration. Imagine a wooden box filled with vibrant popsicles in shades of red, yellow, green, and orange, each one promising a delicious taste of summer.
These popsicles are not just pretty; they are made from real fruit, making them a healthier choice for a sweet treat. You can see strawberries, kiwis, and other fruits peeking out, inviting everyone to grab one. They’re perfect for cooling down on a hot day and are sure to be a crowd-pleaser.
Making your own fruity popsicles is easy and allows you to customize flavors. You can mix and match fruits to create your favorite combinations. Plus, they can be made in advance, so you can enjoy the party without worrying about dessert.
Ingredients
2 cups fresh strawberries, hulled
2 cups fresh mango, diced
2 cups fresh kiwi, peeled and sliced
1 cup coconut water or fruit juice
1 tablespoon honey or agave syrup (optional)
Instructions
Blend the strawberries with half a cup of coconut water until smooth. Pour into popsicle molds, filling them about one-third full.
In a separate bowl, blend the mango with another half cup of coconut water. Pour on top of the strawberry layer in the molds.
Next, blend the kiwi with the remaining coconut water and honey if using. Pour this layer into the molds, filling them to the top.
Insert sticks and freeze for at least 4-6 hours or until solid.
To remove the popsicles, run warm water over the outside of the molds for a few seconds. Enjoy your fruity popsicles!
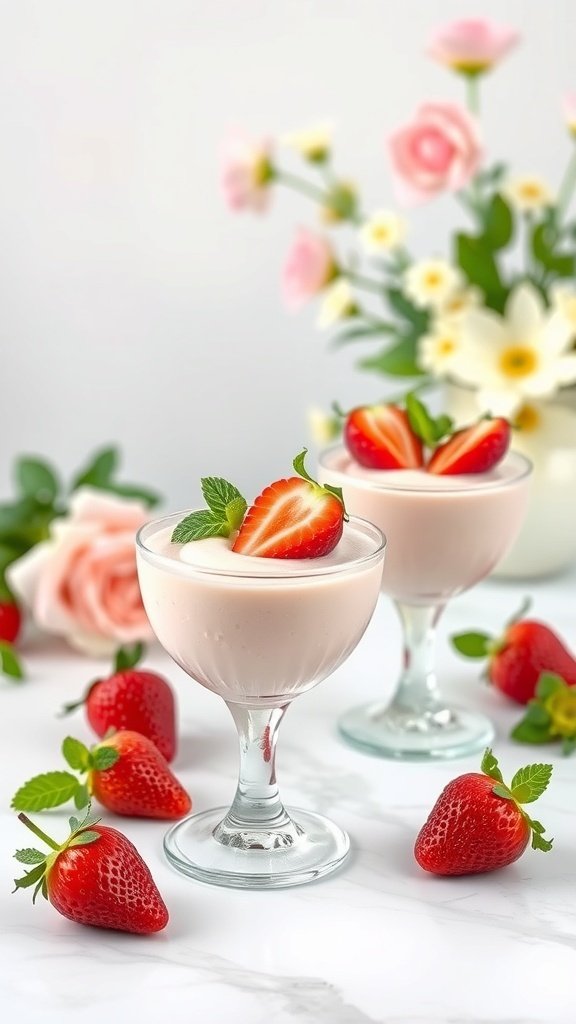
Elegant Strawberry Mousse
Summer birthdays call for light and refreshing desserts, and what better choice than a strawberry mousse? This delightful treat is not only visually appealing but also bursting with flavor. The soft, creamy texture paired with the sweetness of strawberries makes it a perfect addition to any birthday celebration.
Imagine a chilled glass filled with smooth mousse, topped with fresh strawberries and a sprig of mint. It’s a simple yet elegant dessert that can impress your guests without requiring hours in the kitchen. Plus, it’s a great way to showcase those juicy summer strawberries!
Making strawberry mousse is straightforward. You’ll need just a few ingredients, and the steps are easy to follow. This dessert can be prepared ahead of time, allowing you to enjoy the party without stress. Let’s get to the recipe!
Ingredients
2 cups fresh strawberries, hulled and sliced
1/4 cup granulated sugar
1 tablespoon lemon juice
1 cup heavy cream
1 teaspoon vanilla extract
1 tablespoon gelatin powder
3 tablespoons cold water
Instructions
Prepare the Strawberries: In a bowl, combine sliced strawberries, sugar, and lemon juice. Let it sit for about 10 minutes to release the juices.
Blend the Mixture: Use a blender or food processor to puree the strawberry mixture until smooth. Set aside.
Soften the Gelatin: In a small bowl, sprinkle gelatin over cold water. Let it sit for about 5 minutes to soften, then heat gently until dissolved.
Whip the Cream: In a separate bowl, whip the heavy cream and vanilla extract until soft peaks form.
Combine: Gently fold the strawberry puree into the whipped cream. Then, add the dissolved gelatin and mix until well combined.
Chill: Spoon the mousse into serving glasses and refrigerate for at least 2 hours, or until set.
Serve: Garnish with fresh strawberries and mint leaves before serving.
Birthdays are those magical days when we celebrate the people we care about most. Finding the perfect words to express your feelings can transform a simple “happy birthday” into a meaningful moment that touches the heart. Whether you’re looking for something funny to make them laugh, heartfelt to show your love, or inspirational to motivate…
Summer is the perfect time to take a break from the heat and let your crockpot do the cooking! With minimal prep and hassle, you can whip up tasty meals that keep your kitchen cool while delivering fresh flavors. These summer crockpot recipes will help you serve up delightful dishes that are easy to make…
Your birthday is a personal milestone worth celebrating with the same enthusiasm you’d show for others. Finding the perfect birthday quotes for me can transform your special day into a meaningful celebration of self-love and appreciation. After all, no one knows better than you what you’ve overcome, achieved, and dreamed about in the past year….
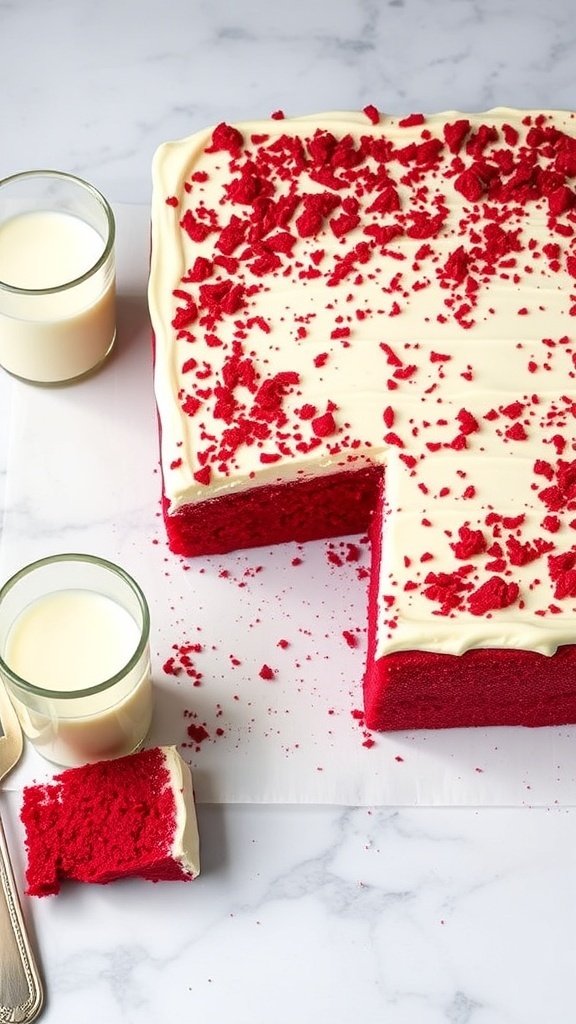
Graduation sheet cakes are the perfect way to celebrate this significant milestone in style and sweetness! These large, decorated cakes come in a variety of flavors and designs, allowing you to personalize them for your graduate’s unique achievements. Whether you’re throwing a big party or just getting together with family, a graduation sheet cake adds…
Roasted carrots in the oven are a simple and delicious side dish that can elevate any meal. With just a few ingredients and minimal prep, you can create tender, caramelized carrots that are bursting with flavor. This method brings out the natural sweetness of the carrots, making them a perfect pairing for various cuisines. This…
A perfect strawberry cake filling can transform an ordinary dessert into something truly spectacular. This vibrant, sweet-tart filling brings the essence of fresh strawberries to your cakes, cupcakes, and pastries. Whether you’re using peak-season berries or frozen fruit, this versatile recipe delivers consistent, mouthwatering results that will elevate your baking to professional levels. Follow along…