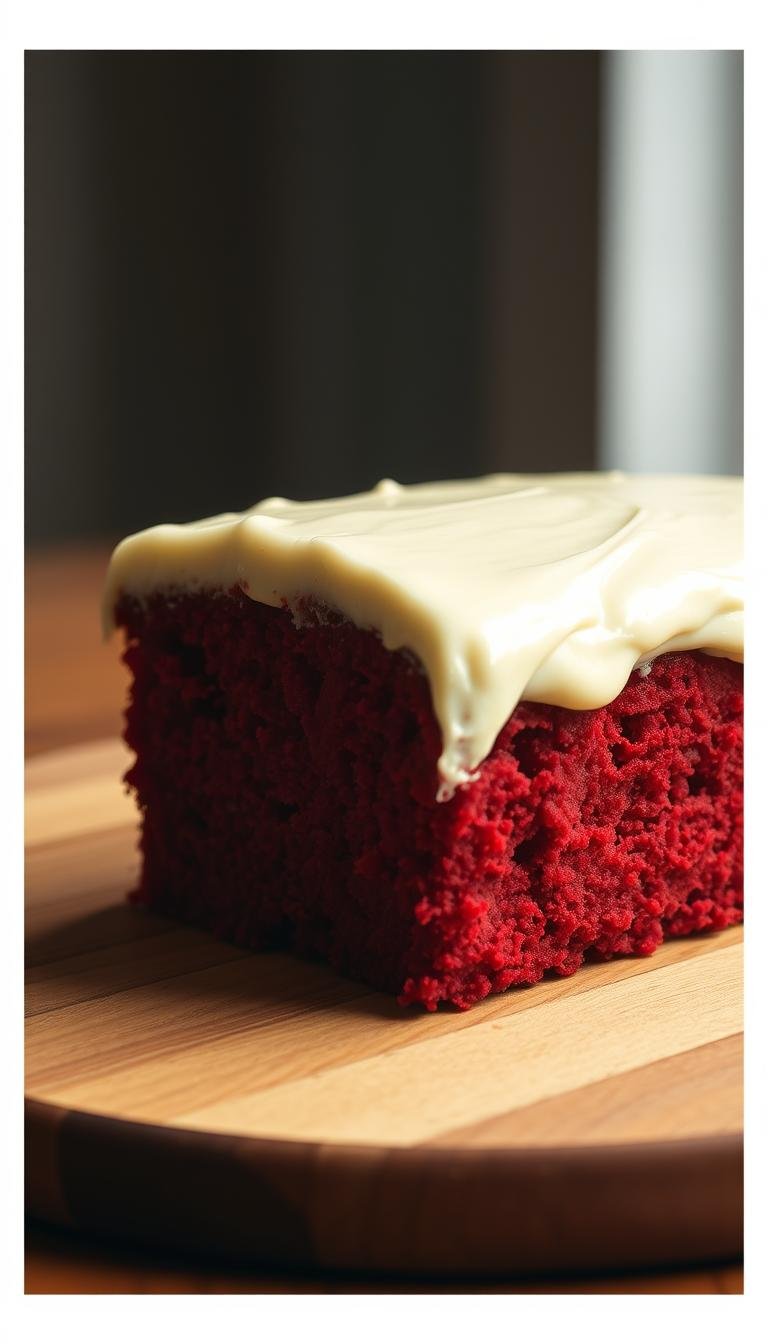
Here’s a surprise: Google searches for red velvet spike every February, with interest rising more than 120% the week of Valentine’s Day. That love is no fad—this Southern red velvet icon wins hearts with a plush crumb, a gentle cocoa note, and cool cream cheese frosting that cuts the sweetness just right.
This Website contains affiliate links. That means I may earn a small commission if you purchase through my links, at no extra cost to you.
This guide delivers a bakery-level red velvet cake recipe for home kitchens. You’ll learn the method that keeps a moist red velvet cake tender, plus how buttermilk, cocoa, and vinegar create that signature hue and flavor. We’ll use American standards in cups and grams, common pans, and trusted brands like King Arthur Baking flour, Bob’s Red Mill, Hershey’s cocoa, Philadelphia Cream Cheese, Nielsen-Massey vanilla, and AmeriColor gels.
If you want a foolproof homemade red velvet that bakes up even layers, smooth edges, and a classic red velvet cake you can frost without crumbs, you’re in the right place. We’ll cover mixing technique, exact bake times, smart storage, and options for cupcakes, sheet cakes, and Bundt pans—all designed to help you master this timeless favorite.
From ingredient science to clean-slice finishes, every step is tested for consistency. Whether it’s your first homemade red velvet or your hundredth, you’ll have a clear path to rich flavor, a velvety crumb, and a silky cream cheese frosting finish.
Key Takeaways
A proven red velvet cake recipe yields a moist red velvet cake with a fine, velvety crumb.
Buttermilk, a touch of cocoa, and vinegar set classic red velvet cake apart in taste and texture.
Use grams for accuracy; brands like King Arthur Baking, Hershey’s, and Philadelphia Cream Cheese boost consistency.
Room-temperature ingredients and proper creaming prevent dense layers and tunneling.
AmeriColor gels offer bold color; natural options are available for a softer hue.
Scales, oven thermometers, and common U.S. pans make homemade red velvet reliable.
Finish with smooth cream cheese frosting for the hallmark look and balanced flavor.
Why This Classic Red Velvet Cake Stands Out
This beloved Southern dessert wins hearts with its color, aroma, and clean slices. It’s a cocoa and buttermilk cake with a gentle lift and a fine, plush crumb. The flavor is balanced and comforting, perfect for a special occasion cake that looks striking on any table.
What Makes Red Velvet Different From Chocolate Cake
Think of red velvet vs chocolate cake as cousins, not twins. Traditional chocolate cake leans on deep cocoa for bold intensity. Red velvet uses a small dose of cocoa plus buttermilk and a touch of vinegar, so the cocoa stays subtle and smooth.
This cocoa and buttermilk cake depends on acidity reacting with baking soda for a tender, even crumb. Food coloring boosts the classic hue, while vanilla rounds the flavor so each bite tastes soft, not heavy.
The Signature Tang and Velvety Crumb
The tangy red velvet cake profile comes from buttermilk and white distilled vinegar working together. That duo softens gluten and creates a delicate texture that feels plush on the tongue. The creaming method adds tiny air pockets for lift and a fine, velvety bite.
Mild cocoa notes meet a gentle tang and a hint of vanilla. The result is a slice that pairs beautifully with cream cheese frosting and stays moist from first cut to last crumb.
Occasions This Cake Shines
As a special occasion cake, it stands out at weddings, birthdays, and holiday spreads. Its bold red layers and white frosting pop for Valentine’s Day and Christmas, and it’s a proud Southern dessert for Juneteenth gatherings.
Serve it when you want a dessert that looks elegant yet familiar. The neat slices, balanced flavor, and tender crumb make it a crowd-pleaser for intimate dinners and grand parties alike.
Key Ingredients for a Moist, Tender Crumb
The secret to a plush, bakery-style red velvet starts with balance. A gentle cocoa note, a creamy tang, and the right structure turn a simple batter into a standout buttermilk cake with a fine, velvety bite.
Cocoa Powder, Buttermilk, and Vinegar Synergy
Use natural cocoa powder for red velvet—Hershey’s Natural keeps the batter’s acidity in check and the flavor mild. Cultured buttermilk adds lactic acid that softens gluten, so every slice stays tender and moist.
A small splash of vinegar in cake (5% white vinegar) activates fresh baking soda for lift. This trio keeps color bright, crumb fine, and the tang balanced without turning the cake bitter.
Choosing the Right Flour and Fats
For a soft crumb, consider cake flour vs all-purpose. Brands like Swan’s Down or King Arthur Unbleached Cake Flour have lower protein, which limits gluten and yields a delicate texture. If using Gold Medal or King Arthur all-purpose, sift well and mix gently to avoid toughness.
Blend unsalted butter for rich flavor with a bit of neutral oil—canola, vegetable, or grapeseed—to lock in moisture even after chilling. A touch of Nielsen-Massey Madagascar vanilla and fine salt rounds out the profile of a classic buttermilk cake.
Food Coloring Options: Liquid vs. Gel
Traditional liquid red works, but it can thin the batter if you need a lot. High-quality gel food coloring like AmeriColor Super Red or Wilton Red-Red delivers bold hue with minimal volume, so structure stays intact.
If you prefer a deeper burgundy tone, pair gel color with natural cocoa powder and keep the acidity steady with a measured dose of vinegar in cake for reliable rise and a smooth, even crumb.
red velvet cake recipe
This step-by-step red velvet cake delivers two even rounds with a soft crumb and a gentle cocoa note. Expect bakery-style red velvet layers that slice clean and stay moist.
Yield: Two 8-inch or 9-inch layers. Preheat oven to 350°F (177°C). Grease and line pans with parchment; dust with cocoa or flour.
Whisk 2 1/2 cups (300 g) cake flour, 2 tablespoons natural cocoa, 1 teaspoon fine sea salt, and 1 teaspoon baking soda. In a separate bowl, cream 1/2 cup (115 g) unsalted butter, 1/2 cup (120 ml) neutral oil, and 1 3/4 cups (350 g) sugar until pale and fluffy.
Beat in 3 room-temperature eggs, one at a time, then 2 teaspoons vanilla. Stir 1 to 1 1/2 tablespoons red gel coloring into 1 cup (240 ml) cultured buttermilk. Add dry ingredients and buttermilk in turns, starting and ending with dry. Mix 1 tablespoon (15 ml) white vinegar with a pinch of the baking soda and fold in at once.
Divide batter evenly and bake 23–30 minutes, depending on pan size. Cool 10 minutes in pans, then invert to racks. These steps are the backbone of the best red velvet cake and set you up for bakery-style red velvet layers.
For the frosting, beat 3/4 cup (170 g) unsalted butter until creamy, then add 12 ounces (340 g) full-fat cream cheese. Gradually mix in 4–5 cups (480–600 g) sifted confectioners’ sugar. Finish with 2 teaspoons vanilla, 1–2 teaspoons fresh lemon juice, and a pinch of salt for a classic red velvet with cream cheese frosting.
Level the cakes. Apply a thin crumb coat, chill 20–30 minutes, then frost smoothly. Follow this step-by-step red velvet cake method for neat slices and a plush finish.
Essential Tools and Bakeware Setup
Set yourself up for smooth baking with the right gear and a clear plan. Choose sturdy pans, measure with care, and prep for clean release. These small steps add up to tall, even layers and a tender crumb.
Pan Sizes and Materials
For layer cakes, use two 8×2-inch or 9×2-inch light-colored aluminum cake pans from brands like Fat Daddio’s or USA Pan. These promote even browning and steady rise. Dark pans run hot and may bake faster, so watch the clock.
For other formats: a standard 12-cup tin for cupcakes, a 9×13-inch for a sheet cake, and a 10–12-cup Bundt. Many bakers favor 8-inch cake pans to get taller slices with tidy edges.
Mixing Bowls, Scales, and Thermometers
Use nesting bowls, a balloon whisk, and a silicone spatula for folding. A stand mixer with paddle, like a KitchenAid, or a reliable hand mixer handles creaming with ease. A digital kitchen scale for baking from OXO or Escali keeps measurements precise.
Check doneness with an instant-read thermometer such as the ThermoWorks Thermapen. Aim for the correct internal temperature to avoid dry crumbs and guesswork.
Prep for Even Layers and Easy Release
Line pans with parchment rounds, then mist with baking spray or grease with butter. Dust with cocoa instead of flour to protect the vibrant hue. Wrap Wilton cake strips around the pans to curb domes and encourage flat tops.
Divide batter by weight with a scale for equal layers. Tap the pans on the counter to pop air bubbles. After baking, sweep an offset spatula around the edges, turn out, and cool completely before stacking.
Step-by-Step Batter Method for Perfect Texture
This method builds lift, color, and a tender crumb with simple, precise moves. Keep tools ready, mix with intention, and move briskly once the leavening is activated.
Room-Temperature Ingredients
Bring butter to about 65–67°F so it presses easily but doesn’t gloss or melt. Use room temperature eggs and cool but not cold buttermilk; this helps the batter emulsify and stay smooth. Whisk dry ingredients well so cocoa and leaveners disperse evenly.
Creaming Butter and Sugar Properly
Use the creaming method with butter, a touch of neutral oil, and granulated sugar. Beat on medium-high for 3–5 minutes until pale and fluffy, scraping the bowl often to avoid dense pockets. Proper aeration sets the stage for rise and a velvet crumb.
Incorporating Dry and Wet Ingredients
Beat in eggs one at a time, waiting until each disappears before the next to prevent curdling. Stir the coloring into the buttermilk now for even tone and smart gel food coloring timing. Add dry mix in three parts with buttermilk in two parts—these alternate additions limit gluten and keep the batter tender; mix on low just until combined.
When to Add Vinegar and Food Coloring
Combine baking soda and vinegar in a small cup; it will foam. Fold it into the batter right away to capture that lift. Do not overmix after this step—portion into prepared pans and bake promptly for the best rise and hue.
Step
Target
Why It Matters
Pro Tip
Ingredient Temp
Butter 65–67°F; room temperature eggs; cool buttermilk
Promotes stable emulsion and fine crumb
Press butter: it should dent, not smear
Creaming
3–5 minutes on medium-high
Incorporates air for lift and softness
Scrape bowl and paddle to prevent dense streaks
Eggs
Add one at a time
Prevents curdling, keeps batter smooth
Wait for each egg to fully blend before the next
Dry/Wet Mix
Alternate additions, end with dry
Reduces gluten development for tenderness
Mix on low only until no dry spots remain
Coloring
Gel food coloring timing: tint the buttermilk
Ensures even color and avoids streaks
Stir until uniform before adding to batter
Final Lift
Baking soda and vinegar at the end
Activates CO2 for a higher rise
Fold quickly and portion batter right away
Baking Times, Temperatures, and Doneness Cues
Set your oven to a steady 350°F baking temperature and confirm it with an oven thermometer. Standard 8- or 9-inch layers typically need a red velvet baking time of 23–30 minutes. Cupcakes bake 16–20 minutes. A 9×13-inch sheet runs 28–35 minutes, while a 10–12-cup Bundt takes 45–60 minutes.
Start checking a few minutes early, especially with dark pans. Rotate pans once at the midpoint if your oven heats unevenly, but avoid opening the door more than necessary. Small swings in heat can add minutes to your red velvet baking time and dry out the crumb.
Use a reliable cake doneness test to protect moisture. The center should spring back with a gentle tap, and the edges will pull slightly from the pan. A toothpick should come out with a few moist crumbs, not wet batter.
For precision, check the internal cake temperature with an instant-read thermometer. Aim for an internal cake temperature of about 200–205°F at the center of the layer. Pull the cake as soon as it hits that range to keep the texture soft and velvety.
How to Cool, Level, and Layer Without Crumbs
Clean layers start with patience. Begin by cooling cake layers in their pans for 10 minutes so the structure sets. Then invert onto wire racks, peel away parchment, and let them rest until completely cool—about 60–90 minutes. Warm layers are fragile and shed crumbs, so chill cake layers briefly if your kitchen runs warm.
Cooling in Pan vs. on Rack
Leave the pans on the counter first; this pause prevents tearing. Move the cakes to racks to promote airflow and even cooling. If time is tight, pop the racks into the fridge to speed cooling cake layers without drying them out.
Leveling Domes Safely
For flat, level cake layers, set a turntable on a stable surface. Use serrated knife leveling with a long bread knife or a pro cake leveler from brands like Wilton or Ateco. Rotate the cake, keeping the blade parallel to the table for a smooth, even pass.
Brush away crumbs with a soft pastry brush. Save the trimmings for garnish or to press along the base. This step keeps the final surface neat and reduces waste.
Crumb-Coat Strategy for Clean Slices
Stack with a thin layer of frosting between each tier. Apply a light crumb coat to seal stray bits, then chill cake layers for 20–30 minutes to firm. Finish with a thicker coat, smoothing with an offset spatula and a bench scraper for sharp sides.
For ultra-clean cuts, warm a chef’s knife in hot water, wipe it dry, and slice with gentle pressure. Clean the blade between passes to maintain pristine edges and a professional look.
Classic Cream Cheese Frosting That Spreads Silky Smooth
This cream cheese frosting recipe gives clean swoops and a cushy finish that holds on layered red velvet. Start with full-fat blocks of Philadelphia cream cheese for body, and keep ingredients cool but pliable for a stable, smooth cream cheese icing.
Butter-to-Cream Cheese Ratio
For balance and lift, the best ratio butter cream cheese is about 1:1.25 by weight. Use 12 oz cream cheese to 6 oz unsalted butter. Beat the butter first until fluffy, then blend in cream cheese just until combined so the mixture stays thick and spreadable.
Salt sharpens the tang, so add a small pinch. If the bowl warms, chill the frosting 10–15 minutes to firm before use.
Sifting Sugar for Lump-Free Texture
Fold in sifted powdered sugar, 4 to 5 cups, a little at a time on low speed to prevent air pockets. Increase to medium only when the sugar is mostly absorbed. This step is key to a velvety finish and ensures truly smooth cream cheese icing with no grit.
If the frosting feels too thick after mixing, loosen with 1 to 2 teaspoons milk. If it softens, return it to the fridge briefly and stir again.
Flavor Boosters: Vanilla and Lemon Juice
Stir in 2 teaspoons pure vanilla extract and 1 to 2 teaspoons fresh lemon juice to brighten. The citrus lifts the tang without making it sour, rounding out the classic cream cheese frosting recipe.
Blend until glossy and uniform. Spread right away over cooled cake, or cover and chill, then re-whip for a silkier glide.
Decorating Ideas for Birthdays, Holidays, and Weddings
For a red velvet birthday cake, aim for smooth sides and neat borders. Use a turntable for balance, then glide a bench scraper to polish the frosting. Try classic piping techniques with a large star tip like the Wilton 1M to swirl bold rosettes. Finish with red velvet crumbs around the base or rainbow sprinkles for a bright, party-ready look.
When planning holiday cake designs, think seasonal and simple. Lay a stencil on top and dust with powdered sugar or cocoa for crisp shapes. For winter, add fresh cranberries rolled in superfine sugar for sparkle. For Valentine’s Day, scatter heart-shaped sprinkles and use piped shells to frame the rim.
For a wedding cake red velvet moment, keep it chic with a semi-naked finish that lets the crimson layers show. Press in food-safe blooms such as roses or ranunculus, and accent with edible gold leaf for a refined shine. A cake comb creates textured bands that catch the light without stealing the spotlight.
Coordinate fillings to match the style. Raspberry compote adds a jewel-toned stripe, while a white chocolate drip brings glossy drama. For rich yet light layers, mascarpone cream pairs well with the tang of red velvet. If stacking tiers, place dowels in each tier and secure a central skewer for steady transport.
Practice makes perfect with piping techniques, so test patterns on parchment before decorating. Keep frosting at a spreadable, not runny, consistency. Rotate the turntable as you pipe to keep spacing even. With these cake decorating ideas, your finish will look clean, modern, and ready for photos.
Ingredient Substitutions and Dietary Tweaks
Small swaps can keep flavor and texture intact while meeting your needs. Whether you want a buttermilk substitute, a natural red velvet color, or a reliable path to gluten-free red velvet and vegan red velvet cake, these tweaks deliver.
No Buttermilk? Easy DIY Options
For a quick buttermilk substitute, add 1 tablespoon white vinegar or lemon juice to a 1-cup measure, fill to the line with whole milk, stir, and rest 5–10 minutes. The mild tang reacts with cocoa and baking soda for lift.
Kefir also works cup-for-cup. Or thin yogurt: mix 3/4 cup plain yogurt with 1/4 cup milk. These choices support a moist crumb and keep the classic flavor profile.
Natural Food Coloring Alternatives
To achieve a natural red velvet color, try beet powder red velvet techniques. Start with 1–2 tablespoons concentrated beet powder, such as Suncore Foods. You can also use pure beet juice reduced by half.
Baking can mute beet tones. Add a squeeze of lemon juice to help preserve vibrancy without harsh dyes. This approach keeps flavor gentle and the hue bright.
Gluten-Free and Egg-Free Adaptations
For gluten-free red velvet, swap in a 1:1 blend with xanthan gum, like King Arthur Gluten-Free Measure for Measure. Mix just until combined, bake a few minutes longer if needed, and cool fully before slicing to set the crumb.
For egg-free bakes, use 1/4 cup unsweetened applesauce plus 1/8 teaspoon baking powder per egg, or 3 tablespoons aquafaba lightly whipped. For dairy-free and a true vegan red velvet cake, use plant milk soured with vinegar and vegan butter from Miyoko’s or Country Crock Plant Butter, and frost with Violife cream cheese, sifting extra sugar for structure.
Brands: Miyoko’s, Country Crock Plant Butter, Violife
Troubleshooting Common Red Velvet Cake Issues
Keep your bakes consistent with quick checks that fix dry cake, prevent dense cake, preserve a bright red cake color, and address cake sinking causes and tunneling in cake. Small tweaks in mixing, measuring, and timing make a big difference.
Dry or Dense Crumb Fixes
Weigh flour with a digital scale to avoid packing the cup. Cream butter and sugar until light to trap air and prevent dense cake. Stop mixing once the flour disappears.
Pull pans when a toothpick shows a few moist crumbs. A splash of neutral oil in the batter helps fix dry cake, especially after chilling. Brush cooled layers with simple syrup for a soft bite.
Color Turning Brown or Dull
For a bright red cake color, use natural cocoa and keep the batter acidic with buttermilk and distilled white vinegar. Measure baking soda carefully; too much can dull hue and brown the crumb.
Choose gel color from brands like Wilton or AmeriColor for strong saturation. If needed, add a touch more gel to boost vibrancy without thinning the batter.
Cake Sinking or Tunneling
Overmixing can create tunneling in cake and weaken structure. Mix on low and stop at just combined. Use fresh baking powder and baking soda to reduce cake sinking causes.
Avoid opening the oven early. Bake until the center reads 200–205°F on an instant-read thermometer. At high altitude, slightly reduce leaveners and raise the oven temperature by 15–25°F.
Problem
Likely Cause
Quick Fix
Pro Tip
Dry crumb
Overbaked; too much flour
Pull at moist crumbs; weigh flour
Add a bit of oil and brush with 1:1 simple syrup
Dense layers
Under-creamed butter and sugar; overmixing
Cream until pale; mix only to combine
Room-temp ingredients help prevent dense cake
Dull or brown color
Excess cocoa or baking soda; low acidity
Use natural cocoa; measure soda; add vinegar
Use gel color for a bright red cake color
Sinking center
Underbaked; old leaveners; door opened early
Bake to 200–205°F; replace leaveners
Minimize peeking to reduce cake sinking causes
Tunneling
Overmixing builds gluten and air tunnels
Stir on low and stop early
Tap pan once to release large bubbles, avoiding tunneling in cake
Make-Ahead, Storage, and Freezing Tips
Plan smart and bake calm. For a reliable make ahead cake, bake the layers 1–2 days early. Let them cool fully, then wrap in plastic and a second layer of foil. Keep at room temperature up to 24 hours, or chill for 2 days for extra insurance.
For longer holding, freeze cake layers for up to 2 months. Double-wrap, slip into a freezer bag, and label the date. Move them—still wrapped—to the fridge overnight to thaw. This prevents condensation and keeps the crumb velvety.
Mix the frosting up to 3 days in advance. Refrigerate cream cheese frosting in an airtight container, then bring it to a spreadable consistency before use. A quick rewhip in a stand mixer or with a hand mixer brings back the gloss.
Once assembled, store red velvet cake in the refrigerator, covered, for up to 4 days. Set it on the counter for 30–60 minutes before serving so the layers relax and the frosting softens.
For weeknight treats, slice leftovers and freeze individually. Wrap each slice snugly and tuck into a freezer bag. Thaw a single slice in the fridge, then enjoy at room temp. It’s the simplest way to freeze cake layers without baking again.
Cupcakes, Sheet Cake, and Bundt Variations
Turn one base batter into red velvet cupcakes, a red velvet sheet cake, or a red velvet Bundt cake without losing that tender crumb. Keep the texture moist, the color vivid, and the finish neat with tools from brands like Wilton and Nordic Ware. A clean scale and an oven thermometer help you hit the same result every time.
Scaling the Recipe and Adjusting Bake Time
For red velvet cupcakes, fill liners two-thirds full. Bake 16–20 minutes until a toothpick comes out clean. The base recipe yields about 24 standard cupcakes.
For a 9×13-inch red velvet sheet cake, pour the full batter into a prepared pan and bake 28–35 minutes. Cool and frost right in the pan for easy serving at parties and potlucks.
For a 10–12-cup red velvet Bundt cake, coat the pan with baking spray that contains flour, then dust lightly with cocoa. Bake 45–60 minutes, cool 15 minutes, and invert. One 8-inch round equals roughly half the base recipe; consult a pan volume chart from King Arthur Baking to scale with confidence.
Piping Frosting for Cupcakes
For neat cupcake piping, fit a large open star tip like 1M or a French star like 4B. Hold the bag straight up and apply steady pressure, spiraling from the outside in. If the frosting softens, chill it for 10 minutes and resume. This method gives tall swirls that travel well and sit cleanly on red velvet cupcakes.
Glazes and Simple Finishes
For a simple glaze on a red velvet Bundt cake, whisk 1 cup confectioners’ sugar with 2–3 tablespoons milk and 1/2 teaspoon vanilla until smooth, then drizzle over cooled ridges. For a white chocolate finish, melt 4 ounces white chocolate with 2 tablespoons cream and drizzle in thin ribbons. A light sweep of crumbs over a red velvet sheet cake adds texture without hiding the shine.
Serving Suggestions and Pairings
Set the scene before the first slice. A few smart steps make every plate look bakery-ready and taste balanced. These red velvet dessert pairings build flavor, texture, and contrast without stealing the spotlight.
Portioning for Clean Cuts
Score the top to map even wedges. For an 8-inch cake, aim for 12–14 slices; a 9-inch cake yields 14–16. To master how to slice cake cleanly, warm a long, sharp knife in hot water, wipe it dry, cut, then clean and repeat.
Use a gentle sawing motion through the crumb and frosting. Slide a thin offset spatula under each slice to lift without smears.
Beverage Pairings: Coffee, Tea, and Milk
Choose a cake beverage pairing that softens sweetness and highlights cocoa notes. A medium-roast coffee from Peet’s or Stumptown keeps the finish smooth. Black tea—Assam or Twinings Earl Grey—adds structure and citrus lift.
Cold whole milk is classic and calming. For a festive edge, pour lightly sweet Brachetto d’Acqui or a dry-leaning Lambrusco; both sparkle against the tang of cream cheese frosting.
Fruit Compotes and Crunchy Toppings
Bright fruit brings contrast. A raspberry or strawberry fruit compote topping plays well with the cake’s cocoa and tang. Macerated cherries or a mixed-berry sauce add a juicy pop and color.
Finish with toasted pecans or walnuts for crunch, white chocolate curls for sweetness, or a sprinkle of red velvet crumbs. A scoop of vanilla ice cream cools the bite and rounds out red velvet dessert pairings for a crowd.
Nutrition Snapshot and Smart Swaps
A typical frosted slice from an 8–9 inch cake lands around 450–600 red velvet cake calories with roughly 25–35 g fat and 45–65 g carbs. Numbers vary with portion size and how thick you frost. Keep an eye on serving size for a balanced treat without losing the signature tang and color.
Small tweaks make a big impact. Aim to reduce sugar in cake by 10–15% to cut sweetness and keep structure stable. Swap part of the butter with neutral oil to hold moisture while lowering saturated fat. Choose 2% buttermilk for a lighter base that still reacts well with vinegar and cocoa.
Try lighter frosting by using Neufchâtel cream cheese, which has one-third less fat than regular cream cheese. Apply thinner coats between layers and on the outside for a clean look and fewer red velvet cake calories. A modest dusting on the sides still reads festive and keeps crumb coverage tidy.
For heart-healthy baking swaps, fold in a small handful of finely chopped pecans. The nuts add texture, flavor, and satiety. Balance any fat or sugar shifts with the correct amounts of baking soda and acid so lift and crumb stay consistent from edge to center.
Choice
Why It Helps
How to Use
Impact on Slice
Reduce sugar in cake 10–15%
Lowers sweetness and calories with minimal texture change
Fewer red velvet cake calories; crumb stays tender
Butter + oil blend
Moist crumb with less saturated fat
Replace 25–40% of butter with canola or light olive oil
Softer bite; supports heart-healthy baking swaps
Neufchâtel cream cheese
Cuts fat while keeping tangy flavor
Use in place of regular cream cheese for lighter frosting
Lower fat per slice; smooth spreadability
2% buttermilk
Maintains structure and tang with fewer calories
Swap 1:1 for whole buttermilk
Stable rise; modest drop in red velvet cake calories
Thinner frosting coats
Trims fat and sugar without changing batter
Use a light crumb coat and a slim final layer
Cleaner slices; lighter frosting feel
Chopped pecans
Adds crunch and fullness
Fold into batter or sprinkle between layers
More satiety; balanced texture with fewer cravings
These ideas help you dial flavor and texture to taste. Keep the classic crumb, add a touch of crunch, and let lighter frosting and simple heart-healthy baking swaps guide a cake that fits your table any night of the week.
Chef’s Tips for Professional-Level Results at Home
Small, repeatable moves add up to bakery polish. These pro baking tips focus on precision, even heat, and smart checks so every red velvet layer bakes level and stays moist.
Weighing Ingredients for Consistency
Always weigh baking ingredients for a true 1:1 result. Flour packs and scoops vary, but a cup of cake flour is about 120 g and a cup of granulated sugar is about 200 g. Tare your digital scale for each bowl and ingredient so you hit the same ratios every time.
Measure cocoa, salt, and leaveners by weight when possible. Keep baking soda fresh—replace it every 6 to 12 months for reliable lift.
Using Bake Strips for Flat Layers
Hydrate and wrap cake strips around your pans to slow the edge heat. This reduces doming and keeps crusts pale, which helps layers stack neatly without heavy trimming. Preheat fully and bake on the center rack for the steadiest rise.
Set a turntable on the counter and use a bench scraper for straight, clean sides. Chill the cake briefly between coats of frosting for a smooth finish, especially if your kitchen runs warm.
Testing With an Instant-Read Thermometer
Go beyond the toothpick. Check the internal cake temperature with an instant-read thermometer inserted in the center—aim for 200–205°F. This confirms set structure without overbaking delicate crumbs.
If the reading lags, give it a minute more and recheck. Pull the pans when they hit range, then cool on a rack before leveling for sharp, even layers.
Conclusion
This guide brings the heart of red velvet home. With balanced cocoa, buttermilk, and a touch of vinegar, you get a gentle tang and moist red velvet layers every time. Keep ingredients at room temperature, weigh with a kitchen scale, and mix just to combine. The crumb coat locks in stray bits so each slice cuts clean and looks polished on the plate.
From cupcakes to Bundt, the method flexes to fit your plans. Clear bake times, visual doneness cues, and simple tools—like parchment rounds and an instant-read thermometer—help you nail the texture. A silky cream cheese frosting ties it all together, turning an easy red velvet cake into a bakery-level centerpiece for weeknights, birthdays, and holidays.
If you want the best red velvet cake recipe for a crowd, prep layers ahead and chill. Store well-wrapped, frost when cool, and finish with smooth swoops or light crumbs for contrast. Whether you’re making a quick homemade red velvet dessert or a showpiece with tall, moist red velvet layers, the steps here keep results reliable, flavorful, and worth the wait.
FAQ
What makes red velvet cake different from regular chocolate cake?
Red velvet uses a small amount of unsweetened cocoa for subtle chocolate notes, plus buttermilk and white distilled vinegar for a gentle tang and fine crumb. The acidity reacts with baking soda for lift, while vanilla rounds out the flavor. The striking red color—often from AmeriColor Super Red or Wilton Red-Red gel—sets it apart.
Which cocoa powder is best for authentic flavor and color?
Natural cocoa, like Hershey’s Natural, preserves acidity and helps the red hue stay vibrant. Dutch-process can work, but you’ll need enough vinegar to balance its lower acidity. Keep cocoa to 1–2 tablespoons for classic flavor without dulling the color.
Cake flour or all-purpose—what should I use?
Cake flour (Swan’s Down or King Arthur Unbleached Cake Flour) yields the most tender crumb. All-purpose flour from King Arthur or Gold Medal can work if you mix gently. To mimic cake flour, replace 2 tablespoons per cup of AP flour with cornstarch and sift well.
Can I use gel food coloring instead of liquid?
Yes. Gel coloring, such as AmeriColor Super Red, gives strong color without thinning the batter. Liquid works too, but you’ll need more volume, which can slightly affect consistency. Add coloring to the buttermilk for even dispersion.
How do I keep the cake moist and tender?
Start with room-temperature ingredients for a smooth emulsion. Cream butter, oil, and sugar until very light and fluffy. Alternate dry ingredients with buttermilk, mixing on low just until combined. Avoid overbaking—pull layers when a toothpick shows a few moist crumbs or the center reads 200–205°F on a ThermoWorks Thermapen.
Why combine vinegar and baking soda at the end?
Stirring them together right before baking captures the most carbon dioxide for lift. Fold the mixture into the batter, portion it quickly into pans, and bake immediately to lock in a tall, velvety crumb.
What pan sizes and materials work best?
Use two 8×2-inch or 9×2-inch light-colored aluminum pans from Fat Daddio’s or USA Pan for even browning. For cupcakes, a standard 12-cup tin; for a 9×13-inch sheet cake; for a 10–12-cup Bundt. Dark pans bake faster—check 3–5 minutes early.
How long should I bake the layers?
Bake at 350°F for 23–30 minutes in 8- or 9-inch pans. Cupcakes take 16–20 minutes, a 9×13-inch sheet 28–35 minutes, and a 10–12-cup Bundt 45–60 minutes. Use an oven thermometer for accuracy and rotate once if your oven bakes unevenly.
How do I cool and level the cakes for neat layers?
Cool in the pans for 10 minutes, then invert onto wire racks. Remove parchment and cool completely. Use a serrated knife or leveler on a turntable to trim any domes. Save trimmings for garnish crumbs.
What’s the trick to a smooth crumb coat and clean slices?
Brush loose crumbs off with a pastry brush. Apply a thin crumb coat and chill 20–30 minutes. Finish with a thicker coat, smoothing with an offset spatula and bench scraper. For ultra-clean cuts, chill briefly and slice with a warm, wiped knife.
How do I make stable cream cheese frosting?
Use full-fat block cream cheese like Philadelphia and a butter-to-cream cheese ratio around 1:1.25 by weight. Beat butter first, then add cream cheese just to combine. Sift confectioners’ sugar and add gradually. Flavor with Nielsen-Massey vanilla, a pinch of salt, and a splash of lemon juice.
Can I bake this as cupcakes, a sheet cake, or a Bundt?
Yes. The base recipe yields about 24 cupcakes baked 16–20 minutes. A 9×13-inch sheet bakes 28–35 minutes and is easy to frost in the pan. For a 10–12-cup Bundt, grease thoroughly with baking spray containing flour, dust with cocoa, and bake 45–60 minutes.
What are good decorating ideas for special occasions?
For birthdays, pipe rosettes with a Wilton 1M tip and finish with red crumb sprinkles. For holidays, stencil cocoa or add sugared cranberries. For weddings, try a semi-naked finish with food-safe roses or ranunculus and a touch of gold leaf.
How can I substitute buttermilk if I don’t have it?
Make a quick version by adding 1 tablespoon white vinegar or lemon juice to a cup measure, then fill to 1 cup with whole milk. Rest 5–10 minutes. Kefir or thinned yogurt also work well.
Are there natural coloring options?
Use beet powder from brands like Suncore Foods or reduced beet juice. Add a little lemon juice to help preserve brightness. Note that natural colors can mute slightly when baked, so expect a deeper crimson.
Can I make it gluten-free or egg-free?
For gluten-free, use a quality 1:1 blend with xanthan gum such as King Arthur Gluten-Free Measure for Measure. For egg-free, try 1/4 cup unsweetened applesauce plus 1/8 teaspoon baking powder per egg, or 3 tablespoons aquafaba per egg. Mix gently and allow extra cooling time.
Why did my red turn brown or dull?
Too much cocoa, insufficient acidity, or excess baking soda can mute color. Use natural cocoa, keep the batter acidic with buttermilk and vinegar, and measure leaveners accurately. Increase gel color if needed.
How do I fix a dry or dense cake?
Weigh flour to avoid packing, cream fat and sugar thoroughly, and don’t overbake. Oil in the batter helps retain moisture after chilling. If needed, brush cooled layers with simple syrup to add moisture.
My cake sank or has tunnels—what happened?
Overmixing can create tunnels. Opening the oven too early or underbaking can cause sinking. Mix on low just until combined, keep leaveners fresh, avoid early door openings, and bake until the center reaches 200–205°F.
How far in advance can I bake and store the cake?
Wrap cooled layers in plastic, then foil. Store at room temperature up to 24 hours or refrigerate up to 2 days. Freeze up to 2 months. Thaw, still wrapped, in the fridge overnight. Refrigerate assembled cakes with cream cheese frosting for up to 4 days.
What tools help achieve bakery-level results?
A digital scale from OXO or Escali ensures accurate measurements. Use a KitchenAid stand mixer, fine-mesh sieve, offset spatula, bench scraper, and a ThermoWorks thermometer. Bake strips from Wilton promote flat, even layers.
How should I portion and serve for clean slices?
Score the top to guide cuts. Warm a long knife in hot water, wipe between slices, and portion an 8-inch cake into 12–14 slices or a 9-inch into 14–16. Pair with coffee, Earl Grey, or cold milk, and add raspberry compote or toasted pecans for contrast.
What are smart swaps to lighten the recipe?
Reduce sugar in the batter by about 10–15%, use part oil for moisture with less saturated fat, and try Neufchâtel cream cheese in the frosting. Keep leavener ratios balanced to maintain structure.
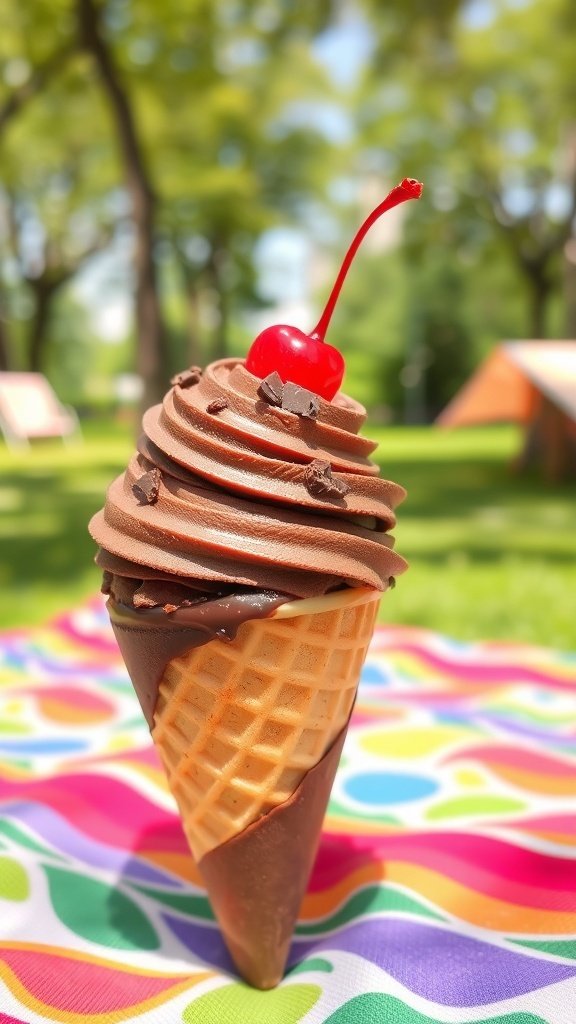
Celebrating a summer birthday brings a unique flavor to your special day! With longer days, warm weather, and a spirit of relaxation in the air, it’s the perfect time for beach parties, barbecues, and outdoor fun. Whether you’re planning a big bash or a simple gathering, summer birthdays offer endless opportunities to create memorable moments…
Finding the perfect happy birthday wishes for a friend can be challenging. Whether you’re looking for something heartfelt, funny, or short and sweet, the right words can make your friend’s special day even more memorable. A thoughtful birthday message shows how much you value your friendship and can brighten their celebration in ways a gift…
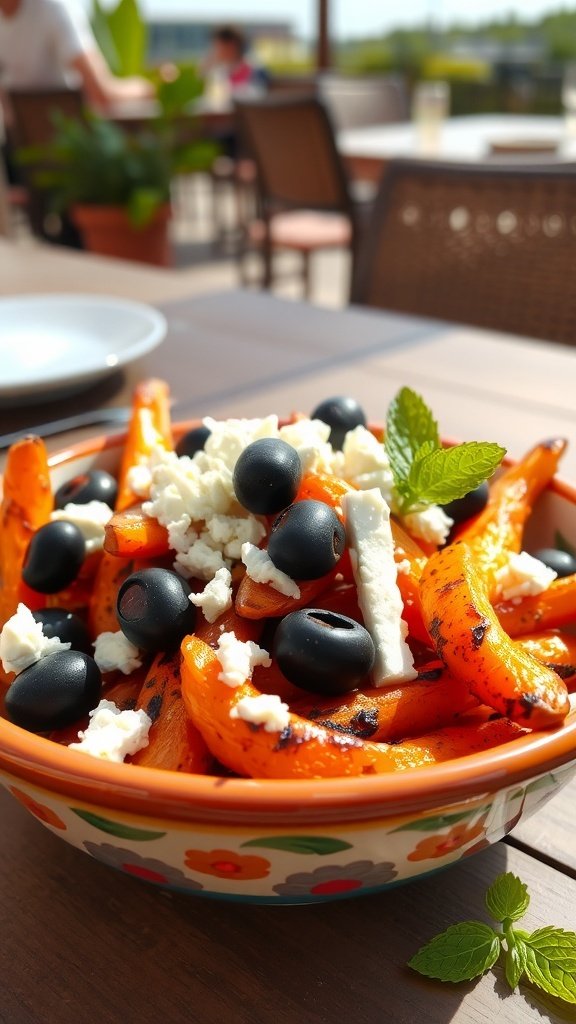
Grilled carrots are a delightful twist on a classic vegetable side dish, bringing out their natural sweetness while adding a smoky flavor. They’re easy to prepare, making them a perfect addition to any barbecue or casual meal. Just toss some fresh carrots on the grill, and you’ll have a colorful and tasty treat that everyone…
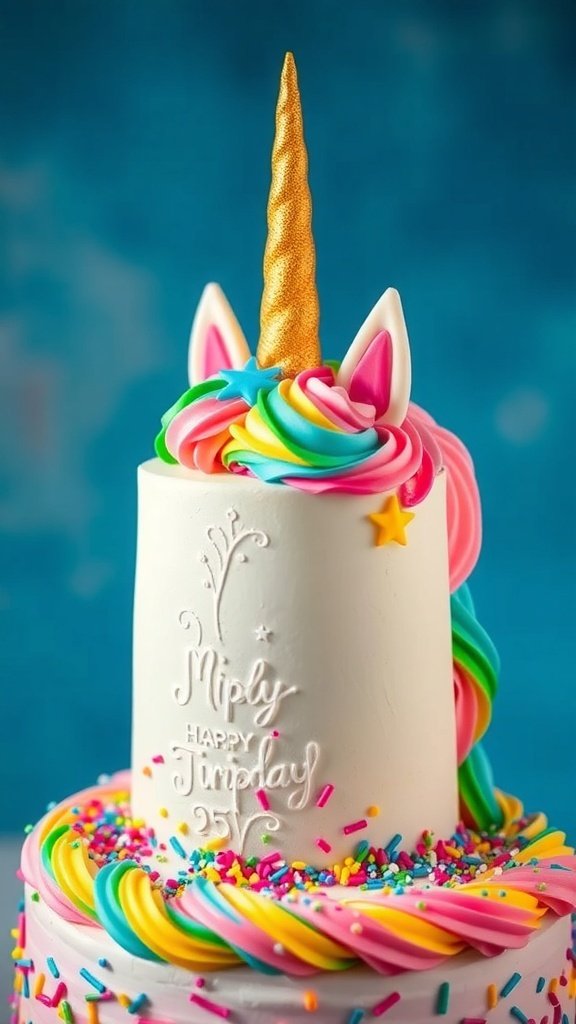
Creative birthday cakes are all about bringing your wildest cake dreams to life! From fun themes to unique flavors, these delicious masterpieces can truly make your celebration unforgettable. Whether you’re looking for a cake shaped like a favorite character or one bursting with flavors, the possibilities are endless, and they’re sure to be the highlight…
Turning 25 is a significant milestone that deserves a cake as special as the occasion. Whether you’re planning your own celebration or organizing a surprise for someone special, the perfect 25th birthday cake can be the centerpiece that makes the day unforgettable. This milestone marks a quarter century of life and often coincides with exciting…
There’s something magical about a daughter’s birthday that makes a mother’s heart overflow with love, memories, and a touch of nostalgia. As you watch your little girl grow—whether she’s turning five or fifty—finding meaningful ways to celebrate her becomes a cherished tradition. Pinterest offers the perfect canvas to express this special mother-daughter bond visually, creating…