Refreshing Summer Foods You Need to Try
Summer foods are all about fresh, light, and delicious flavors that perfectly match the sunny vibes of the season. Think juicy fruits, vibrant salads, and grilled delights that bring everyone together for backyard barbecues or beach picnics. As the temperatures rise, it’s time to savor those seasonal ingredients that make every bite feel like a celebration.
This Website contains affiliate links. That means I may earn a small commission if you purchase through my links, at no extra cost to you.
Refreshing Fruit-Infused Summer Salads
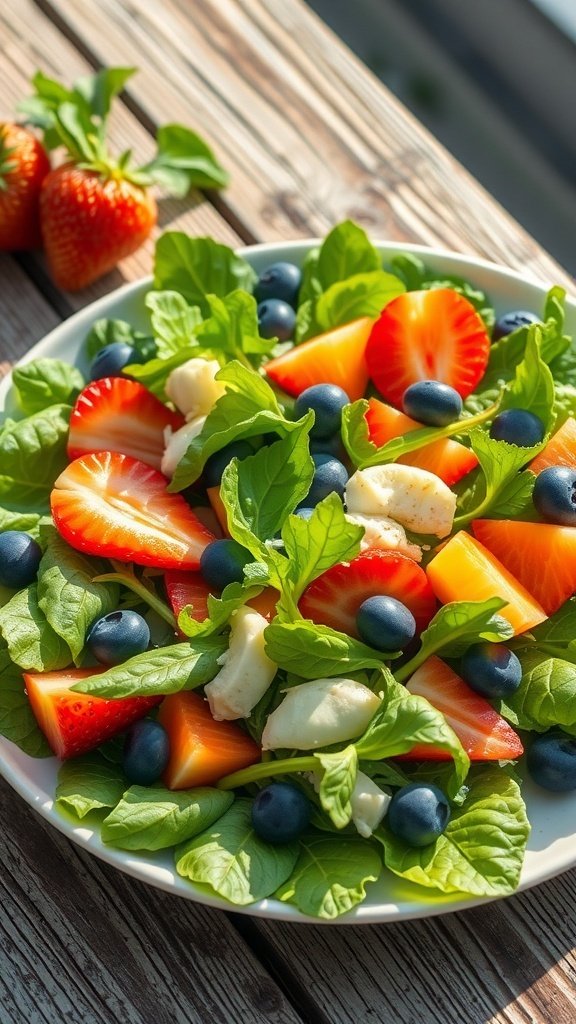
Summer is the perfect time to enjoy light and refreshing meals. One of the best ways to beat the heat is with fruit-infused salads. These salads are colorful, tasty, and packed with nutrients. Imagine a plate filled with vibrant greens, juicy strawberries, and sweet blueberries. The combination of flavors is delightful and satisfying.
In the image, you can see a beautiful salad featuring fresh spinach, strawberries, blueberries, and pieces of sweet cantaloupe. The bright colors make it visually appealing, and the mix of textures adds to the enjoyment. This salad is not just a feast for the eyes; it’s also a great way to stay hydrated during those hot summer days.
To make a refreshing fruit-infused salad, you can easily mix and match your favorite fruits and greens. Add some cheese for creaminess, nuts for crunch, and a light dressing to tie it all together. The possibilities are endless!
Ingredients
- 4 cups fresh spinach
- 1 cup strawberries, sliced
- 1 cup blueberries
- 1 cup cantaloupe, cubed
- 1/2 cup mozzarella balls
- 1/4 cup walnuts, chopped
- 2 tablespoons balsamic vinaigrette
Instructions
- Start by washing all the fruits and greens thoroughly.
- In a large bowl, combine the spinach, strawberries, blueberries, and cantaloupe.
- Add the mozzarella balls and walnuts to the bowl.
- Drizzle the balsamic vinaigrette over the salad and toss gently to combine.
- Serve immediately and enjoy your refreshing summer salad!
Delicious Grilled Vegetable Skewers
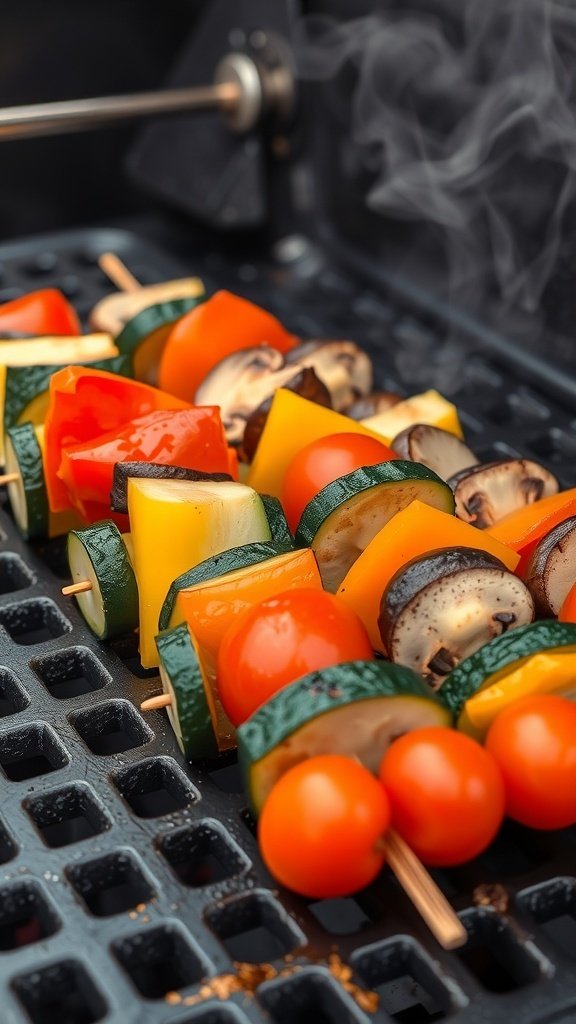
Grilled vegetable skewers are a fantastic way to enjoy summer flavors. They are colorful, healthy, and easy to make. Just look at those vibrant veggies! You can see bell peppers, zucchini, cherry tomatoes, and mushrooms, all perfectly arranged on skewers. The smoky aroma from the grill adds a delightful touch to these fresh ingredients.
These skewers are perfect for barbecues or a simple dinner. They pair well with dips or can be served alongside your favorite protein. Plus, they are a great way to sneak in some extra veggies!
Making grilled vegetable skewers is straightforward. You can mix and match your favorite vegetables. Just remember to soak wooden skewers in water for about 30 minutes before grilling to prevent burning.
Ingredients
- 1 zucchini, sliced
- 1 bell pepper (red, yellow, or green), cut into chunks
- 1 cup cherry tomatoes
- 1 cup mushrooms, halved
- 2 tablespoons olive oil
- 1 teaspoon garlic powder
- 1 teaspoon dried oregano
- Salt and pepper to taste
Instructions
- Prepare the Vegetables: In a large bowl, combine the zucchini, bell pepper, cherry tomatoes, and mushrooms.
- Season: Drizzle the olive oil over the vegetables. Add garlic powder, oregano, salt, and pepper. Toss everything until well coated.
- Skewer: Thread the vegetables onto the soaked skewers, alternating types for a colorful presentation.
- Grill: Preheat your grill to medium heat. Place the skewers on the grill and cook for about 10-15 minutes, turning occasionally, until the veggies are tender and slightly charred.
- Serve: Remove from the grill and enjoy warm. These skewers can be a side dish or a main event!
Classic Summer Bbq Ribs With A Twist
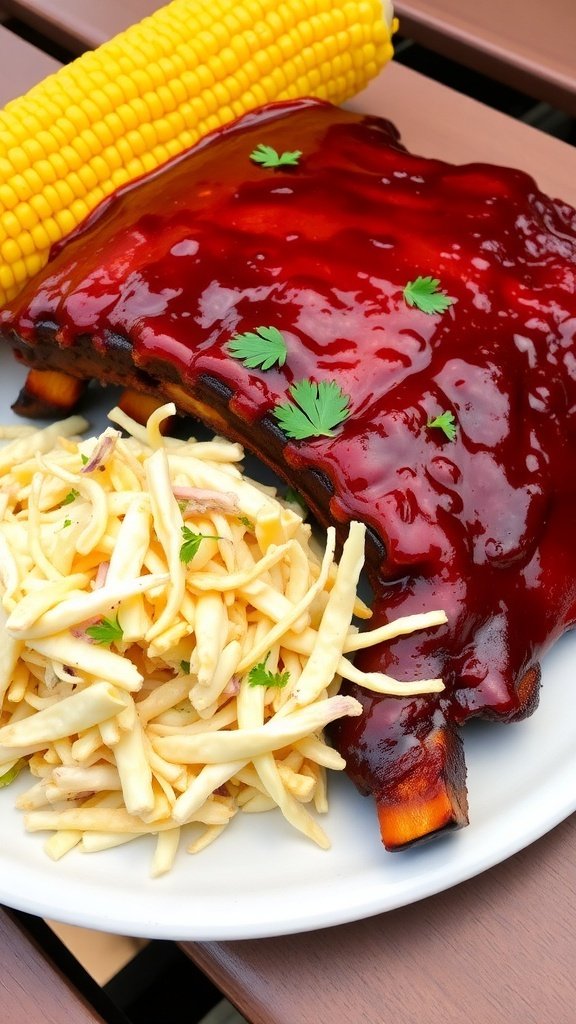
Summer is the perfect time for BBQ, and nothing beats a plate of ribs. These classic BBQ ribs are not just your average dish; they come with a twist that makes them stand out. Picture tender, juicy ribs slathered in a rich, tangy sauce, paired with a side of crunchy coleslaw and sweet corn on the cob. The vibrant colors and mouthwatering aroma make this meal a summer favorite.
The ribs are cooked to perfection, with a caramelized glaze that adds a burst of flavor. The coleslaw offers a refreshing crunch, balancing the richness of the ribs. And let’s not forget the corn, which is a staple at any summer gathering. This combination is sure to impress your guests and make your BBQ unforgettable.
Ingredients
- 2 racks of baby back ribs
- 1 cup BBQ sauce (your favorite brand)
- 1 tablespoon brown sugar
- 1 teaspoon smoked paprika
- 1 teaspoon garlic powder
- Salt and pepper to taste
- 4 cups coleslaw mix
- 1/2 cup mayonnaise
- 2 tablespoons apple cider vinegar
- 1 tablespoon sugar
- 4 ears of corn
Instructions
- Preheat your grill to medium heat.
- In a bowl, mix the BBQ sauce, brown sugar, smoked paprika, garlic powder, salt, and pepper.
- Rub the mixture all over the ribs, ensuring they are well coated.
- Place the ribs on the grill and cook for about 2 hours, turning occasionally and basting with more BBQ sauce.
- While the ribs are cooking, prepare the coleslaw. In a large bowl, combine the coleslaw mix, mayonnaise, apple cider vinegar, and sugar. Toss until well mixed.
- Boil the corn in salted water for about 5-7 minutes until tender.
- Once the ribs are cooked and have a nice glaze, remove them from the grill and let them rest for a few minutes.
- Serve the ribs with coleslaw and corn on the side. Enjoy your delicious summer BBQ!
Chilled Gazpacho For A Refreshing Appetizer
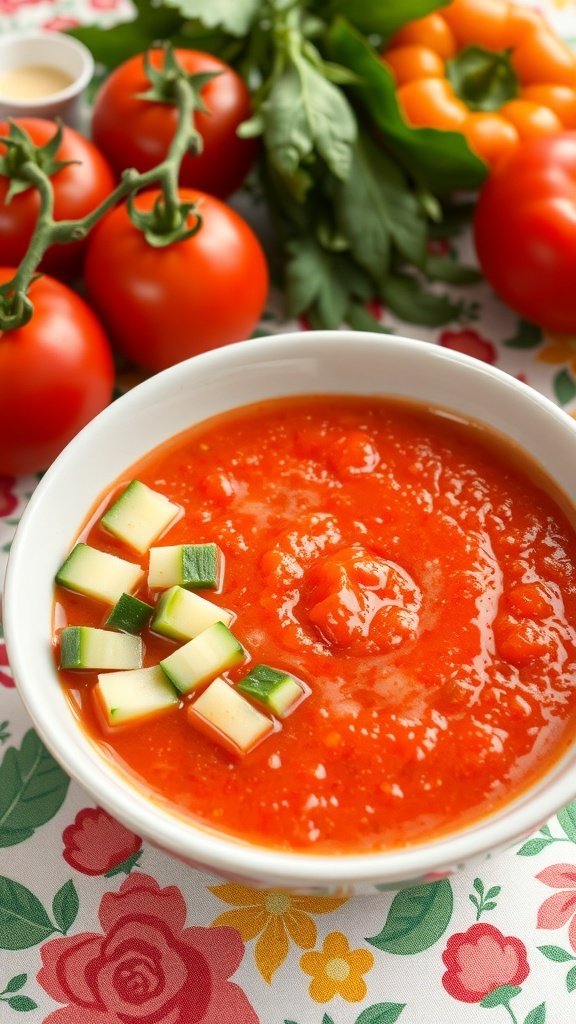
When summer hits, nothing beats a chilled bowl of gazpacho. This refreshing soup is perfect for those hot days when you want something light and tasty. The vibrant red color of the gazpacho, with bits of green cucumber sprinkled on top, makes it visually appealing too.
Made primarily from ripe tomatoes, this dish is packed with flavor. The fresh ingredients, like cucumbers and bell peppers, add a nice crunch. Gazpacho is not only delicious but also healthy, making it a great choice for a summer appetizer.
Making gazpacho is simple. Just blend your ingredients, chill, and serve. It’s a great way to use up those garden-fresh veggies. Pair it with some crusty bread, and you have a delightful meal.
Ingredients
- 6 ripe tomatoes, chopped
- 1 cucumber, peeled and diced
- 1 bell pepper, chopped
- 1 small red onion, chopped
- 2 cloves garlic, minced
- 3 cups tomato juice
- 1/4 cup olive oil
- 2 tablespoons red wine vinegar
- Salt and pepper to taste
Instructions
- Combine all the chopped vegetables in a blender.
- Add the tomato juice, olive oil, and red wine vinegar.
- Blend until smooth. If you prefer a chunkier texture, blend less.
- Season with salt and pepper to taste.
- Chill the gazpacho in the refrigerator for at least 2 hours before serving.
- Serve in bowls, garnished with extra diced cucumber or bell pepper if desired.
Fruity And Creamy Summer Smoothies
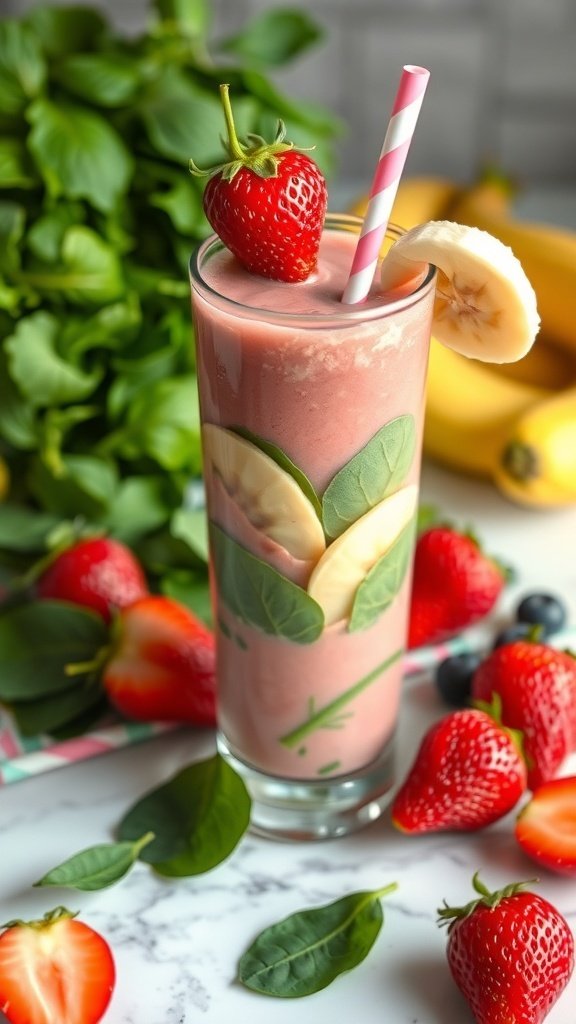
Summer is the perfect time to enjoy refreshing drinks, and fruity smoothies are a top choice. They are not only delicious but also packed with nutrients. Imagine a tall glass filled with a creamy blend of strawberries, bananas, and a hint of spinach. The vibrant colors and fresh ingredients make it a feast for the eyes and the taste buds.
This smoothie is a great way to cool down on a hot day. The sweetness of ripe bananas and strawberries pairs perfectly with the creaminess of yogurt or milk. Plus, adding spinach boosts the nutrition without altering the taste much. It’s a sneaky way to get in those greens!
Making smoothies is super easy. Just toss your ingredients into a blender, blend until smooth, and you’re ready to sip. You can also customize your smoothie with different fruits or add-ins like protein powder or chia seeds. The options are endless!
Ingredients
- 1 cup fresh strawberries, hulled
- 1 ripe banana
- 1/2 cup spinach leaves
- 1 cup yogurt or milk (dairy or plant-based)
- 1 tablespoon honey (optional)
- Ice cubes (optional)
Instructions
- Prepare the Ingredients: Wash the strawberries and hull them. Peel the banana and break it into chunks.
- Blend: In a blender, combine strawberries, banana, spinach, and yogurt or milk. If you like it sweeter, add honey.
- Add Ice: If you want a colder smoothie, add a few ice cubes and blend again until smooth.
- Serve: Pour the smoothie into a glass. Garnish with a slice of banana or a strawberry on the rim for a fun touch.
- Enjoy: Sip and enjoy your refreshing summer smoothie!
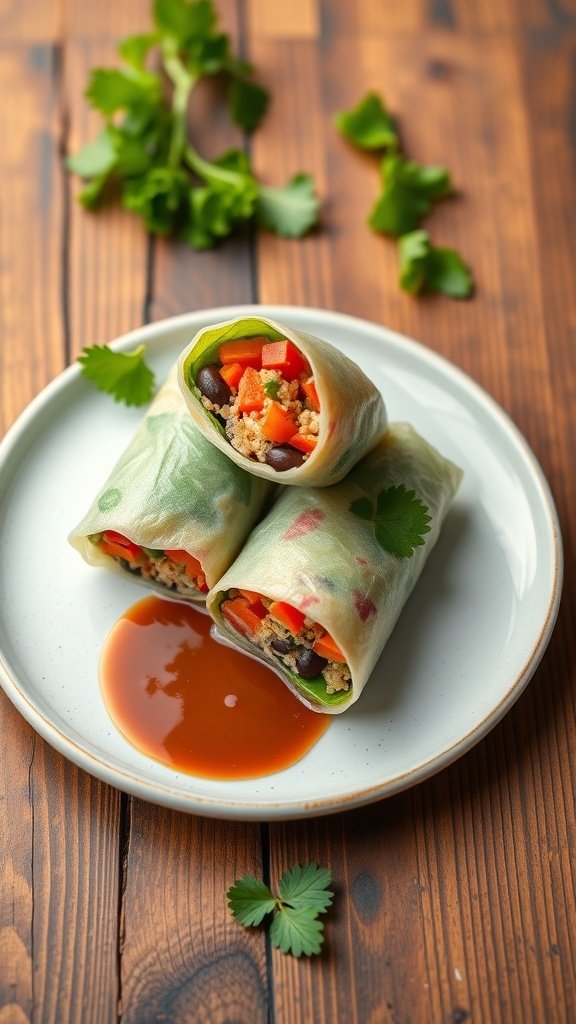
Zesty Shrimp Tacos With Mango Salsa
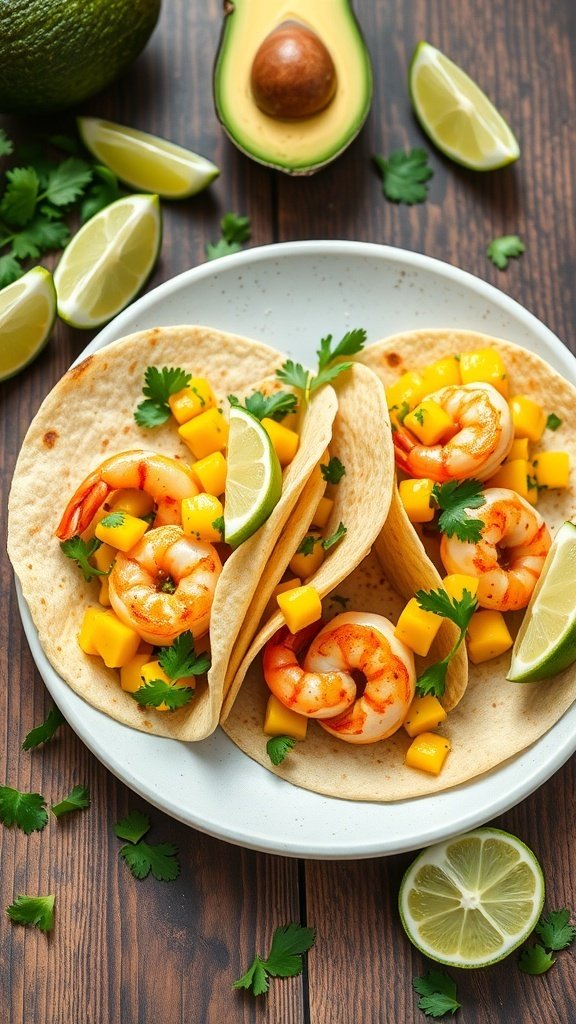
Nothing says summer like fresh shrimp tacos topped with a vibrant mango salsa. These tacos are not just a treat for the taste buds; they are also a feast for the eyes. The bright colors of the mango, lime, and cilantro pop against the soft tortillas, making them perfect for a sunny day.
The shrimp are seasoned and grilled to perfection, bringing out their natural sweetness. Paired with the juicy mango and zesty lime, every bite is refreshing and satisfying. Whether you’re hosting a backyard barbecue or enjoying a quiet evening at home, these tacos are sure to impress.
Let’s get into the details of making these delicious tacos!
Ingredients
- 1 pound shrimp, peeled and deveined
- 1 tablespoon olive oil
- 1 teaspoon chili powder
- 1/2 teaspoon garlic powder
- Salt and pepper to taste
- 8 small corn tortillas
- 1 ripe mango, diced
- 1/4 cup red onion, finely chopped
- 1/4 cup fresh cilantro, chopped
- Juice of 1 lime
- Lime wedges for serving
Instructions
- Prepare the Shrimp: In a bowl, mix the shrimp with olive oil, chili powder, garlic powder, salt, and pepper. Let it marinate for about 15 minutes.
- Grill the Shrimp: Heat a grill or grill pan over medium-high heat. Cook the shrimp for 2-3 minutes on each side until they are pink and opaque.
- Make the Mango Salsa: In a separate bowl, combine the diced mango, red onion, cilantro, and lime juice. Mix well and season with salt to taste.
- Warm the Tortillas: Heat the corn tortillas on the grill for about 30 seconds on each side until warm and pliable.
- Assemble the Tacos: Place a few shrimp on each tortilla, top with mango salsa, and add a squeeze of lime juice.
- Serve: Enjoy your zesty shrimp tacos with extra lime wedges on the side!
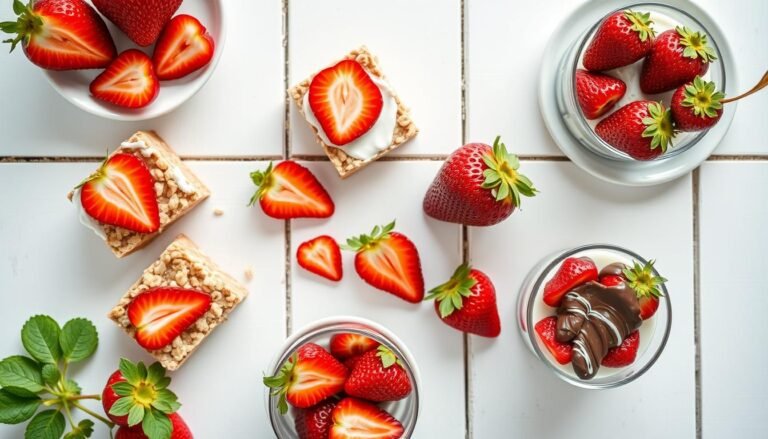
Decadent No-Bake Cheesecake With Berry Topping
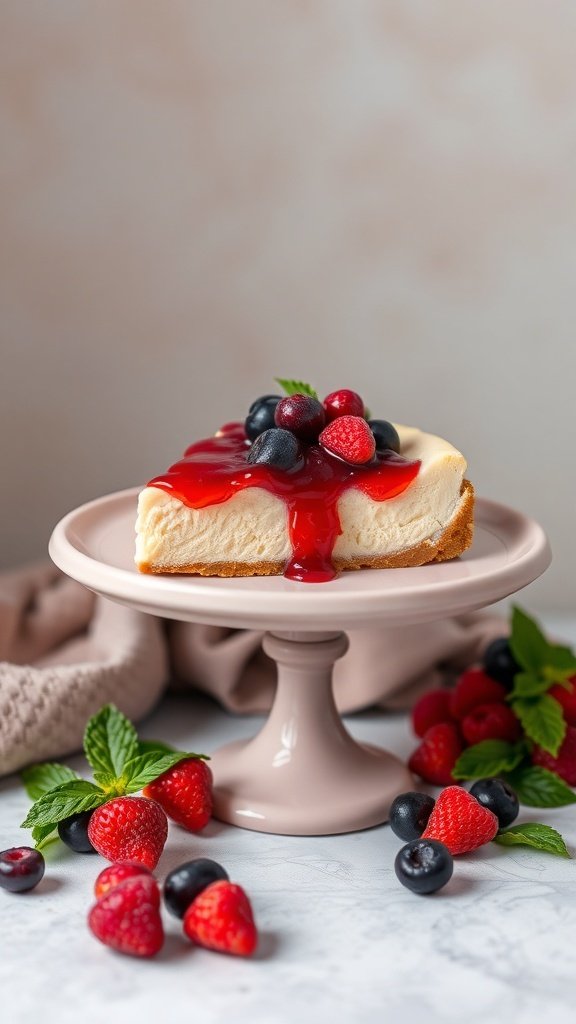
Summer is the perfect time for light and refreshing desserts. A no-bake cheesecake topped with fresh berries is a delightful treat that everyone will love. This cheesecake is creamy, smooth, and incredibly easy to make. You won’t need to turn on the oven, which is a bonus during those hot summer days.
The image showcases a beautiful slice of cheesecake sitting on a lovely cake stand. The rich, creamy filling is drizzled with a vibrant berry topping, featuring blueberries and raspberries. The colors are bright and inviting, making it hard to resist a slice. Surrounding the cheesecake are more fresh berries and mint leaves, adding a touch of freshness.
This dessert is not just pretty; it’s also versatile. You can use any berries you like, or even mix in some other fruits for a twist. It’s perfect for summer gatherings, picnics, or just a sweet treat at home.
Ingredients
- 1 ½ cups graham cracker crumbs
- ½ cup unsalted butter, melted
- 2 cups cream cheese, softened
- 1 cup powdered sugar
- 1 teaspoon vanilla extract
- 1 cup heavy whipping cream
- 2 cups mixed berries (strawberries, blueberries, raspberries)
- ¼ cup berry sauce (optional)
Instructions
- Prepare the Crust: In a bowl, combine graham cracker crumbs and melted butter. Mix well and press into the bottom of a springform pan to form the crust. Chill in the refrigerator for about 30 minutes.
- Make the Filling: In a large bowl, beat the softened cream cheese until smooth. Gradually add powdered sugar and vanilla extract, mixing until well combined.
- Whip the Cream: In another bowl, whip the heavy cream until stiff peaks form. Gently fold the whipped cream into the cream cheese mixture until fully incorporated.
- Assemble: Pour the cheesecake filling over the chilled crust and smooth the top. Cover and refrigerate for at least 4 hours, or until set.
- Serve: Once set, remove the cheesecake from the springform pan. Top with mixed berries and drizzle with berry sauce if desired. Slice and enjoy!
Light And Zesty Lemonade Popsicles
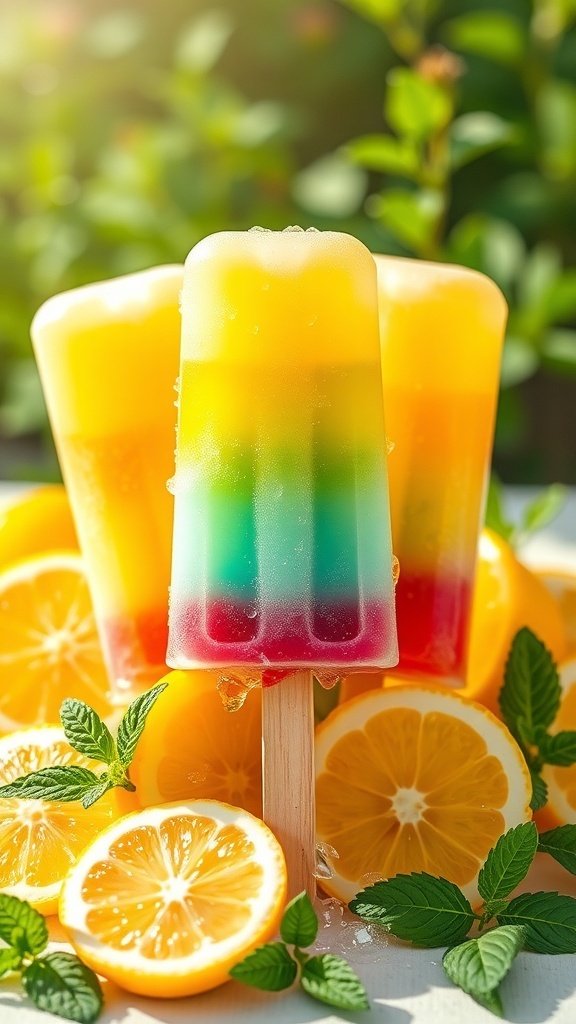
Summer is the perfect time for refreshing treats, and lemonade popsicles are a delightful choice. These popsicles are not only colorful but also bursting with citrus flavor. The bright yellows and greens in the image showcase layers of lemonade, making them visually appealing and fun to eat.
Made with fresh lemon juice, these popsicles offer a zesty kick that cools you down on hot days. The addition of mint leaves adds a touch of freshness, making each bite even more enjoyable. Plus, they’re easy to make and perfect for sharing with friends and family.
To create these delicious popsicles, you’ll need just a few simple ingredients. Gather your lemons, some sugar, and water. You can also play around with different fruit juices for added flavor. The result is a sweet and tangy treat that’s sure to be a hit!
Ingredients
- 1 cup fresh lemon juice
- 1 cup granulated sugar
- 4 cups water
- Mint leaves for garnish
- Optional: food coloring for layers
Instructions
- Mix the lemon juice and sugar in a bowl until the sugar dissolves.
- Add the water and stir well. If you want colorful layers, divide the mixture into separate bowls and add food coloring to each.
- Pour the mixture into popsicle molds, filling them about 1/3 full for each color layer. Freeze for about 1-2 hours until solid.
- Once the first layer is frozen, add the next layer and repeat until the molds are full.
- Insert sticks and freeze for an additional 4-6 hours or until completely solid.
- To remove the popsicles, run warm water over the outside of the molds for a few seconds. Enjoy your refreshing lemonade popsicles!
Savory Caprese Skewers For Easy Snacking
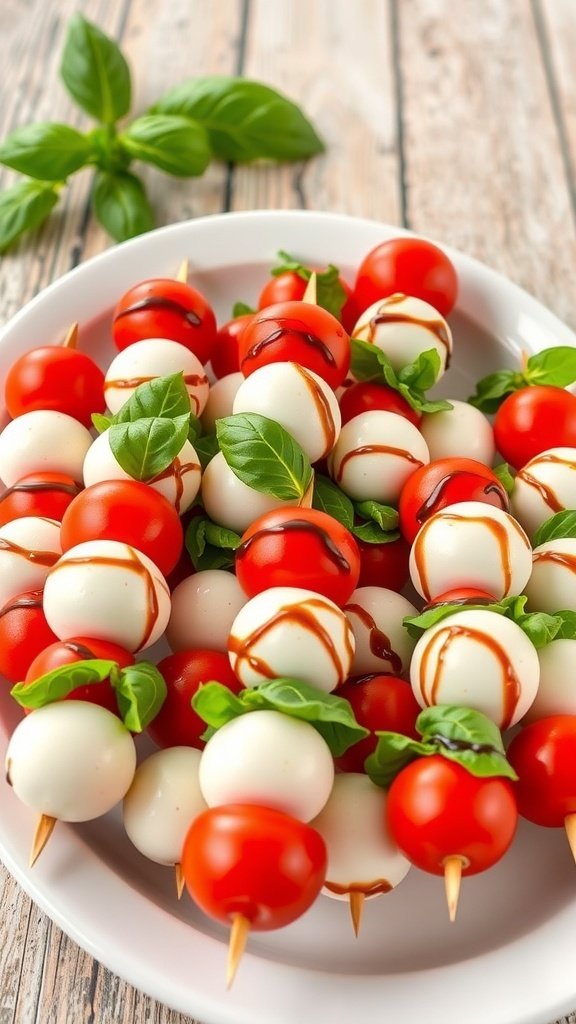
Summer is the perfect time for fresh flavors, and Caprese skewers are a fantastic way to enjoy them. These colorful bites combine juicy cherry tomatoes, creamy mozzarella balls, and fragrant basil leaves. They look great on a platter and are super easy to make, making them ideal for gatherings or a quick snack.
To prepare these skewers, simply thread a cherry tomato, a basil leaf, and a mozzarella ball onto a skewer. Repeat until the skewer is filled, leaving some space at the ends for easy handling. Drizzle with balsamic glaze for an extra touch of flavor. These skewers are not only tasty but also visually appealing, making them a hit at any summer event.
Here’s how to make your own Caprese skewers:
Ingredients
- 1 pint cherry tomatoes
- 8 oz fresh mozzarella balls
- 1 bunch fresh basil leaves
- Balsamic glaze
- Skewers (6-inch or 8-inch)
Instructions
- Gather all your ingredients and prepare your skewers.
- Start by threading a cherry tomato onto the skewer.
- Add a basil leaf next, followed by a mozzarella ball.
- Repeat the process until the skewer is filled, leaving some space at the ends.
- Drizzle balsamic glaze over the assembled skewers.
- Serve immediately or refrigerate until ready to enjoy.
Homemade Ice Cream With Unique Flavors

Summer is the perfect time to enjoy homemade ice cream. The image shows a delightful cone filled with three unique flavors, perfect for cooling down on a hot day. The soft serve on top is a lovely lavender hue, while the scoops below showcase a refreshing green and a creamy white, each with their own toppings.
Making ice cream at home allows you to experiment with flavors that you might not find in stores. Think of combinations like lavender and honey or matcha and coconut. The options are endless, and you can tailor them to your taste.
Gather your friends and family for a fun ice cream-making day. Everyone can create their own flavor, and you can even set up a toppings bar with sprinkles, nuts, and fruits. It’s a great way to bond and enjoy the summer sun.
Here’s a simple recipe to get you started on your homemade ice cream journey!
Ingredients
- 2 cups heavy cream
- 1 cup whole milk
- 3/4 cup granulated sugar
- 1 teaspoon vanilla extract
- 1/2 cup of your favorite flavoring (like lavender syrup or matcha powder)
- Pinch of salt
Instructions
- In a large bowl, whisk together the heavy cream, whole milk, sugar, and salt until the sugar is dissolved.
- Add the vanilla extract and your chosen flavoring. Mix well to combine.
- Pour the mixture into an ice cream maker and churn according to the manufacturer’s instructions until it reaches a soft-serve consistency.
- Transfer the ice cream to a container and freeze for at least 4 hours to firm up.
- Serve in cones or bowls and add your favorite toppings!