Delicious Summer Treats to Savor This Season
Summer treats are the delightful flavors and refreshing snacks that make the warm months even brighter. From icy popsicles to luscious fruit salads, these tasty creations are perfect for beating the heat and celebrating sunny days. Whether you’re lounging by the pool or hosting a backyard BBQ, there’s always a sweet indulgence to savor. Let’s dive into some of the coolest treats to enjoy this season!
This Website contains affiliate links. That means I may earn a small commission if you purchase through my links, at no extra cost to you.
Delight In A Refreshing Watermelon Sorbet
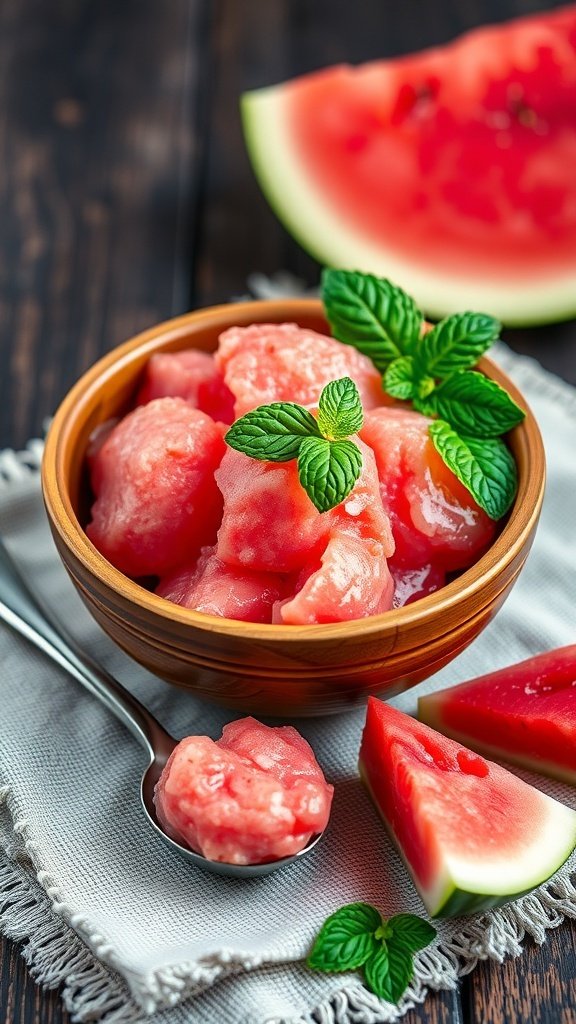
Summer is the perfect time to enjoy a cool treat, and watermelon sorbet hits the spot! This vibrant dessert is not only refreshing but also a great way to use up ripe watermelon. The bright pink color and smooth texture make it a feast for the eyes and the taste buds.
Picture a bowl filled with fluffy sorbet, garnished with fresh mint leaves. The sweetness of the watermelon shines through, making every bite a burst of summer flavor. It’s a simple yet delightful way to cool down on a hot day.
Making watermelon sorbet is easy and requires just a few ingredients. You can whip it up in no time, and it’s a fun activity to do with family or friends. Let’s get started on this delicious recipe!
Ingredients
- 4 cups watermelon, cubed and seedless
- 1/2 cup granulated sugar
- 1 tablespoon lime juice
- 1/4 cup water
Instructions
- Prepare the Watermelon: Start by cutting the watermelon into cubes. Make sure to remove any seeds if there are any.
- Blend: In a blender, combine the watermelon cubes, sugar, lime juice, and water. Blend until smooth.
- Chill: Pour the mixture into a shallow dish and place it in the freezer. Let it freeze for about 2 hours, stirring every 30 minutes to break up any ice crystals.
- Serve: Once the sorbet is fully frozen and fluffy, scoop it into bowls. Garnish with fresh mint leaves for a touch of color and flavor.
Indulge In Classic Peach Cobbler Bliss
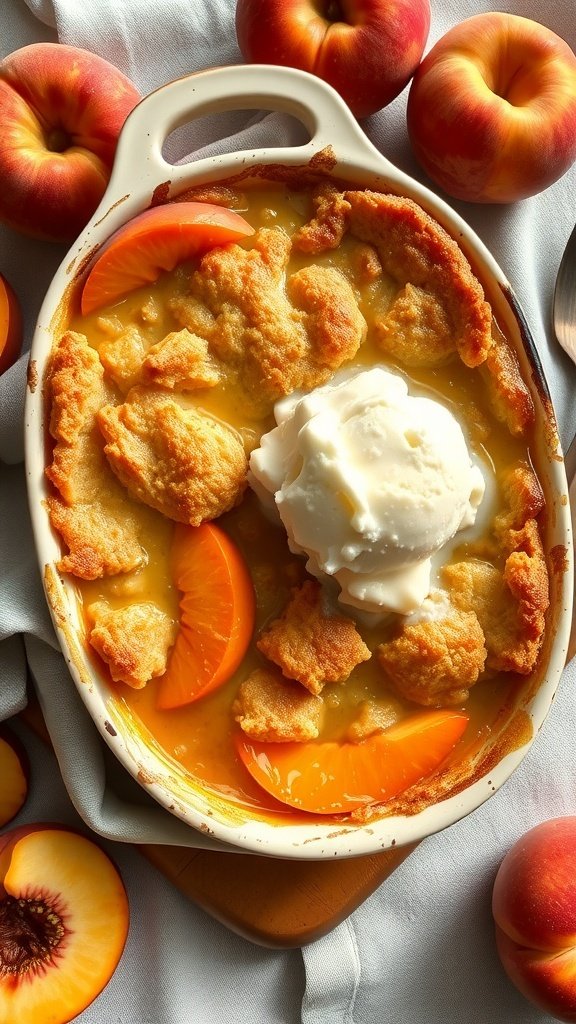
Peach cobbler is a summer classic that brings joy to any gathering. This delightful dessert features juicy peaches, often paired with a buttery, flaky topping. The warm, sweet aroma fills the air, making it hard to resist a second helping.
Imagine a golden-brown crust, perfectly baked, with tender peach slices peeking through. A scoop of vanilla ice cream melting on top adds the perfect touch. This treat is not just a dessert; it’s a celebration of summer flavors.
Making peach cobbler is simple and rewarding. You can use fresh peaches when they’re in season or canned peaches for convenience. Either way, the result is a comforting dish that everyone will love.
Ingredients
- 4 cups fresh peaches, sliced (or 2 cans of sliced peaches)
- 1 cup granulated sugar
- 1 teaspoon cinnamon
- 1 tablespoon lemon juice
- 1 cup all-purpose flour
- 1 tablespoon baking powder
- 1/2 teaspoon salt
- 1 cup milk
- 1/2 cup unsalted butter, melted
Instructions
- Preheat the oven to 350°F (175°C).
- In a bowl, mix sliced peaches with 1/2 cup sugar, cinnamon, and lemon juice. Pour this mixture into a greased baking dish.
- In another bowl, combine flour, baking powder, salt, and remaining sugar. Stir in milk and melted butter until smooth.
- Pour the batter over the peach mixture. Do not stir; the batter will rise during baking.
- Bake for 30-35 minutes or until the top is golden brown and a toothpick comes out clean.
- Serve warm with a scoop of vanilla ice cream on top.
Savor The Sweetness Of No-Bake Chocolate Eclair Cake
Summer is the perfect time for sweet treats that require minimal effort. One delightful option is the no-bake chocolate eclair cake. This dessert is a crowd-pleaser, combining layers of creamy filling and chocolate goodness. It’s cool, refreshing, and perfect for warm days.
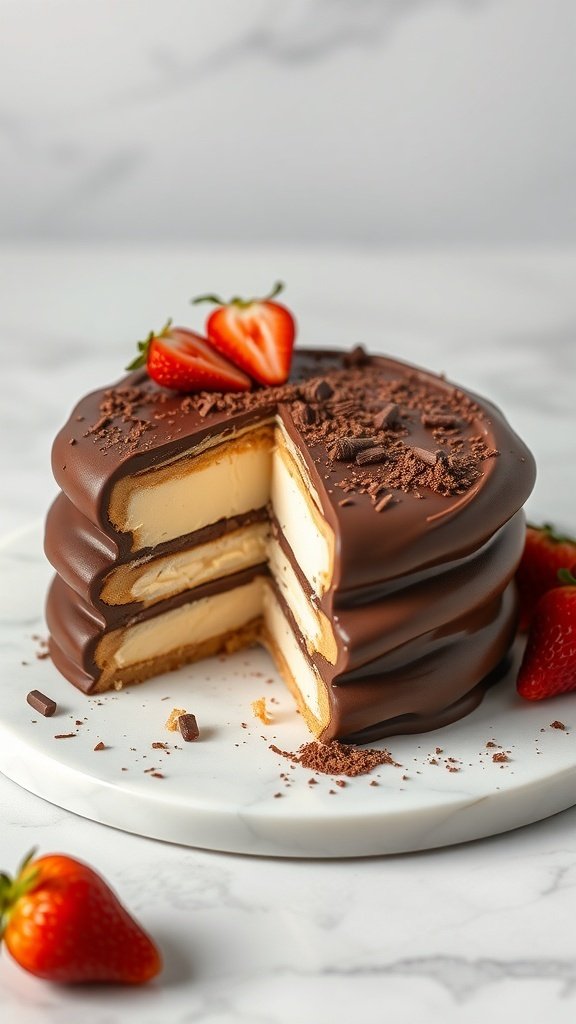
The image showcases a beautifully layered chocolate eclair cake. You can see the smooth chocolate glaze on top, with layers of cream and graham crackers peeking through. Fresh strawberries add a pop of color, making it even more inviting. This cake not only looks stunning but also tastes incredible!
Making this cake is simple and fun. You won’t need to turn on the oven, which is a bonus during hot summer days. Gather your ingredients and get ready to impress your friends and family with this delicious dessert.
Ingredients
- 2 packages (3.4 oz each) instant vanilla pudding mix
- 4 cups milk
- 1 container (8 oz) whipped topping, thawed
- 1 box (14.4 oz) graham crackers
- 1 cup chocolate chips
- 1/4 cup butter
- 1/4 cup milk
- 1 cup powdered sugar
Instructions
- Prepare the Pudding: In a large bowl, whisk together the vanilla pudding mix and 4 cups of milk until smooth. Let it sit for about 5 minutes to thicken.
- Mix in Whipped Topping: Gently fold in the whipped topping until well combined.
- Layer the Cake: In a 9×13 inch dish, layer graham crackers on the bottom. Spread half of the pudding mixture over the crackers. Add another layer of graham crackers, followed by the remaining pudding mixture. Top with a final layer of graham crackers.
- Make the Chocolate Topping: In a saucepan, melt the chocolate chips and butter over low heat. Stir in 1/4 cup of milk and powdered sugar until smooth. Pour this mixture over the top layer of graham crackers.
- Chill: Cover the dish and refrigerate for at least 4 hours, or overnight for best results. Slice and serve chilled, garnished with fresh strawberries if desired.
Enjoy The Creamy Goodness Of Strawberry Shortcake
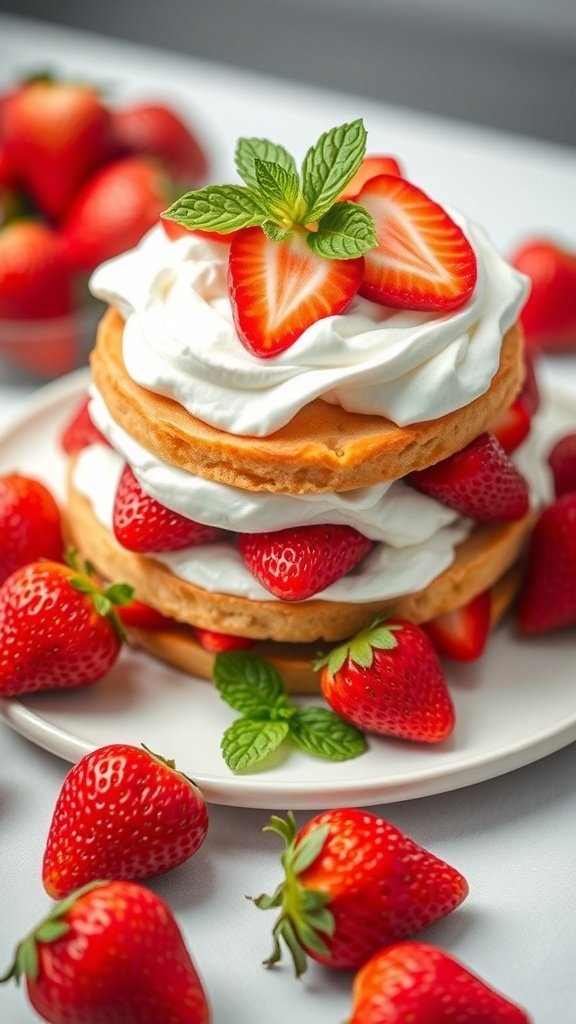
Strawberry shortcake is a classic summer treat that brings joy with every bite. The image captures a delightful stack of fluffy cake layers, generously filled with whipped cream and fresh strawberries. The vibrant red strawberries pop against the creamy white topping, making it not just a treat for the taste buds but also a feast for the eyes.
This dessert is perfect for warm days when you want something light and refreshing. The combination of sweet strawberries and rich cream creates a balance that’s hard to resist. Whether you’re hosting a picnic or enjoying a quiet afternoon, strawberry shortcake is sure to brighten your day.
Making your own strawberry shortcake is simple and fun. You can customize it with your favorite ingredients, ensuring it’s just how you like it. Let’s get into the recipe so you can whip up this delicious dessert!
Ingredients
- 2 cups all-purpose flour
- 1/4 cup granulated sugar
- 1 tablespoon baking powder
- 1/2 teaspoon salt
- 1/2 cup unsalted butter, chilled and cubed
- 1 cup heavy cream
- 1 teaspoon vanilla extract
- 4 cups fresh strawberries, sliced
- 1/4 cup powdered sugar (for strawberries)
- 1 cup whipped cream (for topping)
Instructions
- Preheat the oven to 425°F (220°C). In a large bowl, mix flour, sugar, baking powder, and salt.
- Cut in the chilled butter until the mixture resembles coarse crumbs. Stir in the heavy cream and vanilla until just combined.
- Turn the dough onto a floured surface and gently knead it a few times. Roll out to about 1-inch thick and cut into rounds.
- Place the rounds on a baking sheet and bake for 12-15 minutes until golden brown. Let them cool.
- In a separate bowl, toss the sliced strawberries with powdered sugar and let them sit for about 10 minutes to release their juices.
- To assemble, slice the baked cakes in half, layer with strawberries and whipped cream, and top with the other half. Finish with more whipped cream and strawberries on top.
Treat Yourself To Easy Frozen Banana Pops

Summer is the perfect time to enjoy cool treats, and frozen banana pops are a fun and easy way to satisfy your sweet tooth. These pops are not only delicious but also colorful and inviting, making them a hit with both kids and adults. Imagine a platter filled with bananas dipped in chocolate and coated with sprinkles, all ready to be enjoyed on a hot day.
Making frozen banana pops is simple. You just need ripe bananas, some chocolate for dipping, and your favorite toppings like sprinkles or nuts. The vibrant colors of the toppings make these treats look as good as they taste. Plus, they are a healthier option compared to many store-bought ice creams.
Here’s how you can whip up these delightful frozen banana pops at home!
Ingredients
- 4 ripe bananas
- 1 cup chocolate chips (milk or dark)
- 1 tablespoon coconut oil (optional, for smooth melting)
- 1/2 cup sprinkles or chopped nuts
- Wooden popsicle sticks
Instructions
- Prepare the Bananas: Peel the bananas and cut them in half. Insert a popsicle stick into each half.
- Melt the Chocolate: In a microwave-safe bowl, combine chocolate chips and coconut oil. Microwave in 30-second intervals, stirring in between, until smooth.
- Dip the Bananas: Dip each banana half into the melted chocolate, allowing excess to drip off.
- Add Toppings: Immediately sprinkle your choice of toppings over the chocolate before it sets.
- Freeze: Place the dipped bananas on a parchment-lined baking sheet and freeze for at least 2 hours until solid.
- Enjoy: Once frozen, enjoy your homemade banana pops on a sunny day!
Relish Refreshing Lemonade Ice Pops For Hot Days
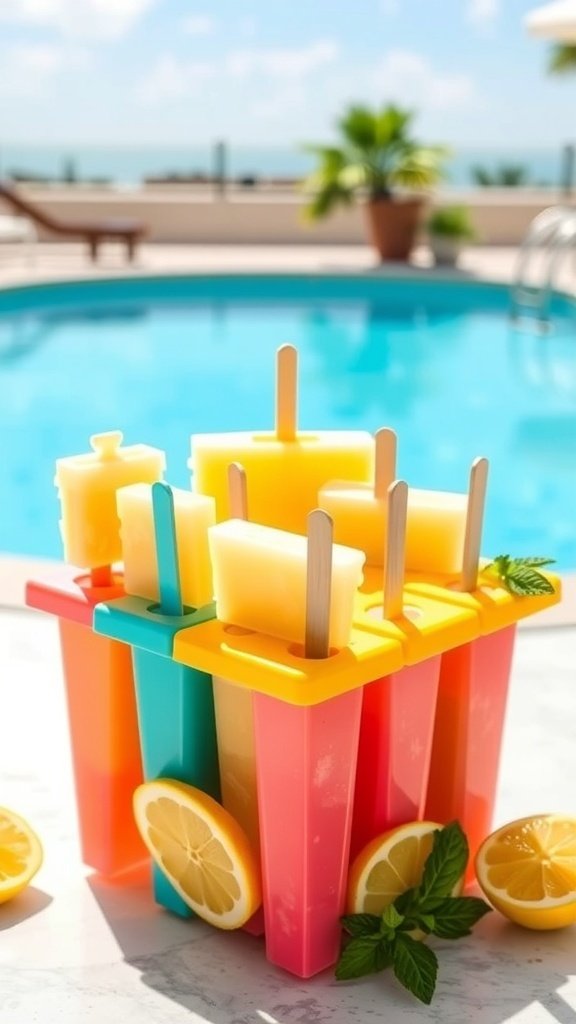
Summer days can get hot, and there’s nothing quite like a cool treat to beat the heat. Lemonade ice pops are a fun and refreshing way to enjoy the classic summer drink in a new form. These pops are bright, cheerful, and perfect for cooling off by the pool.
The image shows colorful ice pop molds filled with a sunny yellow lemonade mixture, sitting next to fresh lemon slices and mint leaves. The vibrant colors of the molds add a playful touch, making them an inviting sight on a warm day. The backdrop of a sparkling pool hints at the perfect setting for enjoying these delightful treats.
Making lemonade ice pops is simple and requires just a few ingredients. You can customize them with your favorite flavors or even add fruits for extra texture. They are not only delicious but also a great way to keep hydrated during those hot summer afternoons.
Ingredients
- 2 cups lemonade (store-bought or homemade)
- 1 cup water
- 1/4 cup sugar (optional, adjust to taste)
- Fresh mint leaves (for garnish)
- Lemon slices (for garnish)
Instructions
- Mix the lemonade and water in a bowl. If you like it sweeter, stir in the sugar until dissolved.
- Pour the mixture into ice pop molds, leaving a little space at the top for expansion.
- Add mint leaves or lemon slices to each mold for added flavor and decoration.
- Insert the sticks and freeze for at least 4-6 hours, or until completely solid.
- To remove the pops, run warm water over the outside of the molds for a few seconds. Enjoy your refreshing lemonade ice pops!
Dive Into A Bowl Of Mixed Berry Parfait
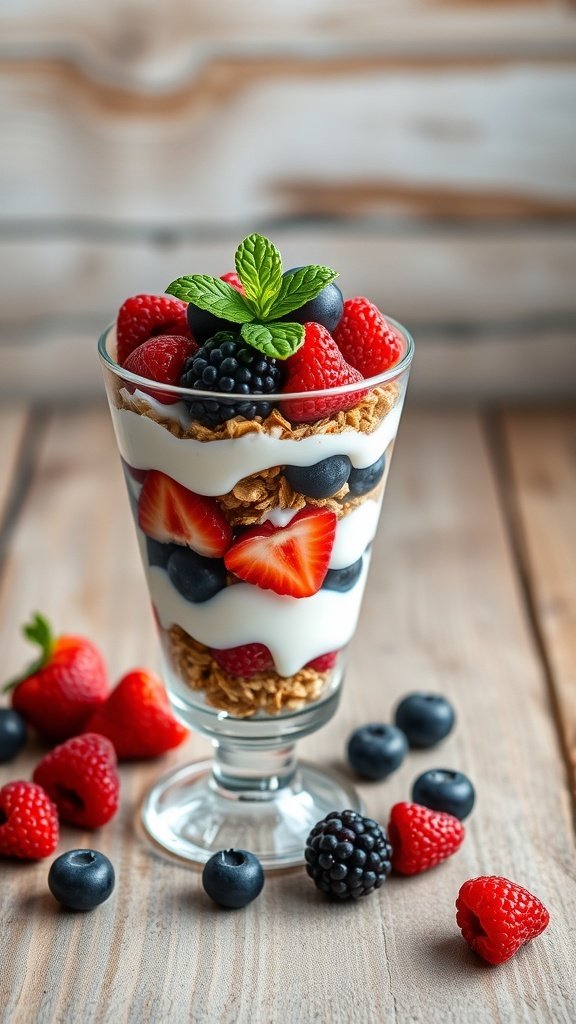
Summer is the perfect time to enjoy refreshing treats, and a mixed berry parfait is a delightful choice. This colorful dessert is not only pleasing to the eye but also packed with flavor and nutrients. Layers of creamy yogurt, crunchy granola, and juicy berries create a delightful combination that’s hard to resist.
Imagine a tall glass filled with vibrant strawberries, blueberries, raspberries, and blackberries. Each layer is a surprise, with the creamy yogurt blending perfectly with the sweet and tart berries. The granola adds a satisfying crunch, making every bite enjoyable.
This parfait is incredibly easy to make. You can customize it with your favorite berries or even add a drizzle of honey for extra sweetness. It’s a great way to cool off on a hot day and can be enjoyed for breakfast, a snack, or dessert.
Ingredients
- 2 cups mixed berries (strawberries, blueberries, raspberries, blackberries)
- 2 cups yogurt (Greek or regular)
- 1 cup granola
- 2 tablespoons honey (optional)
- Fresh mint leaves for garnish
Instructions
- Prepare the Berries: Wash the mixed berries thoroughly. If using strawberries, slice them into smaller pieces.
- Layer the Ingredients: In a glass or bowl, start with a layer of yogurt at the bottom. Add a layer of granola followed by a layer of mixed berries.
- Repeat Layers: Continue layering yogurt, granola, and berries until you reach the top of the glass.
- Add Honey: Drizzle honey on top if desired, and finish with a sprig of fresh mint for a pop of color.
- Serve: Enjoy immediately or refrigerate for a short while before serving.
Discover The Joy Of Coconut Lime Popsicles
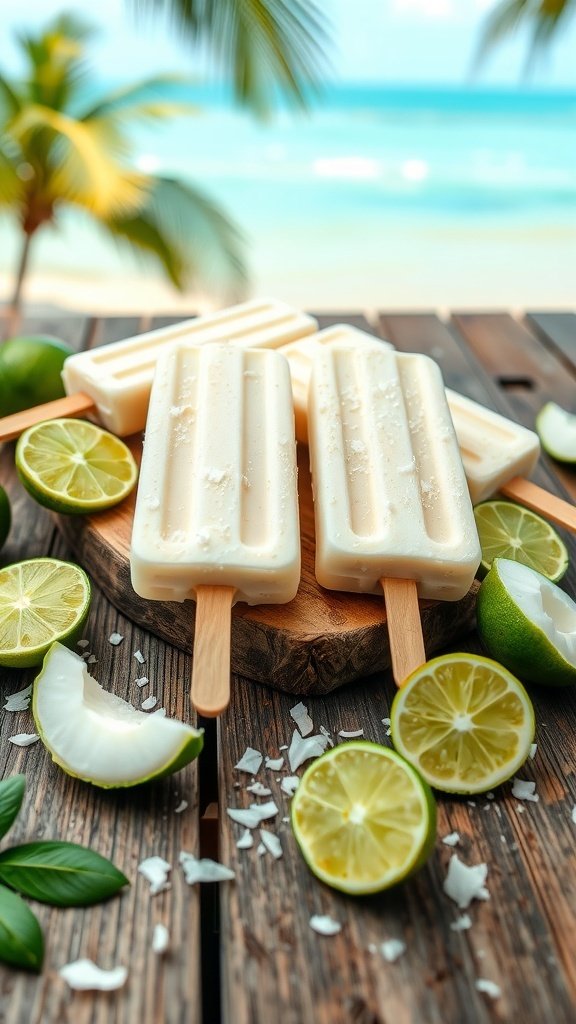
Summer brings a wave of refreshing treats, and coconut lime popsicles are a perfect choice. These popsicles are not just a delight for the taste buds; they also offer a cool escape from the heat. Imagine biting into a creamy, tangy popsicle while lounging in the sun. The combination of coconut and lime creates a tropical vibe that’s hard to resist.
The popsicles are beautifully presented, resting on a wooden board surrounded by fresh lime slices and coconut shavings. The vibrant green of the limes contrasts nicely with the creamy white of the popsicles, making them visually appealing. This treat is not only tasty but also a feast for the eyes!
Making these popsicles is simple and fun. You can easily whip them up at home with just a few ingredients. They’re perfect for sharing with friends or enjoying on a hot afternoon. Let’s get started with the recipe!
Ingredients
- 1 cup coconut milk
- 1/2 cup lime juice (freshly squeezed)
- 1/4 cup honey or agave syrup
- 1/2 cup shredded coconut (unsweetened)
- 1/4 cup water
- 1 teaspoon lime zest
Instructions
- Mix Ingredients: In a mixing bowl, combine coconut milk, lime juice, honey, shredded coconut, water, and lime zest. Stir well until everything is blended.
- Pour into Molds: Carefully pour the mixture into popsicle molds, leaving a little space at the top for expansion.
- Add Sticks: Insert popsicle sticks into the molds. If the mixture is too thick, let it sit for a few minutes before inserting the sticks.
- Freeze: Place the molds in the freezer and let them freeze for at least 4-6 hours, or until solid.
- Enjoy: To remove the popsicles, run warm water over the outside of the molds for a few seconds. Enjoy your homemade coconut lime popsicles!
Experience The Crunch Of Homemade Granola Bars

Summer is the perfect time for light and tasty snacks. Homemade granola bars are a fantastic choice. They are crunchy, chewy, and packed with flavor. Plus, you can customize them to suit your taste. Imagine biting into a bar filled with oats, nuts, and dried fruits. It’s a delightful way to enjoy a healthy treat.
Making granola bars at home is simple and fun. You can involve the kids or whip them up on your own. The best part? You know exactly what goes into them. No hidden ingredients or preservatives here! Just wholesome goodness.
Gather your favorite nuts, seeds, and dried fruits. You can use almonds, walnuts, or even pumpkin seeds. Add some honey or maple syrup for sweetness. Mix everything together and press it into a pan. After a little time in the oven, you’ll have delicious bars ready to enjoy.
These bars are perfect for a summer picnic or a quick snack on the go. They are easy to pack and provide a great energy boost. So, let’s get started on making your own homemade granola bars!
Ingredients
- 2 cups rolled oats
- 1 cup mixed nuts (chopped)
- 1/2 cup honey or maple syrup
- 1/2 cup peanut butter or almond butter
- 1/2 cup dried fruits (raisins, cranberries, etc.)
- 1/4 cup seeds (pumpkin or sunflower)
- 1 teaspoon vanilla extract
- 1/2 teaspoon salt
Instructions
- Preheat your oven to 350°F (175°C). Line a baking dish with parchment paper.
- In a large bowl, mix the oats, chopped nuts, dried fruits, and seeds.
- In a small saucepan, combine honey and peanut butter over low heat. Stir until melted and smooth.
- Pour the honey mixture over the dry ingredients. Add vanilla extract and salt. Mix until everything is well coated.
- Press the mixture firmly into the prepared baking dish. Bake for 20-25 minutes until golden brown.
- Let it cool completely before cutting into bars. Store in an airtight container.
Indulge In The Creaminess Of Vanilla Bean Ice Cream
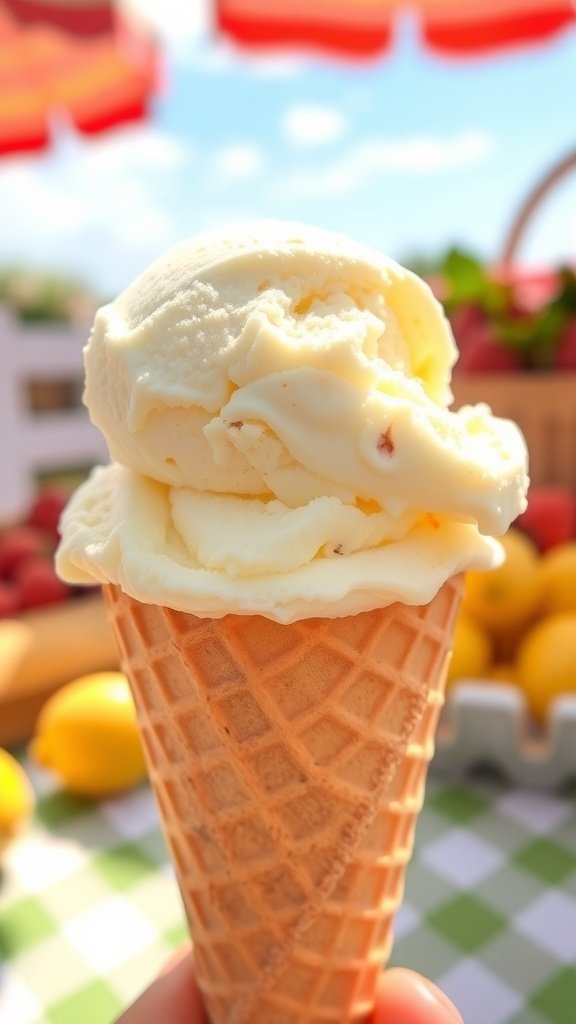
Vanilla bean ice cream is a classic summer treat that brings joy to every scoop. The creamy texture and rich flavor make it a favorite for many. Picture a perfectly swirled scoop sitting atop a crispy cone, ready to melt in the warm sun. It’s the kind of dessert that makes you feel like a kid again.
The beauty of vanilla bean ice cream lies in its simplicity. Made from just a few ingredients, it highlights the natural sweetness of vanilla beans. Each bite is smooth and satisfying, making it perfect on its own or as a topping for pies and cakes.
On a hot summer day, there’s nothing quite like enjoying a cone of this delightful ice cream. Whether you’re at a local ice cream shop or making it at home, the experience is always special. So grab your cone and savor the moment!
Ingredients
- 2 cups heavy cream
- 1 cup whole milk
- 3/4 cup granulated sugar
- 1 tablespoon pure vanilla extract
- 1 vanilla bean, split and scraped
- 1/4 teaspoon salt
- 4 large egg yolks
Instructions
- In a saucepan, combine heavy cream, milk, sugar, vanilla extract, and salt. Heat over medium until the sugar dissolves, stirring occasionally.
- In a separate bowl, whisk the egg yolks. Slowly add a bit of the warm cream mixture to the yolks, whisking constantly to temper them.
- Pour the egg yolk mixture back into the saucepan. Cook over low heat, stirring constantly until the mixture thickens enough to coat the back of a spoon.
- Remove from heat and stir in the vanilla bean seeds. Let the mixture cool, then refrigerate for at least 4 hours or overnight.
- Once chilled, churn the mixture in an ice cream maker according to the manufacturer’s instructions. Transfer to a container and freeze until firm.