Ultimate Summer Desserts Perfect for a Crowd
When the heat of summer rolls in, there’s nothing like a sweet treat to keep spirits high, especially when you’re entertaining a crowd. From creamy parfaits to fruity tarts, these summer desserts are designed for sharing and are sure to impress your guests. Let’s dive into a collection of easy-to-make and refreshing options that will make your gatherings even more enjoyable.
This Website contains affiliate links. That means I may earn a small commission if you purchase through my links, at no extra cost to you.
Watermelon Cake with Coconut Frosting
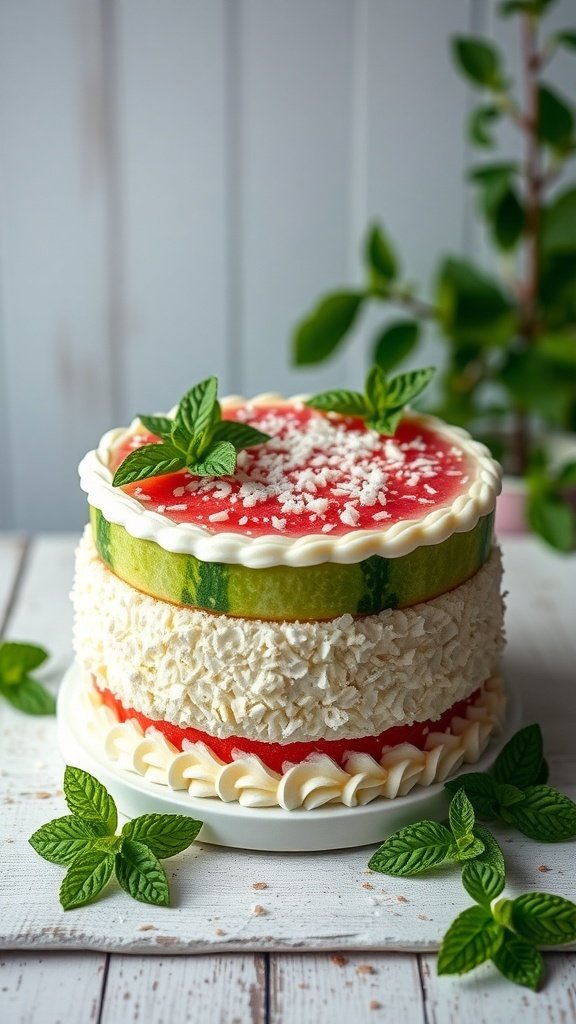
Summer is the perfect time for light and refreshing desserts, and a watermelon cake fits the bill perfectly. This cake is not only visually stunning but also incredibly delicious. The layers of juicy watermelon are complemented by a creamy coconut frosting, making it a hit at any gathering.
The bright green rind and vibrant red flesh of the watermelon create a beautiful contrast. Topped with fresh mint leaves, this cake is as pleasing to the eye as it is to the palate. It’s a fun way to enjoy a classic summer fruit while keeping things cool and light.
Making this cake is simple and requires minimal ingredients. It’s a great option for parties, picnics, or just a sunny afternoon treat. Everyone will love the unique twist on traditional cake!
Ingredients
- 1 large seedless watermelon
- 1 cup coconut cream
- 1/4 cup powdered sugar
- 1 teaspoon vanilla extract
- 1 cup shredded coconut (sweetened or unsweetened)
- Fresh mint leaves for garnish
Instructions
- Prepare the Watermelon: Cut the watermelon into three thick slices. Trim the edges to create a cake-like shape.
- Make the Frosting: In a bowl, mix coconut cream, powdered sugar, and vanilla extract until smooth.
- Assemble the Cake: Place one watermelon slice on a serving plate. Spread a layer of coconut frosting on top. Repeat with the second slice and top with the final slice.
- Decorate: Cover the entire cake with the remaining coconut frosting. Sprinkle shredded coconut on top and around the sides. Garnish with fresh mint leaves.
- Chill: Refrigerate the cake for at least 30 minutes before serving to allow the flavors to meld.
Berry Tart with Whipped Cream

Summer is the perfect time for a refreshing dessert, and a berry tart with whipped cream fits the bill perfectly. This tart is bursting with vibrant colors and flavors, making it a delightful addition to any gathering. The crisp crust pairs beautifully with the creamy filling and fresh berries on top.
Imagine a golden tart shell filled with luscious whipped cream, topped with an array of juicy berries. Strawberries, blueberries, raspberries, and blackberries create a stunning visual display. The combination of textures and tastes makes each bite a treat.
This dessert is not only easy to make but also a crowd-pleaser. It’s light, refreshing, and perfect for warm summer days. Serve it at your next barbecue or picnic, and watch it disappear!
Ingredients
- 1 pre-made tart shell
- 2 cups heavy whipping cream
- 1/4 cup powdered sugar
- 1 teaspoon vanilla extract
- 1 cup strawberries, hulled and sliced
- 1 cup blueberries
- 1 cup raspberries
- 1 cup blackberries
- Fresh mint leaves for garnish
Instructions
- Prepare the Whipped Cream: In a large mixing bowl, beat the heavy whipping cream, powdered sugar, and vanilla extract until soft peaks form.
- Fill the Tart Shell: Spoon the whipped cream into the pre-made tart shell, spreading it evenly.
- Add the Berries: Arrange the strawberries, blueberries, raspberries, and blackberries on top of the whipped cream.
- Garnish: Add fresh mint leaves for a pop of color and flavor.
- Chill: Refrigerate the tart for at least 30 minutes before serving to let the flavors meld.
Frozen Yogurt Bark with Nuts and Berries
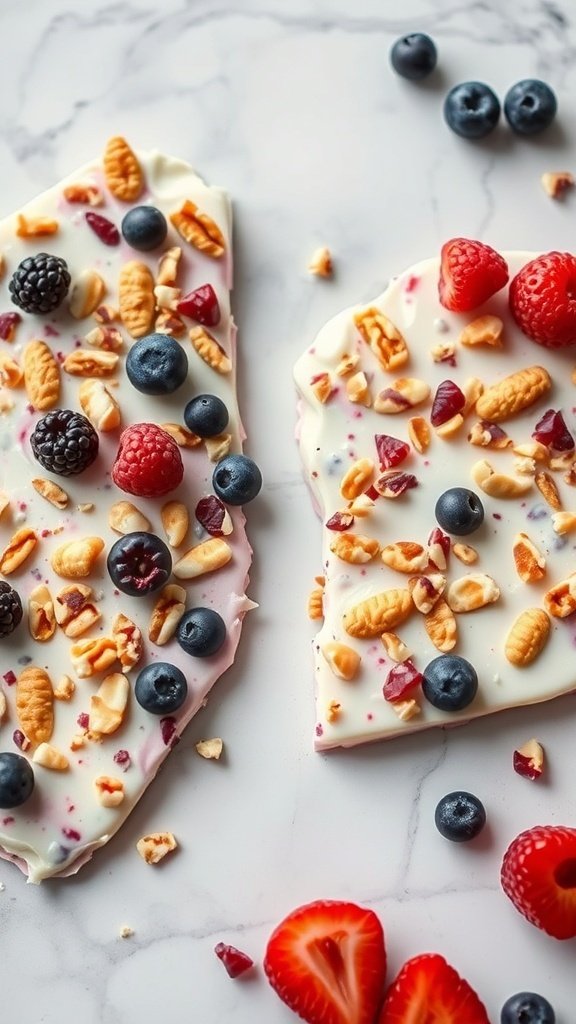
Frozen yogurt bark is a fun and refreshing treat perfect for summer gatherings. This dessert combines creamy yogurt with crunchy nuts and vibrant berries, making it a colorful addition to any table. The image shows a delightful spread of yogurt bark topped with an assortment of nuts and fresh berries, inviting everyone to dig in.
Making this dessert is simple and quick. You can customize it with your favorite nuts and fruits. It’s a great way to keep cool while enjoying something sweet. Plus, it’s a healthier option that still satisfies your cravings.
Gather your friends and family around for a fun dessert experience. Everyone can break off a piece of the yogurt bark, making it a great shareable treat. Perfect for picnics, barbecues, or just a sunny afternoon at home!
Ingredients
- 2 cups Greek yogurt (plain or flavored)
- 1/4 cup honey or maple syrup
- 1/2 cup mixed nuts, chopped
- 1 cup mixed berries (strawberries, blueberries, raspberries, blackberries)
- 1/4 cup granola (optional)
Instructions
- Prepare the Yogurt: In a bowl, mix the Greek yogurt with honey or maple syrup until well combined.
- Spread the Mixture: Line a baking sheet with parchment paper. Pour the yogurt mixture onto the sheet and spread it evenly to about 1/4 inch thick.
- Add Toppings: Sprinkle the chopped nuts, mixed berries, and granola evenly over the yogurt layer.
- Freeze: Place the baking sheet in the freezer for about 3-4 hours, or until the yogurt is completely frozen.
- Break into Pieces: Once frozen, remove the yogurt bark from the sheet and break it into pieces. Serve immediately or store in an airtight container in the freezer.
Peach Melba Parfaits
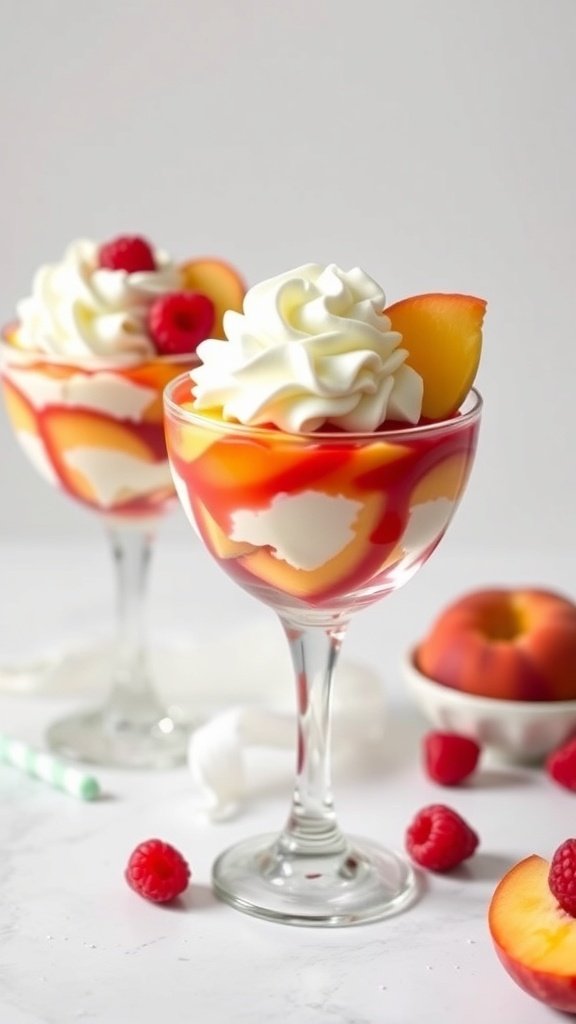
Peach Melba Parfaits are a delightful way to celebrate summer. These treats combine fresh peaches, creamy yogurt, and a hint of raspberry sauce, making them perfect for gatherings. The layers of flavor and texture create a refreshing dessert that everyone will love.
The image shows beautiful parfaits served in elegant glasses. Each layer reveals juicy peach slices, smooth whipped cream, and vibrant raspberry sauce. The colorful presentation makes them a showstopper at any summer event.
To make these parfaits, you’ll need ripe peaches, yogurt, raspberry sauce, and whipped cream. The combination of these ingredients brings a sweet and tangy flavor that’s hard to resist. Plus, they’re easy to assemble, making them a great option for serving a crowd.
Ingredients
- 4 ripe peaches, sliced
- 2 cups vanilla yogurt
- 1 cup raspberry sauce
- 1 cup whipped cream
- Fresh raspberries for garnish
Instructions
- Prepare the Peaches: Wash and slice the peaches. Set aside.
- Layer the Ingredients: In a glass, add a layer of yogurt, followed by a layer of peach slices, then raspberry sauce. Repeat until the glass is full.
- Top with Whipped Cream: Finish with a generous dollop of whipped cream on top.
- Garnish: Add fresh raspberries and a peach slice for decoration.
- Serve: Chill for a bit before serving to let the flavors meld together.
S’mores Dip with Graham Crackers
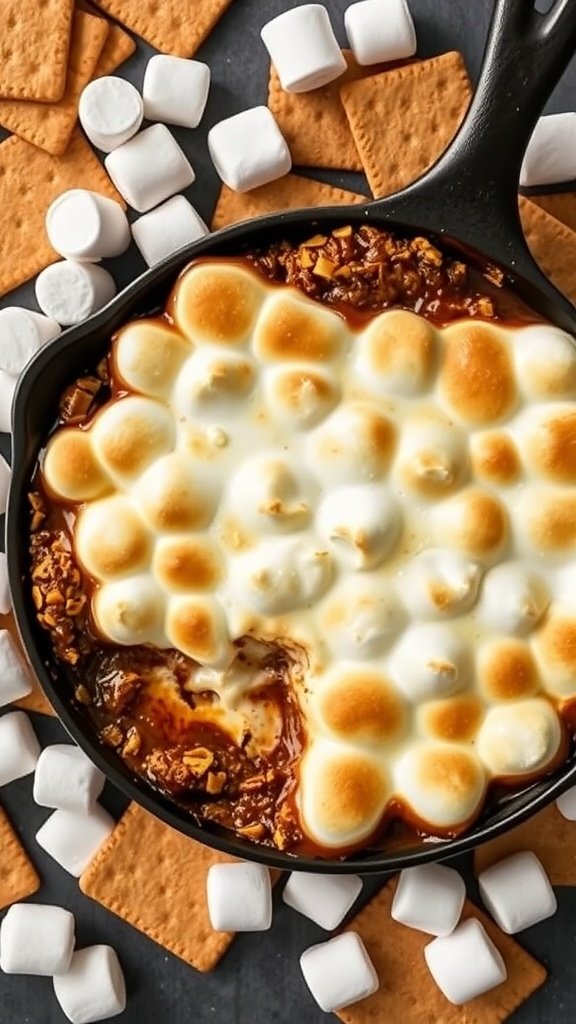
Summer gatherings are perfect for sharing sweet treats, and this S’mores Dip is a crowd-pleaser. Imagine a warm, gooey mixture of chocolate and marshmallows, all melted together in a skillet. It’s the ultimate way to enjoy the classic campfire treat without the need for an open flame.
The image shows a beautifully melted S’mores Dip, topped with golden-brown marshmallows, surrounded by crunchy graham crackers. The contrast of textures makes it irresistible. Just scoop, dip, and enjoy!
This dessert is simple to prepare and perfect for parties. Everyone can gather around, grab a graham cracker, and dive into the deliciousness. It’s a fun way to bring people together and share a nostalgic treat.
Ingredients
- 1 cup chocolate chips
- 1 cup mini marshmallows
- 1/2 cup crushed graham crackers
- 2 tablespoons unsalted butter
- 1 teaspoon vanilla extract
- Graham crackers for dipping
Instructions
- Preheat your oven to 350°F (175°C).
- In a skillet, melt the butter over medium heat. Add the chocolate chips and stir until melted and smooth.
- Remove from heat and stir in the vanilla extract and crushed graham crackers.
- Top the chocolate mixture with mini marshmallows.
- Bake in the oven for about 10 minutes, or until the marshmallows are golden brown.
- Serve warm with graham crackers for dipping.
Mango Coconut Rice Pudding

Mango Coconut Rice Pudding is a delightful treat perfect for summer gatherings. This dish combines creamy coconut milk with sweet mango, creating a refreshing dessert that everyone will love. The image showcases small bowls filled with this delicious pudding, topped with fresh mango slices and mint leaves. The vibrant colors of the mango and the green mint add a beautiful touch, making it as appealing to the eyes as it is to the taste buds.
This dessert is not only easy to make but also a crowd-pleaser. It’s light and satisfying, making it ideal for warm weather. Serve it chilled, and you’ll have a sweet ending to any meal.
Ingredients
- 1 cup jasmine rice
- 2 cups coconut milk
- 1 cup water
- 1/4 cup sugar
- 1/2 teaspoon salt
- 1 ripe mango, diced
- Fresh mint leaves for garnish
Instructions
- Rinse the rice under cold water until the water runs clear.
- In a pot, combine the rinsed rice, coconut milk, water, sugar, and salt. Bring to a boil over medium heat.
- Once boiling, reduce the heat to low, cover, and simmer for about 20 minutes, or until the rice is tender and the liquid is absorbed.
- Remove from heat and let it sit, covered, for an additional 10 minutes.
- Fluff the rice with a fork and let it cool slightly before serving.
- Divide the pudding into bowls, top with diced mango, and garnish with mint leaves.
- Chill in the refrigerator for at least an hour before serving for a refreshing treat.
No-Bake Chocolate Cheesecake

No-bake chocolate cheesecake is a crowd-pleaser, especially during the summer months. This dessert is rich and creamy, with a smooth chocolate layer that makes it irresistible. The best part? You don’t need to turn on the oven!
The cheesecake sits on a delicious chocolate crust, which adds a nice crunch to each bite. Topped with a glossy chocolate ganache, it’s as beautiful as it is tasty. Fresh strawberries and chocolate-covered treats on the side make it even more appealing, perfect for sharing with friends and family.
Making this dessert is simple and quick. Just combine the ingredients, chill, and serve. It’s a great way to impress guests without spending hours in the kitchen. Plus, it’s a wonderful option for those warm summer days when you want something sweet without the heat of baking.
Ingredients
- 1 ½ cups chocolate cookie crumbs
- ½ cup unsalted butter, melted
- 2 cups cream cheese, softened
- 1 cup powdered sugar
- 1 cup heavy cream
- 1 cup semi-sweet chocolate chips
- 1 teaspoon vanilla extract
- Fresh strawberries for garnish
- Chocolate-covered treats for garnish
Instructions
- Prepare the Crust: In a bowl, mix chocolate cookie crumbs with melted butter until combined. Press the mixture into the bottom of a springform pan to form an even layer.
- Make the Filling: In a separate bowl, beat the cream cheese and powdered sugar until smooth. Melt the chocolate chips and let them cool slightly, then add to the cream cheese mixture along with vanilla extract. Mix until well combined.
- Whip the Cream: In another bowl, whip the heavy cream until stiff peaks form. Gently fold the whipped cream into the chocolate mixture until fully incorporated.
- Assemble: Pour the filling over the crust in the springform pan. Smooth the top and refrigerate for at least 4 hours or until set.
- Serve: Once set, remove from the pan and garnish with fresh strawberries and chocolate-covered treats. Slice and enjoy!
Lemon Sorbet in Fresh Fruit Cups

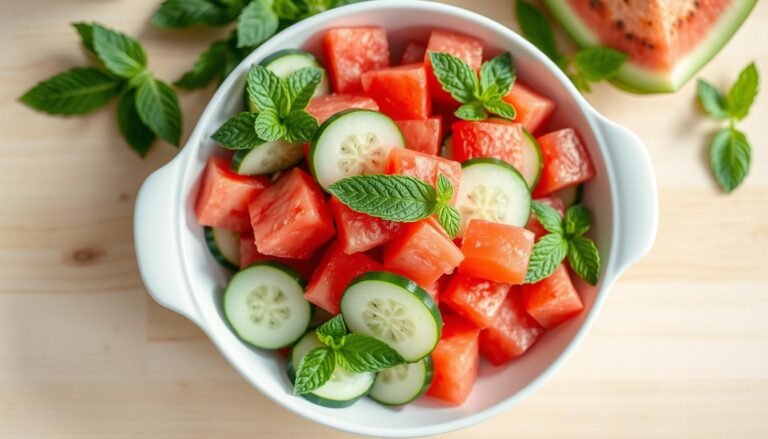
Summer is the perfect time to enjoy light and refreshing desserts. Lemon sorbet served in fresh fruit cups is a delightful option for gatherings. The vibrant colors and flavors make it a hit with guests of all ages.
Imagine a sunny day, and you have a beautiful spread of sorbet nestled in cups made from fresh fruits. Each cup can be filled with a different flavor of sorbet, like lemon, strawberry, or watermelon. The natural sweetness of the fruits complements the tartness of the sorbet perfectly.
Not only does this dessert look stunning, but it’s also easy to prepare. You can make the sorbet ahead of time and simply scoop it into the fruit cups when it’s time to serve. This way, you can spend more time enjoying the company of your friends and family.
Here’s how to make your own lemon sorbet and serve it in fresh fruit cups:
Ingredients
- 1 cup fresh lemon juice (about 4-6 lemons)
- 1 cup granulated sugar
- 2 cups water
- Fresh fruits for cups (like strawberries, oranges, or melons)
- Mint leaves for garnish (optional)
Instructions
- Make the Lemon Syrup: In a saucepan, combine water and sugar. Heat over medium heat, stirring until the sugar dissolves. Remove from heat and let cool.
- Add Lemon Juice: Once the syrup is cool, stir in the fresh lemon juice.
- Chill: Pour the mixture into a shallow dish and freeze for about 2 hours, stirring every 30 minutes until it’s fluffy and frozen.
- Prepare Fruit Cups: While the sorbet is freezing, hollow out your chosen fruits to create cups. For example, cut the tops off strawberries or slice melons in half and scoop out the insides.
- Serve: Once the sorbet is ready, scoop it into the fruit cups. Garnish with mint leaves if desired.
Strawberry Shortcake Trifle

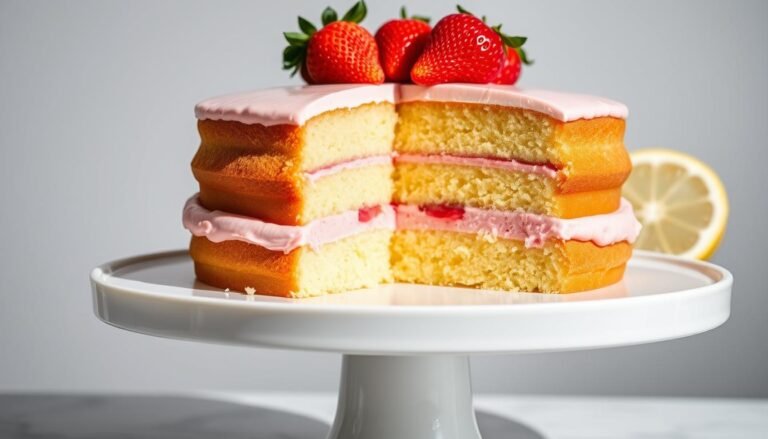
Strawberry shortcake trifle is a delightful summer dessert that’s perfect for gatherings. This dessert combines layers of fluffy cake, fresh strawberries, and creamy whipped topping, all presented in a beautiful glass dish. The vibrant red strawberries pop against the creamy layers, making it not just tasty but also visually appealing.
This trifle is easy to make and can serve a crowd, making it a go-to choice for summer parties. The combination of textures—soft cake, juicy strawberries, and light whipped cream—creates a refreshing treat that everyone will love. Plus, it’s a great way to showcase those juicy summer strawberries!
Here’s how to whip up this delicious dessert:
Ingredients
- 1 pound fresh strawberries, hulled and sliced
- 1 cup heavy whipping cream
- 1/4 cup powdered sugar
- 1 teaspoon vanilla extract
- 1 store-bought pound cake or angel food cake, cut into cubes
- 1/2 cup strawberry jam
Instructions
- Prepare the Strawberries: In a bowl, mix the sliced strawberries with half of the powdered sugar. Let them sit for about 15 minutes to release their juices.
- Make the Whipped Cream: In another bowl, whip the heavy cream with the remaining powdered sugar and vanilla extract until soft peaks form.
- Layer the Trifle: In a large glass bowl or individual cups, start with a layer of cake cubes. Spread a layer of strawberry jam over the cake, followed by a layer of strawberries and then a layer of whipped cream.
- Repeat Layers: Continue layering until you run out of ingredients, finishing with a layer of whipped cream on top.
- Chill and Serve: Refrigerate the trifle for at least an hour before serving. This allows the flavors to meld together beautifully.
Chocolate-Dipped Fruit Skewers

Chocolate-dipped fruit skewers are a fun and tasty treat perfect for summer gatherings. These colorful skewers are easy to make and look fantastic on any table. The combination of fresh fruit and rich chocolate is always a hit with guests of all ages.
To create these delightful skewers, start by selecting a variety of fruits. Strawberries, pineapple, and melon work well together. The vibrant colors make the dish visually appealing. Once you have your fruit ready, it’s time to dip them in chocolate. Melt some chocolate in a microwave or double boiler, then dip each piece of fruit. Let the excess chocolate drip off before placing them on a tray.
After dipping, you can drizzle more chocolate on top for added flair. Once they’re set, arrange the skewers on a platter. They’re not just delicious; they also add a festive touch to your summer dessert table!
Ingredients
- 1 cup strawberries, hulled
- 1 cup pineapple, cubed
- 1 cup melon, cubed
- 1 cup chocolate chips (dark or milk)
- Wooden skewers
Instructions
- Prepare the Fruit: Wash and cut the strawberries, pineapple, and melon into bite-sized pieces.
- Melt the Chocolate: In a microwave-safe bowl, melt the chocolate chips in 30-second intervals, stirring until smooth.
- Dip the Fruit: Skewer pieces of fruit onto the wooden sticks. Dip each skewer into the melted chocolate, allowing excess to drip off.
- Set the Skewers: Place the dipped skewers on a parchment-lined tray. Drizzle with more chocolate if desired.
- Chill: Refrigerate the skewers for about 30 minutes until the chocolate hardens.